No edit summary Tag: Source edit |
Tag: Source edit |
||
| Line 1: | Line 1: | ||
| + | {{DISPLAYTITLE:<span style="position: absolute; clip: rect(1px 1px 1px 1px); clip: rect(1px, 1px, 1px, 1px);">{{FULLPAGENAME}}</span>}} |
||
| + | <center>[[File:Quests.png|800x50px|link=]][[File:Nav_Region_7-M.png|800x90px|link=]]<br> |
||
| + | |||
| + | <div class="event-list" style="padding:5px;width:1000px;white-space:nowrap;margin-left:8px"> |
||
| + | {| style="vertical-align:top" |
||
| + | |style="padding-left:5px"|[[File:Nav_Region_back.png|40px|class=shiny grow|link=Quests|Go Back]][[File:Nav_Region_1-Q.png|115px|class= shiny grow|link=Egypt_(Quests)]][[File:Nav_Region_2-Q.png|170px|class= shiny grow|link=Scandinavia_(Quests)]][[File:Nav_Region_3-Q.png|115px|class= shiny grow|link=China_(Quests)]][[File:Nav_Region_4-Q.png|135px|class= shiny grow|link=Atlantis_(Quests)]][[File:Nav_Region_5-Q.png|123px|class= shiny grow|link=Greece_(Quests)]][[File:Nav_Region_6-Q.png|170px|class= shiny grow|link=NW_(Quests)]][[File:Nav_Region_7-Q.png|115px|class= bw|link=]] |
||
| + | |} |
||
| + | </div> |
||
| + | |||
| + | {| |
||
| + | |colspan="5"| |
||
| + | |- |
||
| + | |{{ButtonLink|width=12|height=2|link=Terra_(Quests)#Main_map|image=Loc0356|tooltip=Main|text=Main}} |
||
| + | |{{ButtonLink|width=12|height=2|link=Terra_(Quests)#Susanoo|image=Loc3052|tooltip=Susanoo|text=2.Susanoo}} |
||
| + | |{{ButtonLink|width=12|height=2|link=Terra_(Quests)#Nanook|image=Loc3166|tooltip=Nanook|text=5.Nanook}} |
||
| + | |{{ButtonLink|width=11|height=2|link=Terra_(Quests)#Aja|image=Loc3301|tooltip=Aja|text=8.Aja}} |
||
| + | |{{ButtonLink|width=12|height=2|link=Terra_(Quests)#Side_Quests_7|image=Excl|tooltip=Side quests as listed on the mobile version|text=Side Quests 7}} |
||
| + | |- |
||
| + | |{{ButtonLink|width=12|height=2|link=Terra_(Quests)#Father|image=Loc0246|tooltip=Father|text=Father}} |
||
| + | |{{ButtonLink|width=12|height=2|link=Terra_(Quests)#Pele|image=Loc3096|tooltip=Pele|text=3.Pele}} |
||
| + | |{{ButtonLink|width=12|height=2|link=Terra_(Quests)#Akhlut|image=Loc3166|tooltip=Akhlut|text=6.Akhlut}} |
||
| + | |{{ButtonLink|width=11|height=2|link=Terra_(Quests)#Dagda|image=Loc3340|tooltip=Dagda|text=9.Dagda}} |
||
| + | |{{ButtonLink|width=12|height=2|link=Story_Mines_-_Terra|image=Region_7|tooltip=Story mines Terra|text=Terra Mines}} |
||
| + | |- |
||
| + | |{{ButtonLink|width=12|height=2|link=Terra_(Quests)#Amaterasu|image=Loc3019|tooltip=Amaterasu|text=1.Amaterasu}} |
||
| + | |{{ButtonLink|width=12|height=2|link=Terra_(Quests)#Kane|image=Loc3140|tooltip=Kane|text=4.Kane}} |
||
| + | |{{ButtonLink|width=12|height=2|link=Terra_(Quests)#Anansi|image=Loc3197|tooltip=Anansi|text=7.Anansi}} |
||
| + | |{{ButtonLink|width=11|height=2|link=Terra_(Quests)#Morrigan|image=Loc3379|tooltip=Morrigan|text=10.Morrigan}} |
||
| + | | |
||
| + | |} |
||
| + | ---- |
||
{| |
{| |
||
| + | |This page shows information about the quests and tasks as shown in game in the task windows.<br> |
||
| − | | style="width:300px;vertical-align:top; text-align:left" | __TOC__ |
||
| + | Yellow arrows for Main Quests, Orange arrows for Father Quests, Blue arrows for optional Side Quests.<br> |
||
| − | | style="width:10px" | |
||
| + | [[File:ArrowYd.png|25px|Unlocks next mine|link=]] Down-arrows lead to next quest/mine, [[File:ArrowRu.png|20px|End of Quest-line|link=]]Red Up-arrow is the end of a quest-line.<br> |
||
| − | | style="vertical-align:top" | |
||
| + | [[File:ArrowYr.png|25px|Unlocks a Main Quest-line|link=]][[File:ArrowOr.png|25px|Unlocks a Father Quest|link=]][[File:ArrowBr.png|25px|Unlocks a Side Quest-line|link=]] Right arrows unlock other Quest-lines and can be clicked on to take you to the next quest-line.<br> |
||
| − | [[Image:FBbanner.jpg|475px]] |
||
| + | Follow the quest-line by following the [[File:ArrowYd.png|25px|Unlocks next mine|link=]] Yellow arrows down and clicking on the [[File:ArrowYr.png|25px|Unlocks a Main Quest-line|link=]]right arrows. |
||
|} |
|} |
||
| + | </center> |
||
| + | ---- |
||
| + | =='''Main map'''== |
||
| − | <big>'''Facebook groups are the best way of acquiring [[Help|help]], finding neighbors and discussing Diggy's Adventure with experienced players! <br><BR>Below is the breakdown of most notable Diggy's Adventure groups on Facebook. <br><BR>This page is updated monthly. As there have been changes with FB, private group membership is no longer visible to a precise level. Starting in May, these results will be rounded up to what is shown by FB (groups like this are showing ??? to the right of the membership count).'''<small> |
||
| + | {{Quests-yellow |
||
| + | | QuestsImage= |
||
| + | | QuestList= |
||
| + | {{Quests/Quest |
||
| + | | QuestImage=[[Image: Qst2378.png|110px|center|Quest Image]] |
||
| + | | QuestName='''Trouble On Board''' |
||
| + | | QuestGiverImage= |
||
| + | | QuestGiverText= |
||
| + | | Tasks={{Quests/Task| TaskText=1. Talk To Robot Rusty| TaskImage=[[Image:Npc26278.png|25px|task]]}}{{Quests/Task| TaskText=2. Fix The Panels| TaskImage=[[Image:Tok8935.png|25px|task]]}}{{Quests/Task| TaskText=3. Restore The Electricity| TaskImage=[[Image:Tok8938.png|25px|task]]}}{{Quests/Task| TaskText=4. Fix Pipeline| TaskImage=[[Image:Tok8937.png|25px|task]]}}{{Quests/Task| TaskText=5. Talk To Robot Rusty| TaskImage=[[Image:Npc26278.png|25px|task]]}} |
||
| + | | Locations={{Quests/Location| Location=Camp}}<br>{{Quests/Location| Location=Damaged Spaceship}} |
||
| + | | Coins=627,000[[File:Mat001.png|link=|20px]] |
||
| + | | ExperiencePoints=1,669,000[[File:Sys001.png|link=|20px]] |
||
| + | | Rewards= |
||
| + | | Available=[[File:QuestIn.png|22px|Available after |link=]] [[File:Region_6.png|30px|class= shiny grow|link=NW_(Quests)#AhPuch]][[NW_(Quests)#AhPuch|Flight To The Orbit]]<br>location: Pyramid Of Restoration (last Hades) |
||
| + | | Arrow=[[File:ArrowYd.png|25px|Unlocks next mine|link=]] |
||
| + | }} |
||
| + | {{Quests/Quest |
||
| − | = International Groups = |
||
| + | | QuestImage=[[Image: Qst2379.png|110px|center|Quest Image]] |
||
| + | | QuestName='''Building The Shuttle''' |
||
| + | | QuestGiverImage= [[Image: Npc26278.png|40px]] |
||
| + | | QuestGiverText=(Camp) |
||
| + | | Tasks={{Quests/Task| TaskText=1. Build The Shuttle| TaskImage=[[Image:Tok8939.png|25px|task]]}}{{Quests/Task| TaskText=2. Talk To Robot Rusty| TaskImage=[[Image:Npc26278.png|25px|task]]}} |
||
| + | | Locations={{Quests/Location| Location=Camp}}<br>{{Quests/Location| Location=Spaceship's Engineering}} |
||
| + | | Coins=628,000[[File:Mat001.png|link=|20px]] |
||
| + | | ExperiencePoints=1,676,000[[File:Sys001.png|link=|20px]] |
||
| + | | Rewards= |
||
| + | | Available=Trouble On Board |
||
| + | | Arrow=[[File:ArrowYd.png|25px|Unlocks next mine|link=]] |
||
| + | }} |
||
| + | {{Quests/Quest |
||
| − | == General Groups == |
||
| + | | QuestImage=[[Image: Qst2380.png|110px|center|Quest Image]] |
||
| − | (As of August 3, 2022)<br> |
||
| + | | QuestName='''Sweet And Starchy''' |
||
| + | | QuestGiverImage= [[Image: Npc26278.png|40px]] |
||
| + | | QuestGiverText=(Camp) |
||
| + | | Tasks={{Quests/Task| TaskText=1. Get The Sample| TaskImage=[[Image:Tok8940.png|25px|task]]}}{{Quests/Task| TaskText=2. Clear Sweet Potato Terrarium| TaskImage=[[Image:Loc2925.png|25px|task]]}}{{Quests/Task| TaskText=3. Talk To Robot Rusty| TaskImage=[[Image:Npc26278.png|25px|task]]}} |
||
| + | | Locations={{Quests/Location| Location=Camp}}<br>{{Quests/Location| Location=Sweet Potato Coast}}<br>{{Quests/Location| Location=Sweet Potato Terrarium}} |
||
| + | | Coins=629,000[[File:Mat001.png|link=|20px]] |
||
| + | | ExperiencePoints=1,683,000[[File:Sys001.png|link=|20px]] |
||
| + | | Rewards=Unlocks [[Image:Loc2925.png|35px|class=shiny grow|link=Repeatable_Mines_-_Terra#Sweet_Potato_Terrarium]] |
||
| + | | Available=Building The Shuttle |
||
| + | | Arrow=[[File:ArrowYd.png|25px|Unlocks next mine|link=]] |
||
| + | }} |
||
| + | {{Quests/Quest |
||
| − | '''Top 3''' |
||
| + | | QuestImage=[[Image: Qst2381.png|110px|center|Quest Image]] |
||
| + | | QuestName='''Jewels of Meadows''' |
||
| + | | QuestGiverImage= [[Image: Npc26278.png|40px]] |
||
| + | | QuestGiverText=(Camp) |
||
| + | | Tasks={{Quests/Task| TaskText=1. Get The Sample| TaskImage=[[Image:Tok8955.png|25px|task]]}}{{Quests/Task| TaskText=2. Clear Mint Terrarium| TaskImage=[[Image:Loc2927.png|25px|task]]}}{{Quests/Task| TaskText=3. Talk To Robot Rusty| TaskImage=[[Image:Npc26278.png|25px|task]]}} |
||
| + | | Locations={{Quests/Location| Location=Camp}}<br>{{Quests/Location| Location=Flowery Garden}}<br>{{Quests/Location| Location=Mint Terrarium}} |
||
| + | | Coins=630,000[[File:Mat001.png|link=|20px]] |
||
| + | | ExperiencePoints=1,690,000[[File:Sys001.png|link=|20px]] |
||
| + | | Rewards=Unlocks [[Image:Loc2927.png|35px|class=shiny grow|link=Repeatable_Mines_-_Terra#Mint_Terrarium]] |
||
| + | | Available=Sweet And Starchy |
||
| + | | Arrow=[[File:ArrowYd.png|25px|Unlocks next mine|link=]] |
||
| + | }} |
||
| + | {{Quests/Quest |
||
| − | [[Image: Goldcup.png|30px]] [https://www.facebook.com/groups/280572782061214/ Diggy's Adventure Help Group] - 41,193 members |
||
| + | | QuestImage=[[Image: Qst2382.png|110px|center|Quest Image]] |
||
| + | | QuestName='''Goliath Fish''' |
||
| + | | QuestGiverImage= [[Image: Npc26278.png|40px]] |
||
| + | | QuestGiverText=(Camp) |
||
| + | | Tasks={{Quests/Task| TaskText=1. Get The Sample| TaskImage=[[Image:Tok8956.png|25px|task]]}}{{Quests/Task| TaskText=2. Clear Space Aquarium| TaskImage=[[Image:Loc2929.png|25px]]}}{{Quests/Task| TaskText=3. Talk To Robot Rusty| TaskImage=[[Image:Npc26278.png|25px]]}} |
||
| + | | Locations={{Quests/Location| Location=Camp}}<br>{{Quests/Location| Location=Icy Coast}}<br>{{Quests/Location| Location=Space Aquarium}} |
||
| + | | Coins=631,000[[File:Mat001.png|link=|20px]] |
||
| + | | ExperiencePoints=1,697,000[[File:Sys001.png|link=|20px]] |
||
| + | | Rewards=Unlocks [[Image:Loc2929.png|35px|class=shiny grow|link=Repeatable_Mines_-_Terra#Space_Aquarium]] |
||
| + | | Available=Jewels of Meadows |
||
| + | | Arrow=[[File:ArrowYd.png|25px|Unlocks next mine|link=]] |
||
| + | }} |
||
| + | {{Quests/Quest |
||
| − | [[Image: Silvercup.png|30px]] [https://www.facebook.com/groups/646375505459643/ Diggy Revolution] - 25,035 members |
||
| + | | QuestImage=[[Image: Qst2383.png|110px|center|Quest Image]] |
||
| + | | QuestName='''Eternal And Shiny''' |
||
| + | | QuestGiverImage= [[Image: Npc26278.png|40px]] |
||
| + | | QuestGiverText=(Camp) |
||
| + | | Tasks={{Quests/Task| TaskText=1. Get The Sample| TaskImage=[[Image:Tok8958.png|25px|task]]}}{{Quests/Task| TaskText=2. Clear Chromite Room| TaskImage=[[Image:Loc2931.png|25px|task]]}}{{Quests/Task| TaskText=3. Talk To Robot Rusty| TaskImage=[[Image:Npc26278.png|25px|task]]}} |
||
| + | | Locations={{Quests/Location| Location=Camp}}<br>{{Quests/Location| Location=Chromite Mine}}<br>{{Quests/Location| Location=Chromite Room}} |
||
| + | | Coins=632,000[[File:Mat001.png|link=|20px]] |
||
| + | | ExperiencePoints=1,704,000[[File:Sys001.png|link=|20px]] |
||
| + | | Rewards=Unlocks [[Image:Loc2931.png|35px|class=shiny grow|link=Repeatable_Mines_-_Terra#Chromite_Room]] |
||
| + | | Available=Goliath Fish |
||
| + | | Arrow=[[File:ArrowYd.png|25px|Unlocks next mine|link=]] |
||
| + | }} |
||
| + | {{Quests/Quest |
||
| − | [[Image: Bronzecup.png|30px]] [https://www.facebook.com/groups/147764568705246/ Diggy's Adventure] - 9,000 members |
||
| + | | QuestImage=[[Image: Qst2408.png|110px|center|Quest Image]] |
||
| + | | QuestName='''Elder Alder''' |
||
| + | | QuestGiverImage= [[Image: Npc26278.png|40px]] |
||
| + | | QuestGiverText=(Camp) |
||
| + | | Tasks={{Quests/Task| TaskText=1. Get The Sample| TaskImage=[[Image:Tok9068.png|25px|task]]}}{{Quests/Task| TaskText=2. Clear Alder Terrarium| TaskImage=[[Image:Loc2933.png|25px|task]]}}{{Quests/Task| TaskText=3. Talk To Robot Rusty| TaskImage=[[Image:Npc26278.png|25px|task]]}} |
||
| + | | Locations={{Quests/Location| Location=Camp}}<br>{{Quests/Location| Location=Forested Mountainside}}<br>{{Quests/Location| Location=|Alder Terrarium}} |
||
| + | | Coins=633,000[[File:Mat001.png|link=|20px]] |
||
| + | | ExperiencePoints=1,711,000[[File:Sys001.png|link=|20px]] |
||
| + | | Rewards=Unlocks [[Image:Loc2933.png|35px|class=shiny grow|link=Repeatable_Mines_-_Terra#Alder_Terrarium]] |
||
| + | | Available=Eternal And Shiny |
||
| + | | Arrow=[[File:ArrowYd.png|25px|Unlocks next mine|link=]] |
||
| + | }} |
||
| + | {{Quests/Quest |
||
| − | '''1800+ members''' |
||
| + | | QuestImage=[[Image: Qst2409.png|110px|center|Quest Image]] |
||
| + | | QuestName='''Have A Gneiss Day!''' |
||
| + | | QuestGiverImage= [[Image: Npc26278.png|40px]] |
||
| + | | QuestGiverText=(Camp) |
||
| + | | Tasks={{Quests/Task| TaskText=1. Get The Sample| TaskImage=[[Image:Tok9069.png|25px|task]]}}{{Quests/Task| TaskText=2. Clear Gneiss Room| TaskImage=[[Image:Loc2935.png|25px|task]]}}{{Quests/Task| TaskText=3. Talk To Robot Rusty| TaskImage=[[Image:Npc26278.png|25px|task]]}} |
||
| + | | Locations={{Quests/Location| Location=Camp}}<br>{{Quests/Location| Location=Forest Quarry}}<br>{{Quests/Location| Location=Gneiss Room}} |
||
| + | | Coins=634,000[[File:Mat001.png|link=|20px]] |
||
| + | | ExperiencePoints=1,718,000[[File:Sys001.png|link=|20px]] |
||
| + | | Rewards=Unlocks [[Image:Loc2935.png|35px|class=shiny grow|link=Repeatable_Mines_-_Terra#Gneiss_Room]] |
||
| + | | Available=Elder Alder |
||
| + | | Arrow=[[File:ArrowYd.png|25px|Unlocks next mine|link=]] |
||
| + | }} |
||
| + | {{Quests/Quest |
||
| − | [https://www.facebook.com/groups/1416782048571145/ Diggy's Adventure Players] - 8,469 members |
||
| + | | QuestImage=[[Image: Qst2410.png|110px|center|Quest Image]] |
||
| + | | QuestName='''My Precious Opal''' |
||
| + | | QuestGiverImage= [[Image: Npc26278.png|40px]] |
||
| + | | QuestGiverText=(Camp) |
||
| + | | Tasks={{Quests/Task| TaskText=1. Get The Sample| TaskImage=[[Image:Tok9070.png|25px|task]]}}{{Quests/Task| TaskText=2. Clear Opal Room| TaskImage=[[Image:Loc2937.png|25px|task]]}}{{Quests/Task| TaskText=3. Talk To Robot Rusty| TaskImage=[[Image:Npc26278.png|25px|task]]}} |
||
| + | | Locations={{Quests/Location| Location=Camp}}<br>{{Quests/Location| Location=Old Shipwrecks}}<br>{{Quests/Location| Location=[[Story_Mines_-_Terra#Repeatables|Opal Room]]}} |
||
| + | | Coins=635,000[[File:Mat001.png|link=|20px]] |
||
| + | | ExperiencePoints=1,725,000[[File:Sys001.png|link=|20px]] |
||
| + | | Rewards=Unlocks [[Image:Loc2937.png|35px|class=shiny grow|link=Repeatable_Mines_-_Terra#Opal_Room]] |
||
| + | | Available=Have A Gneiss Day! |
||
| + | | Arrow=[[File:ArrowYd.png|25px|Unlocks next mine|link=]] |
||
| + | }} |
||
| + | {{Quests/Quest |
||
| − | [https://www.facebook.com/groups/1599287320302034/?fref=ts Diggy Game Tips and Information] - 6,412 members |
||
| + | | QuestImage=[[Image: Qst2416.png|110px|center|Quest Image]] |
||
| + | | QuestName='''Gods' Quarters''' |
||
| + | | QuestGiverImage= |
||
| + | | QuestGiverText= |
||
| + | | Tasks={{Quests/Task| TaskText=1. Find The Space Hub Door| TaskImage=[[Image:Tok9095.png|25px|task]]}}{{Quests/Task| TaskText=2. Make The Door Operational| TaskImage=[[Image:Tok9096.png|25px|task]]}}{{Quests/Task| TaskText=3. Talk To Robot Rusty| TaskImage=[[Image:Npc26280.png|25px|task]]}} |
||
| + | | Locations={{Quests/Location| Location=Spaceship's Main Deck}} |
||
| + | | Coins=636,000[[File:Mat001.png|link=|20px]] |
||
| + | | ExperiencePoints=1,732,000[[File:Sys001.png|link=|20px]] |
||
| + | | Rewards=Unlocks<br>[[Image:Loc3045.png|35px|class=shiny grow|link=Repeatable_Mines_-_Terra#Golden_Room]] [[Image:Loc3046.png|35px|class=shiny grow|link=Repeatable_Mines_-_Terra#Spaceship.27s_Library]] [[Image:Loc3021.png|35px|class=shiny grow|link=Repeatable_Mines_-_Terra#Module_of_Fortune]] |
||
| + | | Available=My Precious Opal |
||
| + | | Arrow=[[File:ArrowYd.png|25px|Unlocks next mine|link=]] |
||
| + | }} |
||
| + | {{Quests/Quest |
||
| − | [https://www.facebook.com/groups/188138441518824/ Diggy United Group] - 3,645 members |
||
| + | | QuestImage=[[Image: Qst2417.png|110px|center|Quest Image]] |
||
| + | | QuestName='''Hello? Rusty Speaking!''' |
||
| + | | QuestGiverImage= |
||
| + | | QuestGiverText= |
||
| + | | Tasks={{Quests/Task| TaskText=1. Find The Communication Room| TaskImage=[[Image:Tok9097.png|25px|task]]}}{{Quests/Task| TaskText=2. Fix The Communication Device (2)| TaskImage=[[Image:Tok9098.png|25px|task]]}}{{Quests/Task| TaskText=3. Turn On The Device| TaskImage=[[Image:Tok9099.png|25px|task]]}}{{Quests/Task| TaskText=4. Talk To Robot Rusty| TaskImage=[[File:Npc26280.png|25px|task]]}} |
||
| + | | Locations={{Quests/Location| Location=Communication Room}} |
||
| + | | Coins=637,000[[File:Mat001.png|link=|20px]] |
||
| + | | ExperiencePoints=1,739,000[[File:Sys001.png|link=|20px]] |
||
| + | | Rewards= |
||
| + | | Available=Gods' Quarters |
||
| + | | Arrow=[[File:ArrowYd.png|25px|Unlocks next mine|link=]] |
||
| + | }} |
||
| + | {{Quests/Quest |
||
| − | [https://www.facebook.com/groups/DiggysAdventureHelpChat/ Diggy's Adventure Help & Chat Group] - 3,313 members |
||
| + | | QuestImage=[[Image: Qst2418.png|110px|center|Quest Image]] |
||
| + | | QuestName='''Source Of The Signal''' |
||
| + | | QuestGiverImage= |
||
| + | | QuestGiverText= |
||
| + | | Tasks={{Quests/Task| TaskText=1. Get To The Source Of The Signal| TaskImage=[[Image:Tok9100.png|25px|task]]}}{{Quests/Task| TaskText=2. Talk To The Imprisoned Being| TaskImage=[[Image:Npc27079.png|25px|task]]}} |
||
| + | | Locations={{Quests/Location| Location=Hidden Underground Facility}} |
||
| + | | Coins=638,000[[File:Mat001.png|link=|20px]] |
||
| + | | ExperiencePoints=1,746,000[[File:Sys001.png|link=|20px]] |
||
| + | | Rewards= |
||
| + | | Available=Hello? Rusty Speaking! |
||
| + | | Arrow=[[File:ArrowYr.png|class=shiny grow|25px|Unlocks next mine (Amaterasu: Mechanical Buddy - Peaceful Japanese Village|link=Terra_(Quests)#Amaterasu]] |
||
| + | }} |
||
| + | }} |
||
| + | ===<div style="font-size:60%">main stage 2</div>=== |
||
| + | {{Quests-yellow |
||
| + | | QuestsImage= |
||
| + | | QuestList= |
||
| + | {{Quests/Quest |
||
| + | | QuestImage=[[Image: Qst2419.png|110px|center|Quest Image]] |
||
| + | | QuestName='''Saving Terra''' |
||
| + | | QuestGiverImage= |
||
| + | | QuestGiverText= |
||
| + | | Tasks={{Quests/Task| TaskText=1. Get The Spheres Of Divine Power (10)| TaskImage=[[Image:Tok9101.png|25px|task]]}}{{Quests/Task| TaskText=2. Free Terra| TaskImage=[[Image:Tok9102.png|25px|task]]}}{{Quests/Task| TaskText=3. Talk To Terra| TaskImage=[[File:Npc27080.png|25px|task]]}} |
||
| + | | Locations={{Quests/Location| Location=Multiple Locations}}<br>{{Quests/Location| Location=Hidden Underground Facility}} |
||
| + | | Coins=650,000[[File:Mat001.png|link=|20px]] |
||
| + | | ExperiencePoints=1,760,000[[File:Sys001.png|link=|20px]] |
||
| + | | Rewards= Unlocks ??? |
||
| + | | Available=Source Of The Signal |
||
| + | | Arrow=[[File:ArrowRu.png|20px|End of Quest-line|link=]] |
||
| + | }} |
||
| + | }} |
||
| + | {| width="100%" |
||
| − | [https://www.facebook.com/groups/1011084998953060/?fref=ts Diggy's Adventure Friendly Diggers] - 3,066 members |
||
| + | | style="text-align:right" |[[File:NAVtop.png|50px|link=|class=shiny grow|link=#top|Return to Top page]] |
||
| + | |} |
||
| + | =='''Father'''== |
||
| − | [https://www.facebook.com/groups/leagueofdiggyadventurers League of Diggy Adventurers] - 2,292 members |
||
| + | ===<div style="font-size:60%">stage 1</div>=== |
||
| + | {{Quests-yellow |
||
| + | | QuestsImage= |
||
| + | | QuestList= |
||
| + | {{Quests/Quest |
||
| − | [https://www.facebook.com/groups/430625287015312/ Diggy's Friends] - 2,137 members |
||
| + | | QuestImage=[[File:Qst2703.png|110px|center|Quest Image]] |
||
| + | | QuestName='''Magnetic Man''' |
||
| + | | QuestGiverImage= |
||
| + | | QuestGiverText= |
||
| + | | Tasks={{Quests/Task| TaskText=1. Talk To Dad| TaskImage=[[File:Npc33327.png|25px|task]]}}{{Quests/Task| TaskText=2. Find Kotaro Honda| TaskImage=[[File:Tok10566.png|25px|task]]}}{{Quests/Task| TaskText=3. Talk To Kotaro Honda| TaskImage=[[File:Npc33328.png|25px|task]]}}{{Quests/Task| TaskText=4. Help Kotaro| TaskImage=[[File:Tok10567.png|25px|task]]}}{{Quests/Task| TaskText=5. Take The Magnetic Steel| TaskImage=[[File:Tok10568.png|25px|task]]}}{{Quests/Task| TaskText=6. Talk To Dad| TaskImage=[[File:Npc33329.png|25px|task]]}}{{Quests/Task| TaskText=7. Fortify The Spaceship| TaskImage=[[File:Tok10569.png|25px|task]]}}{{Quests/Task| TaskText=8. Talk To Dad| TaskImage=[[File:Npc33330.png|25px|task]]}} |
||
| + | | Locations={{Quests/Location| Location=Town Of Yahagi}} |
||
| + | | Coins= 739,000[[File:Mat001.png|20px]] |
||
| + | | ExperiencePoints= 2,453,000[[File:Sys001.png|20px]] |
||
| + | | Rewards= |
||
| + | | Available=[[File:QuestIn.png|22px|Available after the Susanoo quest The Nameless One - Mount Fuji|link=]][[Terra_(Quests)#Susanoo|The Nameless One]]<br>location: Mount Fuji (last Susanoo) |
||
| + | | Arrow=[[File:ArrowOd.png|25px|Unlocks next Father mine|link=]] |
||
| + | }} |
||
| + | }} |
||
| + | ===<div style="font-size:60%">stage 2</div>=== |
||
| + | {{Quests-yellow |
||
| + | | QuestsImage= |
||
| + | | QuestList= |
||
| + | {{Quests/Quest |
||
| + | | QuestImage=[[File:Qst2704.png|110px|center|Quest Image]] |
||
| + | | QuestName='''Slime Out Of Space''' |
||
| + | | QuestGiverImage= |
||
| + | | QuestGiverText= |
||
| + | | Tasks={{Quests/Task| TaskText=1. Take The Slime Samples (3)| TaskImage=[[File:Tok10590.png|25px|task]]}}{{Quests/Task| TaskText=2. Talk To Alice Ball| TaskImage=[[File:Npc33331.png|25px|task]]}}{{Quests/Task| TaskText=3. Help Alice With The Experiments (3)| TaskImage=[[File:Tok10570.png|25px|task]]}}{{Quests/Task| TaskText=4. Talk To Alice Ball| TaskImage=[[File:Npc33332.png|25px|task]]}}{{Quests/Task| TaskText=5. Talk To Dad| TaskImage=[[File:Npc33333.png|25px|task]]}} |
||
| + | | Locations={{Quests/Location| Location=Secret Laboratory}} |
||
| + | | Coins= 740,000[[File:Mat001.png|20px]] |
||
| + | | ExperiencePoints= 2,460,000[[File:Sys001.png|20px]] |
||
| + | | Rewards= |
||
| + | | Available=[[File:QuestIn.png|22px|Available after the Pele quest Like Mother Like Daughters - Kane's Workshop|link=]][[Terra_(Quests)#Pele|Like Mother Like Daughters]]<br>location: Kane's Workshop (last Pele) |
||
| + | | Arrow=[[File:ArrowOd.png|25px|Unlocks next Father mine|link=]] |
||
| + | }} |
||
| + | }} |
||
| + | ===<div style="font-size:60%">stage 3</div>=== |
||
| + | {{Quests-yellow |
||
| + | | QuestsImage= |
||
| + | | QuestList= |
||
| + | {{Quests/Quest |
||
| − | '''1000+ members''' |
||
| + | | QuestImage=[[File:Qst2705.png|110px|center|Quest Image]] |
||
| + | | QuestName='''Secrets In Ice''' |
||
| + | | QuestGiverImage= |
||
| + | | QuestGiverText= |
||
| + | | Tasks={{Quests/Task| TaskText=1. Talk To Taqulittuq| TaskImage=[[File:Npc33334.png|25px|task]]}}{{Quests/Task| TaskText=2. Go To The Spaceship| TaskImage=[[File:Tok10571.png|25px|task]]}}{{Quests/Task| TaskText=3. Get Past The Security System| TaskImage=[[File:Tok10572.png|25px|task]]}}{{Quests/Task| TaskText=4. Gather Information| TaskImage=[[File:Tok10573.png|25px|task]]}}{{Quests/Task| TaskText=5. Talk To Dad| TaskImage=[[File:Npc33335.png|25px|task]]}} |
||
| + | | Locations={{Quests/Location| Location=Arctic Wilderness}} |
||
| + | | Coins= 741,000[[File:Mat001.png|20px]] |
||
| + | | ExperiencePoints= 2,467,000[[File:Sys001.png|20px]] |
||
| + | | Rewards= |
||
| + | | Available=[[File:QuestIn.png|22px|Available after the Akhlut quest General's Research - Confiscated Submarine|link=]][[Terra_(Quests)#Ahlut|General's Research]]<br>location: Confiscated Submarine (last Akhlut) |
||
| + | | Arrow=[[File:ArrowOd.png|25px|Unlocks next Father mine|link=]] |
||
| + | }} |
||
| + | }} |
||
| + | ===<div style="font-size:60%">stage 4</div>=== |
||
| + | {{Quests-yellow |
||
| + | | QuestsImage= |
||
| + | | QuestList= |
||
| + | {{Quests/Quest |
||
| + | | QuestImage=[[File:Qst2707.png|110px|center|Quest Image]] |
||
| + | | QuestName='''Ancient Wisdom''' |
||
| + | | QuestGiverImage= |
||
| + | | QuestGiverText= |
||
| + | | Tasks={{Quests/Task| TaskText=1. Talk To Ahmed Baba| TaskImage=[[File:Npc33343.png|25px|task]]}}{{Quests/Task| TaskText=2. Gather Information (4)| TaskImage=[[File:Tok10576.png|25px|task]]}}{{Quests/Task| TaskText=3. Talk To Dad| TaskImage=[[File:Npc33344.png|25px|task]]}}{{Quests/Task| TaskText=4. Talk To Robot Rusty| TaskImage=[[File:Npc27275.png|25px|task]]}} |
||
| + | | Locations={{Quests/Location| Location=Near Timbuktu}} |
||
| + | | Coins= 742,000[[File:Mat001.png|20px]] |
||
| + | | ExperiencePoints= 2,474,000[[File:Sys001.png|20px]] |
||
| + | | Rewards= |
||
| + | | Available=[[File:QuestIn.png|22px|Available after the Aja quest Holey Pouch - Dense Jungle|link=]][[Terra_(Quests)#Aja|Holey Pouch]]<br>location: Dense Jungle (last Aja) |
||
| + | | Arrow=[[File:ArrowOd.png|25px|Unlocks next Father mine|link=]] |
||
| + | }} |
||
| + | }} |
||
| + | ===<div style="font-size:60%">stage 5</div>=== |
||
| − | [https://www.facebook.com/groups/1627193744199641/?fref=ts A & G Diggy's Adventure Group] - 1,500 members |
||
| + | {{Quests-yellow |
||
| + | | QuestsImage= |
||
| + | | QuestList= |
||
| + | {{Quests/Quest |
||
| − | [https://www.facebook.com/groups/diggysadventurefriends Diggy's Adventure Friends] - 1,473 members |
||
| + | | QuestImage=[[File:Qst2708.png|110px|center|Quest Image]] |
||
| + | | QuestName='''The Father Of Electricity''' |
||
| + | | QuestGiverImage= |
||
| + | | QuestGiverText= |
||
| + | | Tasks={{Quests/Task| TaskText=1. Talk To Nikola Tesla| TaskImage=[[File:Npc33345.png|25px|task]]}}{{Quests/Task| TaskText=2. Help Nikola (2)| TaskImage=[[File:Tok10577.png|25px|task]]}}{{Quests/Task| TaskText=3. Get The Energy Source| TaskImage=[[File:Tok10578.png|25px|task]]}}{{Quests/Task| TaskText=4. Talk To Dad| TaskImage=[[File:Npc33346.png|25px|task]]}} |
||
| + | | Locations={{Quests/Location| Location=Tesla's Research Station}} |
||
| + | | Coins= 743,000[[File:Mat001.png|20px]] |
||
| + | | ExperiencePoints= 2,481,000[[File:Sys001.png|20px]] |
||
| + | | Rewards= |
||
| + | | Available=[[File:QuestIn.png|22px|Available after the Dagda quest Words Of Love- Barrow Of Inspiration|link=]][[Terra_(Quests)#Dagda|Words Of Love]]<br>location: Barrow of Inspiration (last Dagda) |
||
| + | | Arrow=[[File:ArrowOd.png|25px|Unlocks next Father mine|link=]] |
||
| + | }} |
||
| + | }} |
||
| + | ===<div style="font-size:60%">stage 6</div>=== |
||
| + | {{Quests-yellow |
||
| + | | QuestsImage= |
||
| + | | QuestList= |
||
| + | {{Quests/Quest |
||
| − | [https://www.facebook.com/groups/Crazy4Diggy/ Crazy for Diggy] - 1,327 members |
||
| + | | QuestImage=[[File:Qst2709.png|110px|center|Quest Image]] |
||
| + | | QuestName='''Is Anybody There?''' |
||
| + | | QuestGiverImage= |
||
| + | | QuestGiverText= |
||
| + | | Tasks={{Quests/Task| TaskText=1. Plug In The Energy Source| TaskImage=[[File:Tok10579.png|25px|task]]}}{{Quests/Task| TaskText=2. Talk To Dad| TaskImage=[[File:Npc33360.png|25px|task]]}}{{Quests/Task| TaskText=3. Talk To Ada Lovelace| TaskImage=[[File:Npc33361.png|25px|task]]}}{{Quests/Task| TaskText=4. Program The Machine| TaskImage=[[File:Tok10580.png|25px|task]]}}{{Quests/Task| TaskText=5. Talk To Dad| TaskImage=[[File:Npc33362.png|25px|task]]}}{{Quests/Task| TaskText=6. Trace The Caller's Location (5)| TaskImage=[[File:Tok10581.png|25px|task]]}}{{Quests/Task| TaskText=7. Talk To Dad| TaskImage=[[File:Npc33363.png|25px|task]]}} |
||
| + | | Locations={{Quests/Location| Location=Aboard The Spaceship}} |
||
| + | | Coins= 744,000[[File:Mat001.png|20px]] |
||
| + | | ExperiencePoints= 2,488,000[[File:Sys001.png|20px]] |
||
| + | | Rewards= |
||
| + | | Available=[[File:QuestIn.png|22px|Available after the Morrigan quest The Last Sphere - Dark Shrine|link=]][[Terra_(Quests)#Morrigan|The Last Sphere]]<br>location: Dark Shrine (lastMorrigan) |
||
| + | | Arrow=[[File:ArrowRu.png|20px|End of Quest-line|link=]] |
||
| + | }} |
||
| + | }} |
||
| + | {| width="100%" |
||
| + | | style="text-align:right" |[[File:NAVtop.png|50px|link=|class=shiny grow|link=#top|Return to Top page]] |
||
| + | |} |
||
| − | ''' |
+ | =='''Amaterasu'''== |
| + | {{Quests-yellow |
||
| + | | QuestsImage= |
||
| + | | QuestList= |
||
| + | {{Quests/Quest |
||
| − | [https://www.facebook.com/groups/1978772808816940/ Diggy's Sand Castle] - 999 members |
||
| + | | QuestImage=[[Image: Qst2429.png|110px|center|Quest Image]] |
||
| + | | QuestName='''Mechanical Buddy''' |
||
| + | | QuestGiverImage= |
||
| + | | QuestGiverText= |
||
| + | | Tasks={{Quests/Task| TaskText=1. Talk To Robot Rusty| TaskImage=[[Image:Npc27275.png|25px|task]]}}{{Quests/Task| TaskText=2. Find The Blueprint| TaskImage=[[Image:Tok9118.png|25px|task]]}}{{Quests/Task| TaskText=3. Get The Blueprint| TaskImage=[[File:Tok9119.png|25px|task]]}}{{Quests/Task| TaskText=4. Build The Servitor| TaskImage=[[File:Tok9120.png|25px|task]]}}{{Quests/Task| TaskText=5. Talk To Servitor Of Amaterasu| TaskImage=[[File:Npc27089.png|25px|task]]}} |
||
| + | | Locations={{Quests/Location| Location=Peaceful Japanese Village}} |
||
| + | | Coins=639,000[[File:Mat001.png|link=|20px]] |
||
| + | | ExperiencePoints=1,753,000[[File:Sys001.png|link=|20px]] |
||
| + | | Rewards= |
||
| + | | Available=[[File:QuestIn.png|22px|Available after |link=]] [[Terra_(Quests)#Main_map|Source Of The Signal]]<br>location: Hidden Underground Facility (last main) |
||
| + | | Arrow=[[File:ArrowYd.png|25px|Unlocks next mine|link=]] |
||
| + | }} |
||
| + | {{Quests/Quest |
||
| − | [https://www.facebook.com/groups/234169300085759/?fref=ts Addicted to Diggy] - 944 members |
||
| + | | QuestImage=[[Image: Qst2430.png|110px|center|Quest Image]] |
||
| + | | QuestName='''Among The Wolves''' |
||
| + | | QuestGiverImage= |
||
| + | | QuestGiverText= |
||
| + | | Tasks={{Quests/Task| TaskText=1. Find The Wolves| TaskImage=[[Image:Tok9121.png|25px|task]]}}{{Quests/Task| TaskText=2. Catch Up To Amaterasu| TaskImage=[[Image:Tok9122.png|25px|task]]}}{{Quests/Task| TaskText=3. Talk To Amaterasu| TaskImage=[[File:Tok9123.png|25px|task]]}}{{Quests/Task| TaskText=4. Build The Servitor| TaskImage=[[File:Tok9120.png|25px|task]]}}{{Quests/Task| TaskText=5. Talk To Servitor Of Amaterasu| TaskImage=[[File:Npc27089.png|25px|task]]}} |
||
| + | | Locations={{Quests/Location| Location=Wolf Hills}} |
||
| + | | Coins=639,000[[File:Mat001.png|link=|20px]] |
||
| + | | ExperiencePoints=1,753,000[[File:Sys001.png|link=|20px]] |
||
| + | | Rewards= |
||
| + | | Available=Mechanical Buddy |
||
| + | | Arrow=[[File:ArrowYd.png|25px|Unlocks next mine|link=]] |
||
| + | }} |
||
| + | {{Quests/Quest |
||
| − | [https://www.facebook.com/groups/534136170007132/ Diggy's Tomb Raiders] - 906 members |
||
| + | | QuestImage=[[Image: Qst2431.png|110px|center|Quest Image]] |
||
| + | | QuestName='''Sun's Shyness''' |
||
| + | | QuestGiverImage= |
||
| + | | QuestGiverText= |
||
| + | | Tasks={{Quests/Task| TaskText=1. Get To The Cave| TaskImage=[[Image:Tok9124.png|25px|task]]}}{{Quests/Task| TaskText=2. Get The Items (5)| TaskImage=[[Image:Tok9125.png|25px|task]]}}{{Quests/Task| TaskText=3. Lure Out Amaterasu| TaskImage=[[File:Tok9126.png|25px|task]]}}{{Quests/Task| TaskText=4. Block The Cave Entrance| TaskImage=[[File:Tok9127.png|25px|task]]}}{{Quests/Task| TaskText=5. Talk To Amaterasu| TaskImage=[[File:Npc27090.png|25px|task]]}} |
||
| + | | Locations={{Quests/Location| Location=Heavenly Cave}} |
||
| + | | Coins=641,000[[File:Mat001.png|link=|20px]] |
||
| + | | ExperiencePoints=1,767,000[[File:Sys001.png|link=|20px]] |
||
| + | | Rewards= |
||
| + | | Available=Among The Wolves |
||
| + | | Arrow=[[File:ArrowYd.png|25px|Unlocks next mine|link=]] |
||
| + | }} |
||
| + | {{Quests/Quest |
||
| − | [https://www.facebook.com/groups/300475193644444/?ref=group_header DIGGY'S ADV FAM GROUP] - 875 members |
||
| + | | QuestImage=[[Image: Qst2441.png|110px|center|Quest Image]] |
||
| + | | QuestName='''She's Back!''' |
||
| + | | QuestGiverImage= |
||
| + | | QuestGiverText= |
||
| + | | Tasks={{Quests/Task| TaskText=1. Talk To Monk| TaskImage=[[Image:Npc27542.png|25px|task]]}}{{Quests/Task| TaskText=2. Clean The Temple| TaskImage=[[Image:Tok9217.png|25px|task]]}}{{Quests/Task| TaskText=3. Get Wooden Slats| TaskImage=[[File:Tok9218.png|25px|task]]}}{{Quests/Task| TaskText=4. Fix The Statue| TaskImage=[[File:Tok9223.png|25px|task]]}}{{Quests/Task| TaskText=5. Invite The Villagers| TaskImage=[[File:Tok9224.png|25px|task]]}}{{Quests/Task| TaskText=6. Attend The Openings| TaskImage=[[File:Tok9225.png|25px|task]]}}{{Quests/Task| TaskText=7. Talk To Amaterasu| TaskImage=[[File:Npc27546.png|25px|task]]}} |
||
| + | | Locations={{Quests/Location| Location=Sacred Village}} |
||
| + | | Coins=642,000[[File:Mat001.png|link=|20px]] |
||
| + | | ExperiencePoints=1,774,000[[File:Sys001.png|link=|20px]] |
||
| + | | Rewards= |
||
| + | | Available=Sun's Shyness |
||
| + | | Arrow=[[File:ArrowYd.png|25px|Unlocks next mine|link=]] |
||
| + | }} |
||
| + | {{Quests/Quest |
||
| − | [https://www.facebook.com/groups/821949101194821/?ref=br_rs Diggy's Adventure] - 864 members |
||
| + | | QuestImage=[[File:Qst2442.png|110px|center|Quest Image]] |
||
| + | | QuestName='''Impudent Demons''' |
||
| + | | QuestGiverImage= |
||
| + | | QuestGiverText= |
||
| + | | Tasks={{Quests/Task| TaskText=1. Talk To Monk| TaskImage=[[File:Npc27547.png|25px|task]]}}{{Quests/Task| TaskText=2. Get Rid Of The Demons (10)| TaskImage=[[File:Tok9226.png|25px|task]]}}{{Quests/Task| TaskText=3. Talk To Amaterasu| TaskImage=[[File:Npc27548.png|25px|task]]}} |
||
| + | | Locations={{Quests/Location| Location=Haunted Hamlet}} |
||
| + | | Coins= 643,000[[File:Mat001.png|20px]] |
||
| + | | ExperiencePoints= 1,781,000[[File:Sys001.png|20px]] |
||
| + | | Rewards= |
||
| + | | Available=She's Back! |
||
| + | | Arrow=[[File:ArrowYd.png|25px|Unlocks next mine|link=]] |
||
| + | }} |
||
| + | {{Quests/Quest |
||
| − | [https://www.facebook.com/groups/DiggysGuideToTheGalaxy/ Diggy's Guide To The Galaxy] - 648 members |
||
| + | | QuestImage=[[File:Qst2443.png|110px|center|Quest Image]] |
||
| + | | QuestName='''Broken Sword''' |
||
| + | | QuestGiverImage= |
||
| + | | QuestGiverText= |
||
| + | | Tasks={{Quests/Task| TaskText=1. Get Sword Shards (4)| TaskImage=[[File:Tok9227.png|25px|task]]}}{{Quests/Task| TaskText=2. Talk To Amaterasu| TaskImage=[[File:Npc27549.png|25px|task]]}} |
||
| + | | Locations={{Quests/Location| Location=All Across Japan}} |
||
| + | | Coins= 644,000[[File:Mat001.png|20px]] |
||
| + | | ExperiencePoints= 1,788,000[[File:Sys001.png|20px]] |
||
| + | | Rewards= |
||
| + | | Available=Impudent Demons |
||
| + | | Arrow=[[File:ArrowYd.png|25px|Unlocks next mine|link=]] |
||
| + | }} |
||
| + | {{Quests/Quest |
||
| − | [https://www.facebook.com/groups/726404120792416/?ref=br_rs Diggy's Adventure] - 645 members |
||
| + | | QuestImage=[[File:Qst2444.png|110px|center|Quest Image]] |
||
| + | | QuestName='''Legendary Smith''' |
||
| + | | QuestGiverImage= |
||
| + | | QuestGiverText= |
||
| + | | Tasks={{Quests/Task| TaskText=1. Find Hattori Hanzo| TaskImage=[[File:Tok9228.png|25px|task]]}}{{Quests/Task| TaskText=2. Talk To Hattori Hanzo| TaskImage=[[File:Npc27550.png|25px|task]]}}{{Quests/Task| TaskText=3. Help Reforge The Sword| TaskImage=[[File:Tok9229.png|25px|task]]}}{{Quests/Task| TaskText=4. Talk To Amaterasu| TaskImage=[[File:Npc27551.png|25px|task]]}} |
||
| + | | Locations={{Quests/Location| Location=Hattori Hanzo's Forge}} |
||
| + | | Coins= 645,000[[File:Mat001.png|20px]] |
||
| + | | ExperiencePoints= 1,795,000[[File:Sys001.png|20px]] |
||
| + | | Rewards= |
||
| + | | Available=Broken Sword |
||
| + | | Arrow=[[File:ArrowYd.png|25px|Unlocks next mine|link=]] |
||
| + | }} |
||
| + | {{Quests/Quest |
||
| − | [https://www.facebook.com/groups/132949510233704/?ref=br_rs Diggy's World] - 640 members |
||
| + | | QuestImage=[[File:Qst2445.png|110px|center|Quest Image]] |
||
| + | | QuestName='''Susanoo's Tsunami''' |
||
| + | | QuestGiverImage= |
||
| + | | QuestGiverText= |
||
| + | | Tasks={{Quests/Task| TaskText=1. Fix Damages (5)| TaskImage=[[File:Tok9237.png|25px|task]]}}{{Quests/Task| TaskText=2. Get The Pieces Of The Plate (3)| TaskImage=[[File:Tok9238.png|25px|task]]}}{{Quests/Task| TaskText=3. Talk To Amaterasu| TaskImage=[[File:Npc27586.png|25px|task]]}} |
||
| + | | Locations={{Quests/Location| Location=Flooded Coast}} |
||
| + | | Coins= 646,000[[File:Mat001.png|20px]] |
||
| + | | ExperiencePoints= 1,802,000[[File:Sys001.png|20px]] |
||
| + | | Rewards= |
||
| + | | Available=Legendary Smith |
||
| + | | Arrow=[[File:ArrowYd.png|25px|Unlocks next mine|link=]] |
||
| + | }} |
||
| + | {{Quests/Quest |
||
| + | | QuestImage=[[File:Qst2446.png|110px|center|Quest Image]] |
||
| + | | QuestName='''The First Divine Sphere''' |
||
| + | | QuestGiverImage= |
||
| + | | QuestGiverText= |
||
| + | | Tasks={{Quests/Task| TaskText=1. Set Up The Ritual| TaskImage=[[File:Tok9239.png|25px|task]]}}{{Quests/Task| TaskText=2. Perform The Ritual| TaskImage=[[File:Tok9240.png|25px|task]]}}{{Quests/Task| TaskText=3. Take The Sphere| TaskImage=[[File:Tok9288.png|25px|task]]}}{{Quests/Task| TaskText=4. Talk To Monk| TaskImage=[[File:Npc27587.png|25px|task]]}} |
||
| + | | Locations={{Quests/Location| Location=Temple Of Amaterasu}} |
||
| + | | Coins= 647,000[[File:Mat001.png|20px]] |
||
| + | | ExperiencePoints= 1,809,000[[File:Sys001.png|20px]] |
||
| + | | Rewards= |
||
| + | | Available=Susanoo's Tsunami |
||
| + | | Arrow=[[File:ArrowYd.png|25px|Unlocks next mine|link=]] |
||
| + | }} |
||
| + | {{Quests/Quest |
||
| − | '''200+ members''' |
||
| + | | QuestImage=[[File:Qst2447.png|110px|center|Quest Image]] |
||
| + | | QuestName='''Divine Protectress''' |
||
| + | | QuestGiverImage= |
||
| + | | QuestGiverText= |
||
| + | | Tasks={{Quests/Task| TaskText=1. Find Out What Happened| TaskImage=[[File:Tok9242.png|25px|task]]}}{{Quests/Task| TaskText=2. Save People (3)| TaskImage=[[File:Tok9241.png|25px|task]]}}{{Quests/Task| TaskText=3. Talk To Amaterasu| TaskImage=[[File:Npc27588.png|25px|task]]}} |
||
| + | | Locations={{Quests/Location| Location=Wrecked City}} |
||
| + | | Coins= 648,000[[File:Mat001.png|20px]] |
||
| + | | ExperiencePoints= 1,816,000[[File:Sys001.png|20px]] |
||
| + | | Rewards= |
||
| + | | Available=The First Divine Sphere |
||
| + | | Arrow=[[File:ArrowYr.png|25px|class=shiny grow|Unlocks a Main Quest-line (Susanoo: Susanoo's Right Hand - Spaceship's Laboratory)|link=Terra_(Quests)#Susanoo]][[File:ArrowBr.png|25px|class=shiny grow|Unlocks a sidequest line (Amaterasu|link=Terra_(Quests)#Sidequests:Amaterasu]] |
||
| + | }} |
||
| + | }} |
||
| + | {| width="100%" |
||
| − | [https://www.facebook.com/groups/1294862993961835/?fref=ts Diggy's Clearing Community] - 539 members |
||
| + | | style="text-align:right" |[[File:NAVtop.png|50px|link=|class=shiny grow|link=#top|Return to Top page]] |
||
| + | |} |
||
| + | ==Sidequests:Amaterasu== |
||
| − | [https://www.facebook.com/groups/516907295106817/?fref=ts Diggy's] - 539 members |
||
| + | {{Side-Quests |
||
| + | | QuestsImage= |
||
| + | | QuestList= |
||
| + | {{Quests/Quest |
||
| − | [https://www.facebook.com/groups/328067437620364/?ref=group_header DIGGYS ADVENTURE-We accept all gifts! No bullying! No shaming! No politics!] - 497 members |
||
| + | | QuestImage=[[File: Qst2729.png|110px|center|Quest Image]] |
||
| + | | QuestName='''Potential Champion''' |
||
| + | | QuestGiverImage= |
||
| + | | QuestGiverText= |
||
| + | | Tasks={{Quests/Task|TaskText=1. Join The Competition|TaskImage=[[File: Tok10628.png|35px]]}}{{Quests/Task|TaskText=2. Get Through The Challenges|TaskImage=[[File: Tok10629.png|35px]]}}{{Quests/Task|TaskText=3. Talk To Kateshi|TaskImage=[[File: Npc34004.png|35px]]}} |
||
| + | | Locations={{Quests/Location|Location=Outside Kateshi's Castle}} |
||
| + | | Coins= 648,000[[File:Mat001.png|20px]]<br> |
||
| + | | ExperiencePoints= 1,816,000[[File:Sys001.png|20px]]<br> |
||
| + | | Rewards= |
||
| + | | Available=[[File:QuestIn.png|22px|Available after |link=]] [[Terra_(Quests)#Amaterasu|Divine Protectress]]<br>location: Wrecked City (last Amaterasu) |
||
| + | | Arrow=[[File:ArrowBd.png|25px|Unlock next Side Ques mine|link=]] |
||
| + | }} |
||
| + | {{Quests/Quest |
||
| − | [https://www.facebook.com/groups/380070529195931/ Diggy NSFW] - 280 members (As the name says, it might not always be safe for work due to Funny Meme's or grumbling about problems with a quest!!) |
||
| + | | QuestImage=[[File: Qst2730.png|110px|center|Quest Image]] |
||
| + | | QuestName='''In The Belly Of The Beast''' |
||
| + | | QuestGiverImage= |
||
| + | | QuestGiverText= |
||
| + | | Tasks={{Quests/Task|TaskText=1. Get Through The Challenges|TaskImage=[[File: Tok10630.png|35px]]}} |
||
| + | | Locations= {{Quests/Location|Location=Kateshi's Castle}} |
||
| + | | Coins= 651,000[[File:Mat001.png|20px]]<br> |
||
| + | | ExperiencePoints= 1,824,000[[File:Sys001.png|20px]]<br> |
||
| + | | Rewards= |
||
| + | | Available=Potential Champion |
||
| + | | Arrow=[[File:ArrowBd.png|25px|Unlock next Side Ques mine|link=]] |
||
| + | }} |
||
| + | {{Quests/Quest |
||
| − | == Specialized Groups == |
||
| + | | QuestImage=[[File: Qst2731.png|110px|center|Quest Image]] |
||
| − | (As of August 3, 2022)<br> |
||
| + | | QuestName='''Winner Takes All''' |
||
| + | | QuestGiverImage= |
||
| + | | QuestGiverText= |
||
| + | | Tasks={{Quests/Task|TaskText=1. Win The Competition|TaskImage=[[File: Tok10631.png|35px]]}}{{Quests/Task|TaskText=2. Talk To Kateshi|TaskImage=[[File: Npc33551.png|35px]]}} |
||
| + | | Locations= {{Quests/Location|Location=Centre Of Kateshi's Castle}} |
||
| + | | Coins= 654,000[[File:Mat001.png|20px]]<br> |
||
| + | | ExperiencePoints= 1,832,000[[File:Sys001.png|20px]]<br> |
||
| + | | Rewards= |
||
| + | | Available=In The Belly Of The Beast |
||
| + | | Arrow=[[File:ArrowRu.png|25px|End of questline|link=]] |
||
| + | }} |
||
| + | }} |
||
| + | {| width="100%" |
||
| + | | style="text-align:right" |[[File:NAVtop.png|50px|link=|class=shiny grow|link=#top|Return to Top page]] |
||
| + | |} |
||
| + | =='''Susanoo'''== |
||
| − | [https://www.facebook.com/groups/diggyaddme/ Diggy's Adventure Add me group] - 8,719 members This group no longer has admins. Be aware that it might have spam or other dangerous posts. |
||
| + | {{Quests-yellow |
||
| + | | QuestsImage= |
||
| + | | QuestList= |
||
| + | {{Quests/Quest |
||
| − | [https://www.facebook.com/groups/898614333519173/ Diggy's Links exchange Group] - 3,819 members (only reward link exchanging) |
||
| + | | QuestImage=[[Image: Qst2456.png|110px|center|Quest Image]] |
||
| + | | QuestName='''Susanoo's Right Hand''' |
||
| + | | QuestGiverImage= |
||
| + | | QuestGiverText= |
||
| + | | Tasks={{Quests/Task| TaskText=1. Find The Servitor| TaskImage=[[Image:Tok9309.png|25px|task]]}}{{Quests/Task| TaskText=2. Catch The Servitor| TaskImage=[[Image:Tok9310.png|25px|task]]}}{{Quests/Task| TaskText=3. Get The Servitor To Your Ship| TaskImage=[[Image:Tok9311.png|25px|task]]}}{{Quests/Task| TaskText=4. Talk To Robot Rusty| TaskImage=[[Image:Npc27975.png|25px|task]]}}{{Quests/Task| TaskText=5. Hack The Servitor (3)| TaskImage=[[Image:Tok9312.png|25px|task]]}}{{Quests/Task| TaskText=6. Talk To Servitor Of Susanoo| TaskImage=[[File:Npc27976.png|25px|task]]}} |
||
| + | | Locations={{Quests/Location| Location=Spaceship's Laboratory}} |
||
| + | | Coins=649,000[[File:Mat001.png|link=|20px]] |
||
| + | | ExperiencePoints=1,823,000[[File:Sys001.png|link=|20px]] |
||
| + | | Rewards=[[File:Dec1309.png|40px]] |
||
| + | | Available=[[File:QuestIn.png|22px|Available after |link=]] [[Terra_(Quests)#Amaterasu|Divine Protectress]]<br>location: Wrecked City (last Amaterasu) |
||
| + | | Arrow=[[File:ArrowYd.png|25px|Unlocks next mine|link=]] |
||
| + | }} |
||
| + | {{Quests/Quest |
||
| − | [https://www.facebook.com/groups/1705918083028244/ Absentee Players] - 1,942 members (group identifying inactive or deceased players) |
||
| + | | QuestImage=[[Image: Qst2457.png|110px|center|Quest Image]] |
||
| + | | QuestName='''Chasing The Storm''' |
||
| + | | QuestGiverImage= |
||
| + | | QuestGiverText= |
||
| + | | Tasks={{Quests/Task| TaskText=1. Gather Information (5)| TaskImage=[[Image:Tok9313.png|25px|task]]}}{{Quests/Task| TaskText=2. Talk To Servitor Of Susanoo| TaskImage=[[Image:Npc27977.png|25px|task]]}} |
||
| + | | Locations={{Quests/Location| Location=Village In Turmoil}} |
||
| + | | Coins=650,000[[File:Mat001.png|link=|20px]] |
||
| + | | ExperiencePoints=1,830,000[[File:Sys001.png|link=|20px]] |
||
| + | | Rewards= |
||
| + | | Available=Susanoo's Right Hand |
||
| + | | Arrow=[[File:ArrowYd.png|25px|Unlocks next mine|link=]] |
||
| + | }} |
||
| + | {{Quests/Quest |
||
| − | [https://www.facebook.com/groups/170294490002890/ Diggy's Adventure, level 100+ add me group] - 1,138 members (only neighbor adding, as the name suggests, for levels 100+) ??? |
||
| + | | QuestImage=[[Image: Qst2458.png|110px|center|Quest Image]] |
||
| + | | QuestName='''Way Of The Samurai''' |
||
| + | | QuestGiverImage= |
||
| + | | QuestGiverText= |
||
| + | | Tasks={{Quests/Task| TaskText=1. Get To Samurai School| TaskImage=[[Image:Tok9314.png|25px|task]]}}{{Quests/Task| TaskText=2. Talk To Hattori Hanzo| TaskImage=[[Image:Npc27978.png|25px|task]]}}{{Quests/Task| TaskText=3. Recruit The Samurai (4)| TaskImage=[[File:Tok9315.png|25px|task]]}}{{Quests/Task| TaskText=4. Talk To Hattori Hanzo| TaskImage=[[File:Npc27979.png|25px|task]]}} |
||
| + | | Locations={{Quests/Location| Location=Samurai School}} |
||
| + | | Coins=651,000[[File:Mat001.png|link=|20px]] |
||
| + | | ExperiencePoints=1,837,000[[File:Sys001.png|link=|20px]] |
||
| + | | Rewards= |
||
| + | | Available=Chasing The Storm |
||
| + | | Arrow=[[File:ArrowYd.png|25px|Unlocks next mine|link=]] |
||
| + | }} |
||
| + | {{Quests/Quest |
||
| − | [https://www.facebook.com/groups/508030152703000/ Diggy Survey] - 645 members (only polls/surveys about the game) |
||
| + | | QuestImage=[[Image: Qst2459.png|110px|center|Quest Image]] |
||
| + | | QuestName='''In The Eye Of The Storm''' |
||
| + | | QuestGiverImage= |
||
| + | | QuestGiverText= |
||
| + | | Tasks={{Quests/Task| TaskText=1. Get Inside The Fortress| TaskImage=[[Image:Tok9316.png|25px|task]]}}{{Quests/Task| TaskText=2. Defeat Susanoo| TaskImage=[[Image:Tok9317.png|25px|task]]}}{{Quests/Task| TaskText=3. Talk To Amaterasu| TaskImage=[[File:Npc27981.png|25px|task]]}} |
||
| + | | Locations={{Quests/Location| Location=Susanoo's Fortress}} |
||
| + | | Coins=652,000[[File:Mat001.png|link=|20px]] |
||
| + | | ExperiencePoints=1,844,000[[File:Sys001.png|link=|20px]] |
||
| + | | Rewards= |
||
| + | | Available=Way Of The Samurai |
||
| + | | Arrow=[[File:ArrowYd.png|25px|Unlocks next mine|link=]] |
||
| + | }} |
||
| + | {{Quests/Quest |
||
| − | [https://www.facebook.com/groups/123756732973726/ Reward links DIGGY pixel and fb version] - 756 members (reward link exchanging) |
||
| + | | QuestImage=[[Image: Qst2460.png|110px|center|Quest Image]] |
||
| + | | QuestName='''Tainted Memories''' |
||
| + | | QuestGiverImage= |
||
| + | | QuestGiverText= |
||
| + | | Tasks={{Quests/Task| TaskText=1. Enter Susanoo's Memories| TaskImage=[[Image:Tok9318.png|25px|task]]}}{{Quests/Task| TaskText=2. Purge The Memories (30)| TaskImage=[[Image:Tok9319.png|25px|task]]}}{{Quests/Task| TaskText=3. Talk To Susanoo| TaskImage=[[File:Npc27982.png|25px|task]]}} |
||
| + | | Locations={{Quests/Location| Location=M.T.R.}} |
||
| + | | Coins=653,000[[File:Mat001.png|link=|20px]] |
||
| + | | ExperiencePoints=1,851,000[[File:Sys001.png|link=|20px]] |
||
| + | | Rewards= |
||
| + | | Available=In The Eye Of The Storm |
||
| + | | Arrow=[[File:ArrowYd.png|25px|Unlocks next mine|link=]] |
||
| + | }} |
||
| + | {{Quests/Quest |
||
| − | [https://www.facebook.com/groups/1294862993961835/?fref=ts/ Diggy's Clearing Community] - 539 members (helping ALL Diggy players in a friendly, kindly manner) |
||
| + | | QuestImage=[[File:Qst2461.png|110px|center|Quest Image]] |
||
| + | | QuestName='''The Regretful God''' |
||
| + | | QuestGiverImage= |
||
| + | | QuestGiverText= |
||
| + | | Tasks={{Quests/Task| TaskText=1. Help Susanoo Fix Damages (4)| TaskImage=[[File:Tok9320.png|25px|task]]}}{{Quests/Task| TaskText=2. Talk To Susanoo| TaskImage=[[File:Npc27983.png|25px|task]]}} |
||
| + | | Locations={{Quests/Location| Location=Japanese Seaside Town}} |
||
| + | | Coins= 654,000[[File:Mat001.png|20px]] |
||
| + | | ExperiencePoints= 1,858,000[[File:Sys001.png|20px]] |
||
| + | | Rewards= |
||
| + | | Available=Tainted Memories |
||
| + | | Arrow=[[File:ArrowYd.png|25px|Unlocks next mine|link=]] |
||
| + | }} |
||
| + | {{Quests/Quest |
||
| − | [https://www.facebook.com/groups/MastersofDiggy/ Masters of Diggy] - 456 members (Members must exhibit a mastery of the game and must be at least in Atlantis, level 300 or over and have at least three dragon eggs.) |
||
| + | | QuestImage=[[File:Qst2462.png|110px|center|Quest Image]] |
||
| + | | QuestName='''The Thirsty Dragon''' |
||
| + | | QuestGiverImage= |
||
| + | | QuestGiverText= |
||
| + | | Tasks={{Quests/Task| TaskText=1. Find The Dragon| TaskImage=[[File:Tok9322.png|25px|task]]}}{{Quests/Task| TaskText=2. Get Dragon Drunk (8)| TaskImage=[[File:Tok9321.png|25px|task]]}}{{Quests/Task| TaskText=3. Defeat The Dragon| TaskImage=[[File:Tok9323.png|25px|task]]}}{{Quests/Task| TaskText=4. Talk To Susanoo| TaskImage=[[File:Npc27984.png|25px|task]]}} |
||
| + | | Locations={{Quests/Location| Location=The Serpent Road}} |
||
| + | | Coins= 655,000[[File:Mat001.png|20px]] |
||
| + | | ExperiencePoints= 1,865,000[[File:Sys001.png|20px]] |
||
| + | | Rewards= |
||
| + | | Available=The Regretful God |
||
| + | | Arrow=[[File:ArrowYd.png|25px|Unlocks next mine|link=]] |
||
| + | }} |
||
| + | {{Quests/Quest |
||
| − | [https://www.facebook.com/groups/2059744810921381/ Diggy Fake News] - 237 members (Diggy's Adventure chat is full of lies and nonsense, but in case you missed some of it, here is a group where you can find the latest B.S.) |
||
| + | | QuestImage=[[File:Qst2466.png|110px|center|Quest Image]] |
||
| + | | QuestName='''Dead Keeper''' |
||
| + | | QuestGiverImage= |
||
| + | | QuestGiverText= |
||
| + | | Tasks={{Quests/Task| TaskText=1. Enter The Underworld| TaskImage=[[File:Tok9374.png|25px|task]]}}{{Quests/Task| TaskText=2. Talk To Seasoned Ghost| TaskImage=[[File:Npc28287.png|25px|task]]}}{{Quests/Task| TaskText=3. Complete Tasks For Ghosts (3)| TaskImage=[[File:Tok9375.png|25px|task]]}}{{Quests/Task| TaskText=4. Get The Pieces Of The Plate (3)| TaskImage=[[File:Tok9376.png|25px|task]]}}{{Quests/Task| TaskText=5. Talk To Susanoo| TaskImage=[[File:Npc28286.png|25px|task]]}} |
||
| + | | Locations={{Quests/Location| Location=Misty Underworld}} |
||
| + | | Coins= 656,000[[File:Mat001.png|20px]] |
||
| + | | ExperiencePoints= 1,872,000[[File:Sys001.png|20px]] |
||
| + | | Rewards= |
||
| + | | Available=The Thirsty Dragon |
||
| + | | Arrow=[[File:ArrowYd.png|25px|Unlocks next mine|link=]] |
||
| + | }} |
||
| + | {{Quests/Quest |
||
| − | [https://www.facebook.com/groups/JoinDiggyExtraordinaire/ Diggy Extraordinaire (DEX)] - 49 members |
||
| + | | QuestImage=[[File:Qst2467.png|110px|center|Quest Image]] |
||
| + | | QuestName='''The Second Divine Sphere''' |
||
| + | | QuestGiverImage= |
||
| + | | QuestGiverText= |
||
| + | | Tasks={{Quests/Task| TaskText=1. Set Up The Ritual| TaskImage=[[File:Tok9386.png|25px|task]]}}{{Quests/Task| TaskText=2. Perform The Ritual| TaskImage=[[File:Tok9387.png|25px|task]]}}{{Quests/Task| TaskText=3. Take The Sphere| TaskImage=[[File:Tok9388.png|25px|task]]}}{{Quests/Task| TaskText=4. Talk To Susanoo| TaskImage=[[File:Npc28352.png|25px|task]]}} |
||
| + | | Locations={{Quests/Location| Location=Secluded Sanctuary}} |
||
| + | | Coins= 657,000[[File:Mat001.png|20px]] |
||
| + | | ExperiencePoints= 1,879,000[[File:Sys001.png|20px]] |
||
| + | | Rewards= |
||
| + | | Available=Dead Keeper |
||
| + | | Arrow=[[File:ArrowYd.png|25px|Unlocks next mine|link=]] |
||
| + | }} |
||
| + | {{Quests/Quest |
||
| + | | QuestImage=[[File:Qst2468.png|110px|center|Quest Image]] |
||
| + | | QuestName='''Where To Next?''' |
||
| + | | QuestGiverImage= |
||
| + | | QuestGiverText= |
||
| + | | Tasks={{Quests/Task| TaskText=1. Get To The Operations Room| TaskImage=[[File:Tok9391.png|25px|task]]}}{{Quests/Task| TaskText=2. Gather Information| TaskImage=[[File:Tok9390.png|25px|task]]}}{{Quests/Task| TaskText=3. Talk To Susanoo| TaskImage=[[File:Npc28286.png|25px|task]]}} |
||
| + | | Locations={{Quests/Location| Location=Mount Fuji}} |
||
| + | | Coins= 658,000[[File:Mat001.png|20px]] |
||
| + | | ExperiencePoints= 1,886,000[[File:Sys001.png|20px]] |
||
| + | | Rewards= [[File:Dec1320.png|40px]] |
||
| + | | Available=The Second Divine Sphere |
||
| + | | Arrow=[[File:ArrowYd.png|25px|Unlocks next mine|link=]] |
||
| + | }} |
||
| + | {{Quests/Quest |
||
| − | {| style="width: 100%; text-align:right" |
||
| + | | QuestImage=[[File:Qst2469.png|110px|center|Quest Image]] |
||
| − | |[[#top | Return To Top]] |
||
| + | | QuestName='''The Nameless One''' |
||
| + | | QuestGiverImage= |
||
| + | | QuestGiverText= |
||
| + | | Tasks={{Quests/Task| TaskText=1. Talk To The Nameless One| TaskImage=[[File:Npc28496.png|25px|task]]}}{{Quests/Task| TaskText=2. Talk To Susanoo| TaskImage=[[File:Npc28286.png|25px|task]]}} |
||
| + | | Locations={{Quests/Location| Location=}} |
||
| + | | Coins= 330,000[[File:Mat001.png|20px]] |
||
| + | | ExperiencePoints= 945,000[[File:Sys001.png|20px]] |
||
| + | | Rewards= |
||
| + | | Available=Where To Next? |
||
| + | | Arrow=[[File:ArrowYr.png|25px|class=shiny grow|Unlocks a Main Quest-line (Pele: Raging Volcano' - Burning Hawaiian Village)|link=Terra_(Quests)#Pele]][[File:ArrowOr.png|25px|class=shiny grow|Unlocks a Father Quest ()|link=Terra_(Quests)#stage_1]] |
||
| + | }} |
||
| + | }} |
||
| + | |||
| + | {| width="100%" |
||
| + | | style="text-align:right" |[[File:NAVtop.png|50px|link=|class=shiny grow|link=#top|Return to Top page]] |
||
|} |
|} |
||
| + | =='''Pele'''== |
||
| − | = National Groups = |
||
| + | {{Quests-yellow |
||
| − | (As of August 3, 2022)<br> |
||
| + | | QuestsImage= |
||
| + | | QuestList= |
||
| + | {{Quests/Quest |
||
| − | National groups usually only welcome people who can speak the language and identify themselves with the nationality. Most of them even have rules against foreigners joining the group, so please do not join them unless you are a speaker of said language. |
||
| + | | QuestImage=[[Image: Qst2470.png|110px|center|Quest Image]] |
||
| + | | QuestName='''Raging Volcano''' |
||
| + | | QuestGiverImage= |
||
| + | | QuestGiverText= |
||
| + | | Tasks={{Quests/Task| TaskText=1. Find Pele| TaskImage=[[Image:Tok9407.png|25px|task]]}}{{Quests/Task| TaskText=2. Talk To Lili| TaskImage=[[Image:Npc28405.png|25px|task]]}}{{Quests/Task| TaskText=3. Bring Pele A Sacrifice| TaskImage=[[File:Tok9408.png|25px|task]]}}{{Quests/Task| TaskText=4. Talk To Lili| TaskImage=[[File:Npc28406.png|25px|task]]}} |
||
| + | | Locations={{Quests/Location| Location=Burning Hawaiian Village}} |
||
| + | | Coins=659,000[[File:Mat001.png|link=|20px]] |
||
| + | | ExperiencePoints=1,893,000[[File:Sys001.png|link=|20px]] |
||
| + | | Rewards= |
||
| + | | Available=[[File:QuestIn.png|22px|Available after |link=]] [[Terra_(Quests)#Susanoo|The Nameless One]]<br>location: Mount Fuji (last Susanoo) |
||
| + | | Arrow=[[File:ArrowYd.png|25px|Unlocks next mine|link=]] |
||
| + | }} |
||
| + | {{Quests/Quest |
||
| − | The following groups are ordered alphabetically by the country name. |
||
| + | | QuestImage=[[Image: Qst2471.png|110px|center|Quest Image]] |
||
| + | | QuestName='''Servitor Unaccounted For''' |
||
| + | | QuestGiverImage= |
||
| + | | QuestGiverText= |
||
| + | | Tasks={{Quests/Task| TaskText=1. Find The Servitor| TaskImage=[[Image:Tok9409.png|25px|task]]}}{{Quests/Task| TaskText=2. Talk To Servitor Of Pele| TaskImage=[[Image:Npc28407.png|25px|task]]}} |
||
| + | | Locations={{Quests/Location| Location=Place of Serenity}} |
||
| + | | Coins=660,000[[File:Mat001.png|link=|20px]] |
||
| + | | ExperiencePoints=1,900,000[[File:Sys001.png|link=|20px]] |
||
| + | | Rewards= |
||
| + | | Available=Raging Volcano |
||
| + | | Arrow=[[File:ArrowYd.png|25px|Unlocks next mine|link=]] |
||
| + | }} |
||
| + | {{Quests/Quest |
||
| − | [[Image: Czech.png|30px]] [[Image: Slovakia.png|30px]] Czech & Slovak [https://www.facebook.com/groups/228037493981742/?ref=br_rs Diggy's Adventure CZECH&SLOVAK group] - 2,940 members |
||
| + | | QuestImage=[[Image: Qst2472.png|110px|center|Quest Image]] |
||
| + | | QuestName='''The Fiery Goddess''' |
||
| + | | QuestGiverImage= |
||
| + | | QuestGiverText= |
||
| + | | Tasks={{Quests/Task| TaskText=1. Get Inside The Volcano| TaskImage=[[Image:Tok9410.png|25px|task]]}}{{Quests/Task| TaskText=2. Talk To Servitor Of Pele| TaskImage=[[Image:Npc28408.png|25px|task]]}}{{Quests/Task| TaskText=3. Calm Down Pele| TaskImage=[[Image:Tok9411.png|25px|task]]}}{{Quests/Task| TaskText=4. Talk To Pele| TaskImage=[[Image:Npc28409.png|25px|task]]}} |
||
| + | | Locations={{Quests/Location| Location=Halema‘Uma‘U}} |
||
| + | | Coins=661,000[[File:Mat001.png|link=|20px]] |
||
| + | | ExperiencePoints=1,907,000[[File:Sys001.png|link=|20px]] |
||
| + | | Rewards= |
||
| + | | Available=Servitor Unaccounted For |
||
| + | | Arrow=[[File:ArrowYd.png|25px|Unlocks next mine|link=]] |
||
| + | }} |
||
| + | {{Quests/Quest |
||
| − | [[Image: Czech.png|30px]] [[Image: Slovakia.png|30px]] Czech & Slovak [https://www.facebook.com/groups/1032897416729459/?ref=group_header Diggy a radost z něj] - 278 members |
||
| + | | QuestImage=[[Image: Qst2473.png|110px|center|Quest Image]] |
||
| + | | QuestName='''Lost Children''' |
||
| + | | QuestGiverImage= |
||
| + | | QuestGiverText= |
||
| + | | Tasks={{Quests/Task| TaskText=1. Talk To Lili| TaskImage=[[Image:Npc28411.png|25px|task]]}}{{Quests/Task| TaskText=2. Get To The Island| TaskImage=[[Image:Tok9413.png|25px|task]]}}{{Quests/Task| TaskText=3. Interview The Witnesses| TaskImage=[[Image:Tok9414.png|25px|task]]}}{{Quests/Task| TaskText=4. Find The Clues| TaskImage=[[Image:Tok9415.png|25px|task]]}}{{Quests/Task| TaskText=5. Talk To Lili| TaskImage=[[Image:Npc28417.png|25px|task]]}}{{Quests/Task| TaskText=6. Talk To Pele| TaskImage=[[Image:Npc28418.png|25px|task]]}} |
||
| + | | Locations={{Quests/Location| Location=Tahiti}} |
||
| + | | Coins=662,000[[File:Mat001.png|link=|20px]] |
||
| + | | ExperiencePoints=1,914,000[[File:Sys001.png|link=|20px]] |
||
| + | | Rewards= |
||
| + | | Available=The Fiery Goddess |
||
| + | | Arrow=[[File:ArrowYd.png|25px|Unlocks next mine|link=]] |
||
| + | }} |
||
| + | {{Quests/Quest |
||
| − | [[Image: Denmark.png|30px]] Danish/Dansk [https://www.facebook.com/groups/DanskeDiggySpillere/ Danske Diggy Spiller] - 387 members |
||
| + | | QuestImage=[[Image: Qst2474.png|110px|center|Quest Image]] |
||
| + | | QuestName='''Secrets Of The Pacific''' |
||
| + | | QuestGiverImage= |
||
| + | | QuestGiverText= |
||
| + | | Tasks={{Quests/Task| TaskText=1. Get Inside The Fortress| TaskImage=[[Image:Tok9416.png|25px|task]]}}{{Quests/Task| TaskText=2. Talk To Servitor Of Pele| TaskImage=[[Image:Npc28419.png|25px|task]]}} |
||
| + | | Locations={{Quests/Location| Location=On the Ocean Floor}} |
||
| + | | Coins=663,000[[File:Mat001.png|link=|20px]] |
||
| + | | ExperiencePoints=1,921,000[[File:Sys001.png|link=|20px]] |
||
| + | | Rewards= |
||
| + | | Available=Lost Children |
||
| + | | Arrow=[[File:ArrowYd.png|25px|Unlocks next mine|link=]] |
||
| + | }} |
||
| + | {{Quests/Quest |
||
| − | [[Image: Finland.png|30px]] Finnish/Suomi [https://www.facebook.com/groups/663744377026226/ Diggy's Adventure -SUOMI] - 612 members |
||
| + | | QuestImage=[[Image: Qst2475.png|110px|center|Quest Image]] |
||
| + | | QuestName='''General's Gambit''' |
||
| + | | QuestGiverImage= |
||
| + | | QuestGiverText= |
||
| + | | Tasks={{Quests/Task| TaskText=1. Find The General| TaskImage=[[Image:Tok9417.png|25px|task]]}}{{Quests/Task| TaskText=2. Defeat The General| TaskImage=[[Image:Tok9418.png|25px|task]]}}{{Quests/Task| TaskText=3. Talk To Servitor Of Pele| TaskImage=[[Image:Npc28421.png|25px|task]]}}{{Quests/Task| TaskText=4. Escape| TaskImage=[[Image:Tok9419.png|25px|task]]}}{{Quests/Task| TaskText=5. Talk To Servitor Of Pele| TaskImage=[[Image:Npc28422.png|25px|task]]}} |
||
| + | | Locations={{Quests/Location| Location=General's Fortress}} |
||
| + | | Coins=664,000[[File:Mat001.png|link=|20px]] |
||
| + | | ExperiencePoints=1,928,000[[File:Sys001.png|link=|20px]] |
||
| + | | Rewards= |
||
| + | | Available=Secrets Of The Pacific |
||
| + | | Arrow=[[File:ArrowYd.png|25px|Unlocks next mine|link=]] |
||
| + | }} |
||
| + | {{Quests/Quest |
||
| − | [[Image: France.png|30px]] French/Francophone [https://www.facebook.com/groups/212738195564152/?fref=ts Diggy's Adventures (groupe Francophone)] - 5,034 members |
||
| + | | QuestImage=[[Image: Qst2476.png|110px|center|Quest Image]] |
||
| + | | QuestName='''Fire And Water''' |
||
| + | | QuestGiverImage= |
||
| + | | QuestGiverText= |
||
| + | | Tasks={{Quests/Task| TaskText=1. Find Pele's Children| TaskImage=[[Image:Tok9420.png|25px|task]]}}{{Quests/Task| TaskText=2. Save Pele's Children| TaskImage=[[Image:Tok9421.png|25px|task]]}}{{Quests/Task| TaskText=3. Talk To Pele's Daughter| TaskImage=[[Image:Npc28423.png|25px|task]]}}{{Quests/Task| TaskText=4. Talk To Pele| TaskImage=[[Image:Npc28418.png|25px|task]]}}{{Quests/Task| TaskText=5. Talk To Servitor Of Pele| TaskImage=[[Image:Npc28422.png|25px|task]]}} |
||
| + | | Locations={{Quests/Location| Location=Deep-Sea Facility}} |
||
| + | | Coins=665,000[[File:Mat001.png|link=|20px]] |
||
| + | | ExperiencePoints=1,935,000[[File:Sys001.png|link=|20px]] |
||
| + | | Rewards= |
||
| + | | Available=General's Gambit |
||
| + | | Arrow=[[File:ArrowYd.png|25px|Unlocks next mine|link=]] |
||
| + | }} |
||
| + | {{Quests/Quest |
||
| − | [[Image: France.png|30px]] French/Francophone [https://www.facebook.com/groups/667610179917867/?ref=br_rs Les Aventures de Diggy (groupe francophone pour Diggy's Adventure)] - 4,436 members |
||
| + | | QuestImage=[[File:Qst2492.png|110px|center|Quest Image]] |
||
| + | | QuestName='''Fiery Race''' |
||
| + | | QuestGiverImage= |
||
| + | | QuestGiverText= |
||
| + | | Tasks={{Quests/Task| TaskText=1. Talk To Hawaiian Chief| TaskImage=[[File:Npc28898.png|25px|task]]}}{{Quests/Task| TaskText=2. Help Pele Win| TaskImage=[[File:Tok9502.png|25px|task]]}}{{Quests/Task| TaskText=3. Get The Pieces Of The Plate (3)| TaskImage=[[File:Tok9503.png|25px|task]]}}{{Quests/Task| TaskText=4. Talk To Pele| TaskImage=[[File:Npc28899.png|25px|task]]}} |
||
| + | | Locations={{Quests/Location| Location=Mauna Kea}} |
||
| + | | Coins= 666,000[[File:Mat001.png|20px]] |
||
| + | | ExperiencePoints= 1,942,000[[File:Sys001.png|20px]] |
||
| + | | Rewards= |
||
| + | | Available=Fire And Water |
||
| + | | Arrow=[[File:ArrowYd.png|25px|Unlocks next mine|link=]] |
||
| + | }} |
||
| + | {{Quests/Quest |
||
| − | [[Image: France.png|30px]] French/Francophone [https://www.facebook.com/groups/1520945071252781/about/ Diggy’s Adventure pour tous récup les bonus kdo du jour] - 985 members |
||
| + | | QuestImage=[[File:Qst2493.png|110px|center|Quest Image]] |
||
| + | | QuestName='''The Third Divine Sphere''' |
||
| + | | QuestGiverImage= |
||
| + | | QuestGiverText= |
||
| + | | Tasks={{Quests/Task| TaskText=1. Set Up The Ritual| TaskImage=[[File:Tok9504.png|25px|task]]}}{{Quests/Task| TaskText=2. Perform The Ritual| TaskImage=[[File:Tok9505.png|25px|task]]}}{{Quests/Task| TaskText=3. Take The Sphere| TaskImage=[[File:Tok9506.png|25px|task]]}}{{Quests/Task| TaskText=4. Talk To Pele| TaskImage=[[File:Npc28900.png|25px|task]]}} |
||
| + | | Locations={{Quests/Location| Location=Temple Of Pele}} |
||
| + | | Coins= 667,000[[File:Mat001.png|20px]] |
||
| + | | ExperiencePoints= 1,949,000[[File:Sys001.png|20px]] |
||
| + | | Rewards= |
||
| + | | Available=Fire And Water |
||
| + | | Arrow=[[File:ArrowYd.png|25px|Unlocks next mine|link=]] |
||
| + | }} |
||
| + | {{Quests/Quest |
||
| − | [[Image: France.png|30px]] French/Francophone [https://www.facebook.com/groups/726629970777126/?fref=ts Speed Diggy's] - 365 members |
||
| + | | QuestImage=[[File:Qst2494.png|110px|center|Quest Image]] |
||
| + | | QuestName='''Like Mother Like Daughters''' |
||
| + | | QuestGiverImage= |
||
| + | | QuestGiverText= |
||
| + | | Tasks={{Quests/Task| TaskText=1. Talk To Kane| TaskImage=[[File:Npc28901.png|25px|task]]}}{{Quests/Task| TaskText=2. Get Materials For The Kites| TaskImage=[[File:Tok9507.png|25px|task]]}}{{Quests/Task| TaskText=3. Bring The Materials To Kane (4)| TaskImage=[[File:Tok9509.png|25px|task]]}}{{Quests/Task| TaskText=4. Give The Kites To Pele's Daughters| TaskImage=[[File:Tok9508.png|25px|task]]}}{{Quests/Task| TaskText=5. Take The Sphere| TaskImage=[[File:Tok9510.png|25px|task]]}}{{Quests/Task| TaskText=6. Talk To Pele| TaskImage=[[File:Npc28418.png|25px|task]]}} |
||
| + | | Locations={{Quests/Location| Location=Kane's Workshop}} |
||
| + | | Coins= 668,000[[File:Mat001.png|20px]] |
||
| + | | ExperiencePoints= 1,956,000[[File:Sys001.png|20px]] |
||
| + | | Rewards=[[File:Dec1324.png|40px]] |
||
| + | | Available=The Third Divine Sphere |
||
| + | | Arrow=[[File:ArrowYr.png|25px|class=shiny grow|Unlocks a Main Quest-line (Kane: Power Of Creation - Spaceship's Laboratory)|link=Terra_(Quests)#Kane]][[File:ArrowOr.png|25px|class=shiny grow|Unlocks a Father Quest (Father: Slime Out Of Space - Village of Plenty)|link=Terra_(Quests)#stage_2]] |
||
| + | }} |
||
| + | }} |
||
| + | {| width="100%" |
||
| − | [[Image: Germany.png|30px]] German/Deutsche [https://www.facebook.com/groups/433548266738366/?ref=br_rs Rund um Diggy`s Adventure - Deutsche Gruppe] - 7,815 members |
||
| + | | style="text-align:right" |[[File:NAVtop.png|50px|link=|class=shiny grow|link=#top|Return to Top page]] |
||
| + | |} |
||
| + | =='''Kane'''== |
||
| − | [[Image: Germany.png|30px]] German/Deutsche [https://www.facebook.com/groups/241394875966246/?ref=br_rs Deutsche Diggy's Adventure Gruppe] - 6,646 members |
||
| + | {{Quests-yellow |
||
| + | | QuestsImage= |
||
| + | | QuestList= |
||
| + | {{Quests/Quest |
||
| − | [[Image: Greece.png|30px]] Greek [https://www.facebook.com/groups/GreekDiggysGroup/ Greek Diggy's Adventure Group] - 888 members |
||
| + | | QuestImage=[[Image: Qst2496.png|110px|center|Quest Image]] |
||
| + | | QuestName='''Power Of Creation''' |
||
| + | | QuestGiverImage= |
||
| + | | QuestGiverText= |
||
| + | | Tasks={{Quests/Task| TaskText=1. Meet Kane| TaskImage=[[Image:Tok9555.png|25px|task]]}}{{Quests/Task| TaskText=2. Help Kane| TaskImage=[[Image:Tok9556.png|25px|task]]}}{{Quests/Task| TaskText=3. Talk To Kane| TaskImage=[[Image:Npc29012.png|25px|task]]}} |
||
| + | | Locations={{Quests/Location| Location=Village of Plenty}} |
||
| + | | Coins=669,000[[File:Mat001.png|link=|20px]] |
||
| + | | ExperiencePoints=1,963,000[[File:Sys001.png|link=|20px]] |
||
| + | | Rewards= |
||
| + | | Available=[[File:QuestIn.png|22px|Available after |link=]] [[Terra_(Quests)#Pele|Like Mother Like Daughters]]<br>location: Kane's Workshop (last Pele) |
||
| + | | Arrow=[[File:ArrowYd.png|25px|Unlocks next mine|link=]] |
||
| + | }} |
||
| + | {{Quests/Quest |
||
| − | [[Image: Hungary.gif|30px]] Hungary: [https://www.facebook.com/groups/MagyarDiggy/?fref=ts Magyar Diggy's Adventure Közösség] - 1,968 members |
||
| + | | QuestImage=[[Image: Qst2497.png|110px|center|Quest Image]] |
||
| + | | QuestName='''The Last Wave''' |
||
| + | | QuestGiverImage= |
||
| + | | QuestGiverText= |
||
| + | | Tasks={{Quests/Task| TaskText=1. Talk To Surfer Ghost| TaskImage=[[Image:Npc29013.png|25px|task]]}}{{Quests/Task| TaskText=2. Help The Surfer Win| TaskImage=[[Image:Tok9557.png|25px|task]]}}{{Quests/Task| TaskText=3. Talk To Surfer Ghost| TaskImage=[[Image:Npc29018.png|25px|task]]}}{{Quests/Task| TaskText=4. Connect The Head To The Body| TaskImage=[[Image:Tok9558.png|25px|task]]}}{{Quests/Task| TaskText=5. Take Servitor's Body| TaskImage=[[Image:Tok9560.png|25px|task]]}} |
||
| + | | Locations={{Quests/Location| Location=Surfers Paradise}} |
||
| + | | Coins=670,000[[File:Mat001.png|link=|20px]] |
||
| + | | ExperiencePoints=1,970,000[[File:Sys001.png|link=|20px]] |
||
| + | | Rewards= |
||
| + | | Available=Power Of Creation |
||
| + | | Arrow=[[File:ArrowYd.png|25px|Unlocks next mine|link=]] |
||
| + | }} |
||
| + | {{Quests/Quest |
||
| − | [[Image: Hungary.gif|30px]] Hungary [https://www.facebook.com/groups/496561323854582/ Diggy Segítő csoport] - 717 members |
||
| + | | QuestImage=[[Image: Qst2498.png|110px|center|Quest Image]] |
||
| + | | QuestName='''Crustacean's Treasure''' |
||
| + | | QuestGiverImage= |
||
| + | | QuestGiverText= |
||
| + | | Tasks={{Quests/Task| TaskText=1. Catch Up With The Crab| TaskImage=[[Image:Tok9561.png|25px|task]]}}{{Quests/Task| TaskText=2. Take Servitor's Head| TaskImage=[[Image:Tok9559.png|25px|task]]}}{{Quests/Task| TaskText=3. Talk To Kane| TaskImage=[[Image:Npc29017.png|25px|task]]}} |
||
| + | | Locations={{Quests/Location| Location=Crabby Coast}} |
||
| + | | Coins=671,000[[File:Mat001.png|link=|20px]] |
||
| + | | ExperiencePoints=1,977,000[[File:Sys001.png|link=|20px]] |
||
| + | | Rewards= |
||
| + | | Available=The Last Wave |
||
| + | | Arrow=[[File:ArrowYd.png|25px|Unlocks next mine|link=]] |
||
| + | }} |
||
| + | {{Quests/Quest |
||
| − | [[Image: Italy.gif|30px]] Italian/Italiano [https://www.facebook.com/groups/1486762838049231/ DIGGYMANIA ITALIA] - 1,749 members |
||
| + | | QuestImage=[[Image: Qst2499.png|110px|center|Quest Image]] |
||
| + | | QuestName='''From Head To Toe''' |
||
| + | | QuestGiverImage= |
||
| + | | QuestGiverText= |
||
| + | | Tasks={{Quests/Task| TaskText=1. Talk To Robot Rusty| TaskImage=[[Image:Npc29019.png|25px|task]]}}{{Quests/Task| TaskText=2. Connect The Head To The Body| TaskImage=[[Image:Tok9562.png|25px|task]]}}{{Quests/Task| TaskText=3. Talk To Servitor Of Kane| TaskImage=[[Image:Npc29020.png|25px|task]]}} |
||
| + | | Locations={{Quests/Location| Location=Spaceship's Workshop}} |
||
| + | | Coins=672,000[[File:Mat001.png|link=|20px]] |
||
| + | | ExperiencePoints=1,984,000[[File:Sys001.png|link=|20px]] |
||
| + | | Rewards= |
||
| + | | Available=Crustacean's Treasure |
||
| + | | Arrow=[[File:ArrowYd.png|25px|Unlocks next mine|link=]] |
||
| + | }} |
||
| + | {{Quests/Quest |
||
| − | [[Image: Italy.gif|30px]] Italian/Italiano [https://www.facebook.com/groups/1379878858942230/ VIVA DIGGY!!!] - 1,522 members |
||
| + | | QuestImage=[[Image: Qst2506.png|110px|center|Quest Image]] |
||
| + | | QuestName='''The Other Side Of The Coin''' |
||
| + | | QuestGiverImage= |
||
| + | | QuestGiverText= |
||
| + | | Tasks={{Quests/Task| TaskText=1. Find Where Kanaloa Resides| TaskImage=[[Image:Tok9626.png|25px|task]]}}{{Quests/Task| TaskText=2. Talk To Kanaloa| TaskImage=[[Image:Npc29282.png|25px|task]]}} |
||
| + | | Locations={{Quests/Location| Location=Kaho'olawe}} |
||
| + | | Coins=673,000[[File:Mat001.png|link=|20px]] |
||
| + | | ExperiencePoints=1,991,000[[File:Sys001.png|link=|20px]] |
||
| + | | Rewards= |
||
| + | | Available=From Head To Toe |
||
| + | | Arrow=[[File:ArrowYd.png|25px|Unlocks next mine|link=]] |
||
| + | }} |
||
| + | {{Quests/Quest |
||
| − | [[Image: Italy.gif|30px]] Italian/Italiano [https://www.facebook.com/groups/357911784552386/ Chat Amici group Diggy's] - 874 members |
||
| + | | QuestImage=[[Image: Qst2507.png|110px|center|Quest Image]] |
||
| + | | QuestName='''General's Curse''' |
||
| + | | QuestGiverImage= |
||
| + | | QuestGiverText= |
||
| + | | Tasks={{Quests/Task| TaskText=1. Lift The Curse From The Villagers| TaskImage=[[Image:Tok9627.png|25px|task]]}}{{Quests/Task| TaskText=2. Talk To Kanaloa| TaskImage=[[Image:Npc29283.png|25px|task]]}} |
||
| + | | Locations={{Quests/Location| Location=Blighted Village}} |
||
| + | | Coins=674,000[[File:Mat001.png|link=|20px]] |
||
| + | | ExperiencePoints=1,998,000[[File:Sys001.png|link=|20px]] |
||
| + | | Rewards= |
||
| + | | Available=The Other Side Of The Coin |
||
| + | | Arrow=[[File:ArrowYd.png|25px|Unlocks next mine|link=]] |
||
| + | }} |
||
| + | {{Quests/Quest |
||
| − | [[Image: Italy.gif|30px]] Italian/Italiano [https://www.facebook.com/groups/202583360508064// Pazzi per Diggy] - 664 members |
||
| + | | QuestImage=[[Image: Qst2508.png|110px|center|Quest Image]] |
||
| + | | QuestName='''Doing And Undoing''' |
||
| + | | QuestGiverImage= |
||
| + | | QuestGiverText= |
||
| + | | Tasks={{Quests/Task| TaskText=1. Help The Gods Cooperate| TaskImage=[[Image:Tok9628.png|25px|task]]}}{{Quests/Task| TaskText=2. Talk To Kane| TaskImage=[[Image:Npc29284.png|25px|task]]}} |
||
| + | | Locations={{Quests/Location| Location=Tainted Land}} |
||
| + | | Coins=675,000[[File:Mat001.png|link=|20px]] |
||
| + | | ExperiencePoints=2,005,000[[File:Sys001.png|link=|20px]] |
||
| + | | Rewards= |
||
| + | | Available=General's Curse |
||
| + | | Arrow=[[File:ArrowYd.png|25px|Unlocks next mine|link=]] |
||
| + | }} |
||
| + | {{Quests/Quest |
||
| − | [[Image: Italy.gif|30px]] Italian/Italiano [https://www.facebook.com/groups/isoladiggy/ L'isola di Diggy] - 517 members |
||
| + | | QuestImage=[[Image: Qst2518.png|110px|center|Quest Image]] |
||
| + | | QuestName='''The Springs Of Life''' |
||
| + | | QuestGiverImage= |
||
| + | | QuestGiverText= |
||
| + | | Tasks={{Quests/Task| TaskText=1. Get The Pieces Of The Plate| TaskImage=[[Image:Tok9707.png|25px|task]]}}{{Quests/Task| TaskText=2. Talk To Kanaloa| TaskImage=[[Image:Npc29545.png|25px|task]]}} |
||
| + | | Locations={{Quests/Location| Location=Land of Springs}} |
||
| + | | Coins=676,000[[File:Mat001.png|link=|20px]] |
||
| + | | ExperiencePoints=2,012,000[[File:Sys001.png|link=|20px]] |
||
| + | | Rewards= |
||
| + | | Available=Doing And Undoing |
||
| + | | Arrow=[[File:ArrowYd.png|25px|Unlocks next mine|link=]] |
||
| + | }} |
||
| + | {{Quests/Quest |
||
| − | [[Image: Netherlands.jpg|30px]] [[Image: Belgium.jpg|30px]] Dutch/Nederlands: NL/B [https://www.facebook.com/groups/210358339334893/ Diggy's Avontuur] - 1,377 members |
||
| + | | QuestImage=[[Image: Qst2519.png|110px|center|Quest Image]] |
||
| + | | QuestName='''The Fourth Divine Sphere''' |
||
| + | | QuestGiverImage= |
||
| + | | QuestGiverText= |
||
| + | | Tasks={{Quests/Task| TaskText=1. Set Up The Ritual| TaskImage=[[Image:Tok9708.png|25px|task]]}}{{Quests/Task| TaskText=2. Merge The Gods Together| TaskImage=[[Image:Tok9709.png|25px|task]]}}{{Quests/Task| TaskText=3. Talk To Kane| TaskImage=[[Image:Npc29547.png|25px|task]]}} |
||
| + | | Locations={{Quests/Location| Location=Ka ʻaina a Kane-Huna-Moku}} |
||
| + | | Coins=677,000[[File:Mat001.png|link=|20px]] |
||
| + | | ExperiencePoints=2,019,000[[File:Sys001.png|link=|20px]] |
||
| + | | Rewards= |
||
| + | | Available=Land of Springs |
||
| + | | Arrow=[[File:ArrowYd.png|25px|Unlocks next mine|link=]] |
||
| + | }} |
||
| + | {{Quests/Quest |
||
| − | [[Image: Netherlands.jpg|30px]] [[Image: Belgium.jpg|30px]] Dutch/Nederlands: NL/B [https://www.facebook.com/groups/140855886067740/ Diggy in 't Nederlands] - 1,069 members |
||
| + | | QuestImage=[[Image: Qst2520.png|110px|center|Quest Image]] |
||
| + | | QuestName='''Touch Of Winter''' |
||
| + | | QuestGiverImage= |
||
| + | | QuestGiverText= |
||
| + | | Tasks={{Quests/Task| TaskText=1. Find Out Where To Go Next| TaskImage=[[Image:Tok9711.png|25px|task]]}}{{Quests/Task| TaskText=2. Talk To Kane| TaskImage=[[Image:Npc29548.png|25px|task]]}} |
||
| + | | Locations={{Quests/Location| Location=Radar Room}}<br>{{Quests/Location| Location=[[City#Space_Hub|Space Hub]]}} |
||
| + | | Coins=678,000[[File:Mat001.png|link=|20px]] |
||
| + | | ExperiencePoints=2,026,000[[File:Sys001.png|link=|20px]] |
||
| + | | Rewards=[[File:Dec1339.png|40px]] |
||
| + | | Available=The Fourth Divine Sphere |
||
| + | | Arrow=[[File:ArrowYr.png|25px|class=shiny grow|Unlocks a Main Quest-line (Nanook: The Northern Connection - Arctic Base)|link=Terra_(Quests)#Nanook]] [[File:ArrowBr.png|25px|class=shiny grow|Unlocks a sidequest line (Kane)|link=Terra_(Quests)#Sidequests:Kane]] [[File:ArrowBr.png|25px|class=shiny grow|Unlocks a sidequest line Challenges|link=Terra_(Quests)#Challenges_1/3]] |
||
| + | }} |
||
| + | }} |
||
| + | ==Sidequests:Kane== |
||
| − | [[Image: Netherlands.jpg|30px]] [[Image: Belgium.jpg|30px]] Dutch/Nederlands: NL/B [https://www.facebook.com/groups/366558161041786/ Diggy's Avontuur Helpdesk] - 700 members |
||
| + | {{Side-Quests |
||
| + | | QuestsImage= |
||
| + | | QuestList= |
||
| + | {{Quests/Quest |
||
| − | [[Image: Poland.gif|30px]] Polish/Polska [https://www.facebook.com/groups/242119972607134/?ref=br_rs Diggy's Adventure Polska Grupa] - 6,341 members |
||
| + | | QuestImage=[[File: Qst2736.png|110px|center|Quest Image]] |
||
| + | | QuestName='''A Day At The Beach''' |
||
| + | | QuestGiverImage= |
||
| + | | QuestGiverText= |
||
| + | | Tasks={{Quests/Task| TaskText=1. Talk To Dr C. Archaros| TaskImage=[[File: Npc34005.png|25px]]}}{{Quests/Task| TaskText=2. Talk To Dr C. Archaros| TaskImage=[[File: Npc33700.png|25px]]}}{{Quests/Task| TaskText=3. Search The Beach| TaskImage=[[File: Tok10653.png|25px]]}}{{Quests/Task| TaskText=4. Talk To Dr C. Archaros| TaskImage=[[File: Npc33701.png|25px]]}} |
||
| + | | Locations={{Quests/Location| Location=Sandy Beach}} |
||
| + | | Coins= 678,000[[File:Mat001.png|20px]]<br> |
||
| + | | ExperiencePoints= 2,026,000[[File:Sys001.png|20px]]<br> |
||
| + | | Rewards= |
||
| + | | Available=[[File:QuestIn.png|22px|Available after |link=]] [[Terra_(Quests)#Kane|Touch Of Winter]]<br>location: Radar Room (last Kane) |
||
| + | | Arrow=[[File:ArrowBd.png|25px|Unlock next Side Ques mine|link=]] |
||
| + | }} |
||
| + | {{Quests/Quest |
||
| − | [[Image: Poland.gif|30px]] Polish/Polska [https://www.facebook.com/groups/DiggyAdventurePolska/ Diggy's Adventure Polska Fan Club] - 791 members |
||
| + | | QuestImage=[[File: Qst2737.png|110px|center|Quest Image]] |
||
| + | | QuestName='''Shark Hunt''' |
||
| + | | QuestGiverImage= |
||
| + | | QuestGiverText= |
||
| + | | Tasks={{Quests/Task| TaskText=1. Get A Crew (3)| TaskImage=[[File: Tok10654.png|25px]]}}{{Quests/Task| TaskText=2. Track Megalodon| TaskImage=[[File: Tok10655.png|25px]]}}{{Quests/Task| TaskText=3. Escape Megalodon| TaskImage=[[File: Tok10656.png|25px]]}}{{Quests/Task| TaskText=4. Talk To Captain| TaskImage=[[File: Npc33702.png|25px]]}} |
||
| + | | Locations={{Quests/Location| Location=Shelf Sea}} |
||
| + | | Coins= 681,000[[File:Mat001.png|20px]]<br> |
||
| + | | ExperiencePoints= 2,034,000[[File:Sys001.png|20px]]<br> |
||
| + | | Rewards= |
||
| + | | Available=A Day At The Beach |
||
| + | | Arrow=[[File:ArrowBd.png|25px|Unlock next Side Ques mine|link=]] |
||
| + | }} |
||
| + | {{Quests/Quest |
||
| − | [[Image: Portugal.png|30px]] [[Image:Brazil.png|30px]] Portuguese/Português [https://www.facebook.com/groups/AsAventurasDeDiggy/ As Aventuras de Diggy] - 648 members |
||
| + | | QuestImage=[[File: Qst2738.png|110px|center|Quest Image]] |
||
| + | | QuestName='''Jaws From The Past''' |
||
| + | | QuestGiverImage= |
||
| + | | QuestGiverText= |
||
| + | | Tasks={{Quests/Task| TaskText=1. Find Megalodon's Lair| TaskImage=[[File: Tok10657.png|25px]]}}{{Quests/Task| TaskText=2. Chase Away Kraken| TaskImage=[[File: Tok10658.png|25px]]}}{{Quests/Task| TaskText=3. Talk To Captain| TaskImage=[[File: Npc33703.png|25px]]}} |
||
| + | | Locations={{Quests/Location| Location=Bottom Of Mariana Trench}} |
||
| + | | Coins= 684,000[[File:Mat001.png|20px]]<br> |
||
| + | | ExperiencePoints= 2,042,000[[File:Sys001.png|20px]]<br> |
||
| + | | Rewards= |
||
| + | | Available=Shark Hunt |
||
| + | | Arrow=[[File:ArrowRu.png|25px|End of questline|link=]] |
||
| + | }} |
||
| + | }} |
||
| + | ===Challenges 1/3=== |
||
| − | [[Image: Portugal.png|30px]] Portuguese/Português [https://www.facebook.com/groups/277426916050857/ Os fanáticos do Diggy] - 415 members |
||
| + | {{Side-Quests |
||
| + | | QuestsImage= |
||
| + | | QuestList= |
||
| + | {{Quests/Quest |
||
| − | [[Image: Romania.png|30px]] Romanian [https://www.facebook.com/groups/DiggyRomania/ Diggy's Adventure- ROMANIA] - 800 members |
||
| + | | QuestImage=[[File: Qst2771.png|110px|center|Quest Image]] |
||
| + | | QuestName='''Divine Guardian Challenges 1''' |
||
| + | | QuestGiverImage= |
||
| + | | QuestGiverText= |
||
| + | | Tasks={{Quests/Task| TaskText=1. Complete Amaterasu's Challenge (4)| TaskImage=[[File: Tok10747.png|35px]]}}{{Quests/Task| TaskText=2. Complete Susanoo's Challenge| TaskImage=[[File: Tok10748.png|35px]]}}{{Quests/Task| TaskText=3. Complete Kane's Challenge| TaskImage=[[File: Tok10749.png|35px]]}} |
||
| + | | Locations={{Quests/Location|Location=Amaterasu's Challenge<br>Susanoo's Challenge<br>Kane's Challenge}} |
||
| + | | Coins= 1,000,000[[File:Mat001.png|20px]] |
||
| + | | ExperiencePoints= 6,000,000[[File:Sys001.png|20px]] |
||
| + | | Rewards= 1[[File: Mat401.png|35px]] |
||
| + | | Available=[[File:QuestIn.png|22px|Available after |link=]] [[Terra_(Quests)#Kane|Touch Of Winter]]<br>location: Radar Room (last Kane) |
||
| + | |Arrow=[[File:ArrowRu.png|25px|End of questline|link=]] |
||
| + | }} |
||
| + | }} |
||
| + | {| width="100%" |
||
| − | [[Image: Spain.png|30px]] Spanish/Español [https://www.facebook.com/groups/235855797103958/ Diggy's Adventure Ayuda en Español] - 2,557 members |
||
| + | | style="text-align:right" |[[File:NAVtop.png|50px|link=|class=shiny grow|link=#top|Return to Top page]] |
||
| + | |} |
||
| + | =='''Nanook'''== |
||
| − | [[Image: Spain.png|30px]] Spanish/Español [https://www.facebook.com/groups/311095539278956/ Diggy's en español] - 1,131 members |
||
| + | {{Quests-yellow |
||
| + | | QuestsImage= |
||
| + | | QuestList= |
||
| + | {{Quests/Quest |
||
| − | [[Image: Spain.png|30px]] Spanish/Español [https://www.facebook.com/groups/1421703244781008/?fref=ts DIGGY'S ESPAÑA] - 899 members |
||
| + | | QuestImage=[[File: Qst2530.png|110px|center|Quest Image]] |
||
| + | | QuestName='''The Northern Connection''' |
||
| + | | QuestGiverImage= |
||
| + | | QuestGiverText= |
||
| + | | Tasks={{Quests/Task| TaskText=1. Get To The Inuit Village| TaskImage=[[File: Tok9729.png|25px|task]]}}{{Quests/Task| TaskText=2. Talk To Uvavnuk| TaskImage=[[File: Npc29692.png|25px|task]]}}{{Quests/Task| TaskText=3. Find The Servitor| TaskImage=[[File: Tok9730.png|25px|task]]}}{{Quests/Task| TaskText=4. Talk To Servitor Of Nanook| TaskImage=[[File: Npc29693.png|25px|task]]}} |
||
| + | | Locations={{Quests/Location| Location=Arctic Base}} |
||
| + | | Coins= 679,000[[File:Mat001.png|20px]] |
||
| + | | ExperiencePoints= 2,033,000[[File:Sys001.png|20px]] |
||
| + | | Rewards= |
||
| + | | Available=[[File:QuestIn.png|22px|Available after |link=]] [[Terra_(Quests)#Kane|Touch Of Winter]]<br>location: Radar Room (last KAne) |
||
| + | | Arrow=[[File:ArrowYd.png|25px|Unlocks next mine|link=]] |
||
| + | }} |
||
| + | {{Quests/Quest |
||
| − | [[Image: Spain.png|30px]] Spanish/Español [https://www.facebook.com/groups/1737950623086256/ Aventura de Diggy -Español-] - 942 members |
||
| + | | QuestImage=[[File: Qst2531.png|110px|center|Quest Image]] |
||
| + | | QuestName='''Tracking Nanook''' |
||
| + | | QuestGiverImage= |
||
| + | | QuestGiverText= |
||
| + | | Tasks={{Quests/Task| TaskText=1. Join The Competition| TaskImage=[[File: Tok9731.png|25px|task]]}}{{Quests/Task| TaskText=2. Find Nanook's Den| TaskImage=[[File: Tok9732.png|25px|task]]}}{{Quests/Task| TaskText=3. Talk To Uvavnuk| TaskImage=[[File: Npc29695.png|25px|task]]}} |
||
| + | | Locations={{Quests/Location| Location=Land Of Ice}} |
||
| + | | Coins= 680,000[[File:Mat001.png|20px]] |
||
| + | | ExperiencePoints= 2,040,000[[File:Sys001.png|20px]] |
||
| + | | Rewards= |
||
| + | | Available=The Northern Connection |
||
| + | | Arrow=[[File:ArrowYd.png|25px|Unlocks next mine|link=]] |
||
| + | }} |
||
| + | {{Quests/Quest |
||
| − | [[Image: Spain.png|30px]] Spanish/Español [https://www.facebook.com/groups/810588452423964/ Bonus de Diggy's - Internacional] - 285 members |
||
| + | | QuestImage=[[File: Qst2532.png|110px|center|Quest Image]] |
||
| + | | QuestName='''Of Stars And Spirits''' |
||
| + | | QuestGiverImage= |
||
| + | | QuestGiverText= |
||
| + | | Tasks={{Quests/Task| TaskText=1. Set Up The Ritual| TaskImage=[[File: Tok9733.png|25px|task]]}}{{Quests/Task| TaskText=2. Talk To Uvavnuk| TaskImage=[[File: Npc29696.png|25px|task]]}}{{Quests/Task| TaskText=3. Enter The Spirit World| TaskImage=[[File: Tok9734.png|25px|task]]}}{{Quests/Task| TaskText=4. Find Nanook| TaskImage=[[File: Tok9735.png|25px|task]]}}{{Quests/Task| TaskText=5. Talk To Nanook| TaskImage=[[File: Npc29697.png|25px|task]]}} |
||
| + | | Locations={{Quests/Location| Location=Spirit World}} |
||
| + | | Coins= 681,000[[File:Mat001.png|20px]] |
||
| + | | ExperiencePoints= 2,047,000[[File:Sys001.png|20px]] |
||
| + | | Rewards= |
||
| + | | Available=Tracking Nanook |
||
| + | | Arrow=[[File:ArrowYd.png|25px|Unlocks next mine|link=]] |
||
| + | }} |
||
| + | {{Quests/Quest |
||
| − | [[Image: Taiwanese.png|30px]] [[Image: China2.png|30px]] Taiwanese and Chinese: [https://www.facebook.com/groups/871872539578584/?fref=ts Diggy中文社] - 1,140 Members |
||
| + | | QuestImage=[[File: Qst2533.png|110px|center|Quest Image]] |
||
| + | | QuestName='''Furballs In Trouble''' |
||
| + | | QuestGiverImage= |
||
| + | | QuestGiverText= |
||
| + | | Tasks={{Quests/Task| TaskText=1. Meet With Nanook| TaskImage=[[File: Tok9747.png|25px|task]]}}{{Quests/Task| TaskText=2. Save The Polar Bears (10)| TaskImage=[[File: Tok9748.png|25px|task]]}}{{Quests/Task| TaskText=3. Talk To Nanook| TaskImage=[[File: Npc29698.png|25px|task]]}} |
||
| + | | Locations={{Quests/Location| Location=Massive Iceberg}} |
||
| + | | Coins= 682,000[[File:Mat001.png|20px]] |
||
| + | | ExperiencePoints= 2,054,000[[File:Sys001.png|20px]] |
||
| + | | Rewards= |
||
| + | | Available=Of Stars And Spirits |
||
| + | | Arrow=[[File:ArrowYd.png|25px|Unlocks next mine|link=]] |
||
| + | }} |
||
| + | {{Quests/Quest |
||
| − | [[Image: Flag-Turkey.jpg|30px]] Turkish [https://www.facebook.com/groups/147766095890026/ Diggys TURK FAN] - 357 members |
||
| + | | QuestImage=[[File: Qst2534.png|110px|center|Quest Image]] |
||
| + | | QuestName='''Human Or Bear?''' |
||
| + | | QuestGiverImage= |
||
| + | | QuestGiverText= |
||
| + | | Tasks={{Quests/Task| TaskText=1. Recruit Villagers For The Army| TaskImage=[[File: Tok9749.png|25px|task]]}}{{Quests/Task| TaskText=2. Make Catapults| TaskImage=[[File: Tok9750.png|25px|task]]}}{{Quests/Task| TaskText=3. Make Weapons| TaskImage=[[File: Tok9751.png|25px|task]]}}{{Quests/Task| TaskText=4. Talk To Nanook| TaskImage=[[File: Npc29698.png|25px|task]]}} |
||
| + | | Locations={{Quests/Location| Location=Igloo Village}} |
||
| + | | Coins= 683,000[[File:Mat001.png|20px]] |
||
| + | | ExperiencePoints= 2,061,000[[File:Sys001.png|20px]] |
||
| + | | Rewards= |
||
| + | | Available=Furballs In Trouble |
||
| + | | Arrow=[[File:ArrowYd.png|25px|Unlocks next mine|link=]] |
||
| + | }} |
||
| + | {{Quests/Quest |
||
| − | [[Image: Flag-Turkey.jpg|30px]] Turkish [https://www.facebook.com/groups/700736573459598/ Diggy Türkiye] - 348 members |
||
| + | | QuestImage=[[File: Qst2535.png|110px|center|Quest Image]] |
||
| + | | QuestName='''Battle On Icebergs''' |
||
| + | | QuestGiverImage= |
||
| + | | QuestGiverText= |
||
| + | | Tasks={{Quests/Task| TaskText=1. Get To General's Army Camp| TaskImage=[[File: Tok9752.png|25px|task]]}}{{Quests/Task| TaskText=2. Find The General| TaskImage=[[File: Tok9753.png|25px|task]]}}{{Quests/Task| TaskText=3. Talk To Nanook| TaskImage=[[File: Npc29722.png|25px|task]]}} |
||
| + | | Locations={{Quests/Location| Location=Icy Battlefield}} |
||
| + | | Coins= 684,000[[File:Mat001.png|20px]] |
||
| + | | ExperiencePoints= 2,068,000[[File:Sys001.png|20px]] |
||
| + | | Rewards= |
||
| + | | Available=Human Or Bear? |
||
| + | | Arrow=[[File:ArrowYd.png|25px|Unlocks next mine|link=]] |
||
| + | }} |
||
| + | {{Quests/Quest |
||
| − | =Community Pages= |
||
| + | | QuestImage=[[File: Qst2536.png|110px|center|Quest Image]] |
||
| − | '''*Note:*''' The following are pages '''run by players''' of the game and are in no way affiliated with Pixel Federation or Diggy's Adventure (the game): |
||
| + | | QuestName='''Broken Ice''' |
||
| + | | QuestGiverImage= |
||
| + | | QuestGiverText= |
||
| + | | Tasks={{Quests/Task| TaskText=1. Help The Villagers (6)| TaskImage=[[File: Tok9754.png|25px|task]]}}{{Quests/Task| TaskText=2. Talk To Nanook| TaskImage=[[File: Npc29698.png|25px|task]]}} |
||
| + | | Locations={{Quests/Location| Location=Arctic Coast}} |
||
| + | | Coins= 685,000[[File:Mat001.png|20px]] |
||
| + | | ExperiencePoints= 2,075,000[[File:Sys001.png|20px]] |
||
| + | | Rewards= |
||
| + | | Available=Battle On Icebergs |
||
| + | | Arrow=[[File:ArrowYd.png|25px|Unlocks next mine|link=]] |
||
| + | }} |
||
| + | {{Quests/Quest |
||
| − | * Diggy's Adventure Add A Thon - [[https://www.facebook.com/FriendsforDA/ Friends for Diggy's Adventure]] - Creating events to connect neighbors of Diggy's Adventure game. |
||
| + | | QuestImage=[[File: Qst2542.png|110px|center|Quest Image]] |
||
| + | | QuestName='''Nanook's Secrets''' |
||
| + | | QuestGiverImage= |
||
| + | | QuestGiverText= |
||
| + | | Tasks={{Quests/Task| TaskText=1. Get The Pieces Of The Plate (3)| TaskImage=[[File: Tok9779.png|25px|task]]}}{{Quests/Task| TaskText=2. Talk To Nanook| TaskImage=[[File: Npc29698.png|25px|task]]}} |
||
| + | | Locations={{Quests/Location| Location=Nanook's Shuttle}} |
||
| + | | Coins= 686,000[[File:Mat001.png|20px]] |
||
| + | | ExperiencePoints= 2,082,000[[File:Sys001.png|20px]] |
||
| + | | Rewards= |
||
| + | | Available=Broken Ice |
||
| + | | Arrow=[[File:ArrowYd.png|25px|Unlocks next mine|link=]] |
||
| + | }} |
||
| + | |||
| + | {{Quests/Quest |
||
| + | | QuestImage=[[File: Qst2543.png|110px|center|Quest Image]] |
||
| + | | QuestName='''The Fifth Divine Sphere''' |
||
| + | | QuestGiverImage= |
||
| + | | QuestGiverText= |
||
| + | | Tasks={{Quests/Task| TaskText=1. Talk To Nanook In The Spirit World| TaskImage=[[File: Npc29927.png|25px|task]]}}{{Quests/Task| TaskText=2. Perform The Ritual| TaskImage=[[File: Tok9781.png|25px|task]]}}{{Quests/Task| TaskText=3. Take The Sphere| TaskImage=[[File: Tok9782.png|25px|task]]}}{{Quests/Task| TaskText=4. Talk To Nanook| TaskImage=[[File: Npc29928.png|25px|task]]}} |
||
| + | | Locations={{Quests/Location| Location=Spirit World Outskirts}} |
||
| + | | Coins= 687,000[[File:Mat001.png|20px]] |
||
| + | | ExperiencePoints= 2,089,000[[File:Sys001.png|20px]] |
||
| + | | Rewards= |
||
| + | | Available=Nanook's Secrets |
||
| + | | Arrow=[[File:ArrowYd.png|25px|Unlocks next mine|link=]] |
||
| + | }} |
||
| + | |||
| + | {{Quests/Quest |
||
| + | | QuestImage=[[File: Qst2544.png|110px|center|Quest Image]] |
||
| + | | QuestName='''The Sea Wolf''' |
||
| + | | QuestGiverImage= |
||
| + | | QuestGiverText= |
||
| + | | Tasks={{Quests/Task| TaskText=1. Get To Akhlut| TaskImage=[[File: Tok9780.png|25px|task]]}}{{Quests/Task| TaskText=2. Talk To Akhlut| TaskImage=[[File: Npc29929.png|25px|task]]}} |
||
| + | | Locations={{Quests/Location| Location=The Arctic Ocean}} |
||
| + | | Coins= 688,000[[File:Mat001.png|20px]] |
||
| + | | ExperiencePoints= 2,096,000[[File:Sys001.png|20px]] |
||
| + | | Rewards= 1[[File: Dec1364.png|40px]] |
||
| + | | Available=The Fifth Divine Sphere |
||
| + | | Arrow=[[File:ArrowYr.png|25px|class=shiny grow|Unlocks a Main Quest-line (Akhlut: Akhlut's Right Fin - Akhlut's Workshop)|link=Terra_(Quests)#Akhlut]] [[File:ArrowBr.png|25px|class=shiny grow|Unlocks a sidequest line (Nanook)|link=Terra_(Quests)#Sidequests:Nanook]] |
||
| + | }} |
||
| + | }} |
||
| + | |||
| + | ==Sidequests:Nanook== |
||
| + | {{Side-Quests |
||
| + | | QuestsImage= |
||
| + | | QuestList= |
||
| + | |||
| + | {{Quests/Quest |
||
| + | | QuestImage=[[File: Qst2751.png|110px|center|Quest Image]] |
||
| + | | QuestName='''The Freezing Egyptian''' |
||
| + | | QuestGiverImage= |
||
| + | | QuestGiverText= |
||
| + | | Tasks={{Quests/Task| TaskText=1. Talk To Sneferu's Family| TaskImage=[[File: Npc34108.png|25px]]}}{{Quests/Task| TaskText=2. Find Out What Happened| TaskImage=[[File: Tok10722.png|25px]]}}{{Quests/Task| TaskText=3. Save Sneferu| TaskImage=[[File: Tok10723.png|25px]]}}{{Quests/Task| TaskText=4. Talk To Sneferu| TaskImage=[[File: Npc34109.png|25px]]}} |
||
| + | | Locations={{Quests/Location| Location=Icy Cove}} |
||
| + | | Coins= 688,000[[File:Mat001.png|20px]] |
||
| + | | ExperiencePoints= 2,096,000[[File:Sys001.png|20px]] |
||
| + | | Rewards= |
||
| + | | Available=[[File:QuestIn.png|22px|Available after |link=]] [[Terra_(Quests)#Nanook|The Sea Wolf]]<br>location: The Arctic Ocean (last Nanook) |
||
| + | |Arrow=[[File:ArrowBd.png|25px|Unlock next Side Ques mine|link=]] |
||
| + | }} |
||
| + | |||
| + | {{Quests/Quest |
||
| + | | QuestImage=[[File: Qst2752.png|110px|center|Quest Image]] |
||
| + | | QuestName='''Possessive Penguins''' |
||
| + | | QuestGiverImage= |
||
| + | | QuestGiverText= |
||
| + | | Tasks={{Quests/Task| TaskText=1. Find Mrs Sneferu| TaskImage=[[File: Tok10724.png|25px]]}}{{Quests/Task| TaskText=2. Talk To Mrs Sneferu| TaskImage=[[File: Npc34110.png|25px]]}}{{Quests/Task| TaskText=3. Fix The Submarine| TaskImage=[[File: Tok10725.png|25px]]}}{{Quests/Task| TaskText=4. Talk To Mrs Sneferu| TaskImage=[[File: Npc34111.png|25px]]}} |
||
| + | | Locations={{Quests/Location| Location=Old Submarine}} |
||
| + | | Coins= 691,000[[File:Mat001.png|20px]] |
||
| + | | ExperiencePoints= 2,104,000[[File:Sys001.png|20px]] |
||
| + | | Rewards= |
||
| + | | Available=The Freezing Egyptian |
||
| + | |Arrow=[[File:ArrowBd.png|25px|Unlock next Side Ques mine|link=]] |
||
| + | }} |
||
| + | |||
| + | {{Quests/Quest |
||
| + | | QuestImage=[[File: Qst2753.png|110px|center|Quest Image]] |
||
| + | | QuestName='''Move It, Move It''' |
||
| + | | QuestGiverImage= |
||
| + | | QuestGiverText= |
||
| + | | Tasks={{Quests/Task| TaskText=1. Talk To Sneferu's Son| TaskImage=[[File: Npc34112.png|25px]]}}{{Quests/Task| TaskText=2. Teach The Seals To Dance (8)| TaskImage=[[File: Tok10726.png|25px]]}}{{Quests/Task| TaskText=3. Talk To Sneferu's Son| TaskImage=[[File: Npc34113.png|25px]]}} |
||
| + | | Locations={{Quests/Location| Location=Arctic Icebergs}} |
||
| + | | Coins= 694,000[[File:Mat001.png|20px]] |
||
| + | | ExperiencePoints= 2,112,000[[File:Sys001.png|20px]] |
||
| + | | Rewards= |
||
| + | | Available=Possessive Penguins |
||
| + | |Arrow=[[File:ArrowRu.png|25px|End of questline|link=]] |
||
| + | }} |
||
| + | }} |
||
| + | {| width="100%" |
||
| + | | style="text-align:right" |[[File:NAVtop.png|50px|link=|class=shiny grow|link=#top|Return to Top page]] |
||
| + | |} |
||
| + | |||
| + | =='''Akhlut'''== |
||
| + | {{Quests-yellow |
||
| + | | QuestsImage= |
||
| + | | QuestList= |
||
| + | |||
| + | {{Quests/Quest |
||
| + | | QuestImage=[[File:Qst2545.png|110px|center|Quest Image]] |
||
| + | | QuestName='''Akhlut's Right Fin''' |
||
| + | | QuestGiverImage= |
||
| + | | QuestGiverText= |
||
| + | | Tasks={{Quests/Task| TaskText=1. Get To Akhlut's Workshop| TaskImage=[[File:Tok9783.png|25px|task]]}}{{Quests/Task| TaskText=2. Find The Blueprint| TaskImage=[[File:Tok9784.png|25px|task]]}}{{Quests/Task| TaskText=3. Talk To Akhlut| TaskImage=[[File:Npc29930.png|25px|task]]}} |
||
| + | | Locations={{Quests/Location| Location=Akhlut's Workshop}} |
||
| + | | Coins= 689,000[[File:Mat001.png|20px]] |
||
| + | | ExperiencePoints= 2,103,000[[File:Sys001.png|20px]] |
||
| + | | Rewards= |
||
| + | | Available=[[File:QuestIn.png|22px|Available after |link=]] [[Terra_(Quests)#Nanook|The Sea Wolf]]<br>location: The Arctic Ocean (last Nanook) |
||
| + | | Arrow=[[File:ArrowYd.png|25px|Unlocks next mine|link=]] |
||
| + | }} |
||
| + | |||
| + | {{Quests/Quest |
||
| + | | QuestImage=[[File:Qst2546.png|110px|center|Quest Image]] |
||
| + | | QuestName='''Against His Will''' |
||
| + | | QuestGiverImage= |
||
| + | | QuestGiverText= |
||
| + | | Tasks={{Quests/Task| TaskText=1. Take Servitor's Head| TaskImage=[[File:Tok9800.png|25px|task]]}}{{Quests/Task| TaskText=2. Take The First Half Of The Servitor| TaskImage=[[File:Tok9798.png|25px|task]]}}{{Quests/Task| TaskText=3. Take The Second Half Of The Servitor| TaskImage=[[File:Tok9799.png|25px|task]]}}{{Quests/Task| TaskText=4. Put The Servitor Back Together| TaskImage=[[File:Tok9808.png|25px|task]]}}{{Quests/Task| TaskText=5. Talk To Servitor Of Akhlut| TaskImage=[[File:Npc30073.png|25px|task]]}} |
||
| + | | Locations={{Quests/Location| Location=General's Factory}} |
||
| + | | Coins= 690,000[[File:Mat001.png|20px]] |
||
| + | | ExperiencePoints= 2,110,000[[File:Sys001.png|20px]] |
||
| + | | Rewards= |
||
| + | | Available=Akhlut's Right Fin |
||
| + | | Arrow=[[File:ArrowYd.png|25px|Unlocks next mine|link=]] |
||
| + | }} |
||
| + | |||
| + | {{Quests/Quest |
||
| + | | QuestImage=[[File:Qst2547.png|110px|center|Quest Image]] |
||
| + | | QuestName='''Ocean Hide-and-seek''' |
||
| + | | QuestGiverImage= |
||
| + | | QuestGiverText= |
||
| + | | Tasks={{Quests/Task| TaskText=1. Find General's Fortress| TaskImage=[[File:Tok9809.png|25px|task]]}}{{Quests/Task| TaskText=2. Talk To Servitor Of Akhlut| TaskImage=[[File:Npc30074.png|25px|task]]}} |
||
| + | | Locations={{Quests/Location| Location=Deep Ocean}} |
||
| + | | Coins= 691,000[[File:Mat001.png|20px]] |
||
| + | | ExperiencePoints= 2,117,000[[File:Sys001.png|20px]] |
||
| + | | Rewards= |
||
| + | | Available=Against His Will |
||
| + | | Arrow=[[File:ArrowYd.png|25px|Unlocks next mine|link=]] |
||
| + | }} |
||
| + | |||
| + | {{Quests/Quest |
||
| + | | QuestImage=[[File:Qst2557.png|110px|center|Quest Image]] |
||
| + | | QuestName='''Crystal Clear''' |
||
| + | | QuestGiverImage= |
||
| + | | QuestGiverText= |
||
| + | | Tasks={{Quests/Task| TaskText=1. Clean The Ocean Floor| TaskImage=[[File:Tok9864.png|25px|task]]}}{{Quests/Task| TaskText=2. Talk To Akhlut| TaskImage=[[File:Npc29930.png|25px|task]]}} |
||
| + | | Locations={{Quests/Location| Location=Murky Waters}} |
||
| + | | Coins= 692,000[[File:Mat001.png|20px]] |
||
| + | | ExperiencePoints= 2,124,000[[File:Sys001.png|20px]] |
||
| + | | Rewards= |
||
| + | | Available=Ocean Hide-and-seek |
||
| + | | Arrow=[[File:ArrowYd.png|25px|Unlocks next mine|link=]] |
||
| + | }} |
||
| + | |||
| + | {{Quests/Quest |
||
| + | | QuestImage=[[File:Qst2558.png|110px|center|Quest Image]] |
||
| + | | QuestName='''Sea World From Hell''' |
||
| + | | QuestGiverImage= |
||
| + | | QuestGiverText= |
||
| + | | Tasks={{Quests/Task| TaskText=1. Get Inside The Sea World| TaskImage=[[File:Tok9865.png|25px|task]]}}{{Quests/Task| TaskText=2. Rescue The Animals| TaskImage=[[File:Tok9866.png|25px|task]]}}{{Quests/Task| TaskText=3. Help The Whale| TaskImage=[[File:Tok9867.png|25px|task]]}}{{Quests/Task| TaskText=4. Talk To Akhlut| TaskImage=[[File:Npc29930.png|25px|task]]}} |
||
| + | | Locations={{Quests/Location| Location=Ocean Prison}} |
||
| + | | Coins= 693,000[[File:Mat001.png|20px]] |
||
| + | | ExperiencePoints= 2,131,000[[File:Sys001.png|20px]] |
||
| + | | Rewards= |
||
| + | | Available=Crystal Clear |
||
| + | | Arrow=[[File:ArrowYd.png|25px|Unlocks next mine|link=]] |
||
| + | }} |
||
| + | |||
| + | {{Quests/Quest |
||
| + | | QuestImage=[[File:Qst2559.png|110px|center|Quest Image]] |
||
| + | | QuestName='''Akhlut's Army''' |
||
| + | | QuestGiverImage= |
||
| + | | QuestGiverText= |
||
| + | | Tasks={{Quests/Task| TaskText=1. Train Akhlut's Army| TaskImage=[[File:Tok9868.png|25px|task]]}}{{Quests/Task| TaskText=2. Talk To Akhlut| TaskImage=[[File:Npc30294.png|25px|task]]}} |
||
| + | | Locations={{Quests/Location| Location=Underwater Training Grounds}} |
||
| + | | Coins= 694,000[[File:Mat001.png|20px]] |
||
| + | | ExperiencePoints= 2,138,000[[File:Sys001.png|20px]] |
||
| + | | Rewards= |
||
| + | | Available=Sea World From Hell |
||
| + | | Arrow=[[File:ArrowYd.png|25px|Unlocks next mine|link=]] |
||
| + | }} |
||
| + | |||
| + | {{Quests/Quest |
||
| + | | QuestImage=[[File:Qst2560.png|110px|center|Quest Image]] |
||
| + | | QuestName='''Ocean Strikes Back''' |
||
| + | | QuestGiverImage= |
||
| + | | QuestGiverText= |
||
| + | | Tasks={{Quests/Task| TaskText=1. Overcome The Security Measures (4)| TaskImage=[[File:Tok9869.png|25px|task]]}}{{Quests/Task| TaskText=2. Get Inside The Fortress| TaskImage=[[File:Tok9870.png|25px|task]]}}{{Quests/Task| TaskText=3. Talk To Nanook| TaskImage=[[File:Npc30295.png|25px|task]]}}{{Quests/Task| TaskText=4. Defeat The General| TaskImage=[[File:Tok9871.png|25px|task]]}}{{Quests/Task| TaskText=5. Talk To Akhlut| TaskImage=[[File:Npc30296.png|25px|task]]}} |
||
| + | | Locations={{Quests/Location| Location=Ocean Fortress}} |
||
| + | | Coins= 695,000[[File:Mat001.png|20px]] |
||
| + | | ExperiencePoints= 2,145,000[[File:Sys001.png|20px]] |
||
| + | | Rewards= |
||
| + | | Available=Akhlut's Army |
||
| + | | Arrow=[[File:ArrowYd.png|25px|Unlocks next mine|link=]] |
||
| + | }} |
||
| + | |||
| + | {{Quests/Quest |
||
| + | | QuestImage=[[File:Qst2561.png|110px|center|Quest Image]] |
||
| + | | QuestName='''The Legend Of Akhlut''' |
||
| + | | QuestGiverImage= |
||
| + | | QuestGiverText= |
||
| + | | Tasks={{Quests/Task| TaskText=1. Talk To Uvavnuk| TaskImage=[[File:Npc30394.png|25px|task]]}}{{Quests/Task| TaskText=2. Find Actors| TaskImage=[[File:Tok9889.png|25px|task]]}}{{Quests/Task| TaskText=3. Find Costumes| TaskImage=[[File:Tok9890.png|25px|task]]}}{{Quests/Task| TaskText=4. Build The Set| TaskImage=[[File:Tok9891.png|25px|task]]}}{{Quests/Task| TaskText=5. Take Part In The Theatre Play| TaskImage=[[File:Tok9892.png|25px|task]]}}{{Quests/Task| TaskText=6. Talk To Uvavnuk| TaskImage=[[File:Npc30395.png|25px|task]]}}{{Quests/Task| TaskText=7. Get The Pieces Of The Plate (3)| TaskImage=[[File:Tok9893.png|25px|task]]}}{{Quests/Task| TaskText=8. Talk To Akhlut| TaskImage=[[File:Npc29930.png|25px|task]]}} |
||
| + | | Locations={{Quests/Location| Location=Theatre On Ice}} |
||
| + | | Coins= 696,000[[File:Mat001.png|20px]] |
||
| + | | ExperiencePoints= 2,152,000[[File:Sys001.png|20px]] |
||
| + | | Rewards= |
||
| + | | Available=Ocean Strikes Back |
||
| + | | Arrow=[[File:ArrowYd.png|25px|Unlocks next mine|link=]] |
||
| + | }} |
||
| + | |||
| + | {{Quests/Quest |
||
| + | | QuestImage=[[File:Qst2562.png|110px|center|Quest Image]] |
||
| + | | QuestName='''The Sixth Divine Sphere''' |
||
| + | | QuestGiverImage= |
||
| + | | QuestGiverText= |
||
| + | | Tasks={{Quests/Task| TaskText=1. Get To The Race Registration| TaskImage=[[File:Tok9894.png|25px|task]]}}{{Quests/Task| TaskText=2. Talk To Inuit Racer| TaskImage=[[File:Npc30396.png|25px|task]]}}{{Quests/Task| TaskText=3. Win The Race| TaskImage=[[File:Tok9895.png|25px|task]]}}{{Quests/Task| TaskText=4. Talk To Inuit Racer| TaskImage=[[File:Npc30397.png|25px|task]]}}{{Quests/Task| TaskText=5. Take The Sphere| TaskImage=[[File:Tok9896.png|25px|task]]}}{{Quests/Task| TaskText=6. Talk To Akhlut| TaskImage=[[File:Npc29930.png|25px|task]]}} |
||
| + | | Locations={{Quests/Location| Location=Orca Racing Track}} |
||
| + | | Coins= 697,000[[File:Mat001.png|20px]] |
||
| + | | ExperiencePoints= 2,159,000[[File:Sys001.png|20px]] |
||
| + | | Rewards= |
||
| + | | Available=The Legend Of Akhlut |
||
| + | | Arrow=[[File:ArrowYd.png|25px|Unlocks next mine|link=]] |
||
| + | }} |
||
| + | |||
| + | {{Quests/Quest |
||
| + | | QuestImage=[[File:Qst2563.png|110px|center|Quest Image]] |
||
| + | | QuestName='''General's Research''' |
||
| + | | QuestGiverImage= |
||
| + | | QuestGiverText= |
||
| + | | Tasks={{Quests/Task| TaskText=1. Find The Clues (5)| TaskImage=[[File:Tok9897.png|25px|task]]}}{{Quests/Task| TaskText=2. Talk To Akhlut| TaskImage=[[File:Npc29930.png|25px|task]]}} |
||
| + | | Locations={{Quests/Location| Location=Confiscated Submarine}} |
||
| + | | Coins= 698,000[[File:Mat001.png|20px]] |
||
| + | | ExperiencePoints= 2,166,000[[File:Sys001.png|20px]] |
||
| + | | Rewards= 1[[File:Dec1383.png|40px]] |
||
| + | | Available=The Sixth Divine Sphere |
||
| + | | Arrow=[[File:ArrowYr.png|25px|class=shiny grow|Unlocks a Main Quest-line (Anansi: Warrior's Song - Savannah Town)|link=Terra_(Quests)#Anansi]][[File:ArrowOr.png|25px|class=shiny grow|Unlocks a Father Quest (Father: Secrets In Ice- Arctic Wilderness)|link=Terra_(Quests)#stage_3]] [[File:ArrowBr.png|25px|class=shiny grow|Unlocks a sidequest line (Ahklut)|link=Terra_(Quests)#Sidequests:Ahklut]] |
||
| + | }} |
||
| + | }} |
||
| + | ===Sidequests:Ahklut=== |
||
| + | ===Challenges 2/3=== |
||
| + | {{Side-Quests |
||
| + | | QuestsImage= |
||
| + | | QuestList= |
||
| + | |||
| + | {{Quests/Quest |
||
| + | | QuestImage=[[File: Qst2777.png|110px|center|Quest Image]] |
||
| + | | QuestName='''Divine Guardian Challenges 2''' |
||
| + | | QuestGiverImage= |
||
| + | | QuestGiverText= |
||
| + | | Tasks={{Quests/Task| TaskText=1. Complete Pele's Challenge| TaskImage=[[File: Tok10789.png|35px]]}}{{Quests/Task| TaskText=2. Complete Nanook's Challenge| TaskImage=[[File: Tok10790.png|35px]]}}{{Quests/Task| TaskText=3. Complete Akhlut's Challenge| TaskImage=[[File: Tok10791.png|35px]]}} |
||
| + | | Locations={{Quests/Location| Location=Pele's Challenge<br>Nanook's Challenge<br>Akhlut's Challenge}} |
||
| + | | Coins= 1,500,000[[File:Mat001.png|20px]] |
||
| + | | ExperiencePoints= 6,500,000[[File:Sys001.png|20px]] |
||
| + | | Rewards= 1[[File: Mat401.png|35px]]<br> |
||
| + | | Available=[[Terra_(Quests)#Challenges_1/3|Divine Guardian Challenges 1]] &<br> [[File:QuestIn.png|22px|Available after |link=]] [[Terra_(Quests)#Kane|General's Research]]<br>location: Confiscated Submarine (last Akhlut) |
||
| + | |Arrow=[[File:ArrowRu.png|25px|End of questline|link=]] |
||
| + | }} |
||
| + | }} |
||
| + | {| width="100%" |
||
| + | | style="text-align:right" |[[File:NAVtop.png|50px|link=|class=shiny grow|link=#top|Return to Top page]] |
||
| + | |} |
||
| + | |||
| + | =='''Anansi'''== |
||
| + | {{Quests-yellow |
||
| + | | QuestsImage= |
||
| + | | QuestList= |
||
| + | |||
| + | {{Quests/Quest |
||
| + | | QuestImage=[[File:Qst2567.png|110px|center|Quest Image]] |
||
| + | | QuestName='''Warrior's Song''' |
||
| + | | QuestGiverImage= |
||
| + | | QuestGiverText= |
||
| + | | Tasks={{Quests/Task| TaskText=1. Get To The Town| TaskImage=[[File:Tok9898.png|25px|task]]}}{{Quests/Task| TaskText=2. Find Sundiata| TaskImage=[[File:Tok9899.png|25px|task]]}}{{Quests/Task| TaskText=3. Talk To Sundiata| TaskImage=[[File:Npc30425.png|25px|task]]}}{{Quests/Task| TaskText=4. Get The Musicians (3)| TaskImage=[[File:Tok9900.png|25px|task]]}}{{Quests/Task| TaskText=5. Get Musical Instruments (3)| TaskImage=[[File:Tok9901.png|25px|task]]}}{{Quests/Task| TaskText=6. Talk To Sundiata| TaskImage=[[File:Npc30426.png|25px|task]]}}{{Quests/Task| TaskText=7. Play A Gig With The Band| TaskImage=[[File:Tok9902.png|25px|task]]}}{{Quests/Task| TaskText=8. Talk To Sundiata| TaskImage=[[File:Npc30427.png|25px|task]]}} |
||
| + | | Locations={{Quests/Location| Location=Savannah Town}} |
||
| + | | Coins= 699,000[[File:Mat001.png|20px]] |
||
| + | | ExperiencePoints= 2,173,000[[File:Sys001.png|20px]] |
||
| + | | Rewards= |
||
| + | | Available=[[File:QuestIn.png|22px|Available after |link=]] [[Terra_(Quests)#Ahklut|General's Research]]<br>location: Confiscated Sbmarine (last Ahklut) |
||
| + | | Arrow=[[File:ArrowYd.png|25px|Unlocks next mine|link=]] |
||
| + | }} |
||
| + | |||
| + | {{Quests/Quest |
||
| + | | QuestImage=[[File:Qst2568.png|110px|center|Quest Image]] |
||
| + | | QuestName='''Itsy-bitsy Spider''' |
||
| + | | QuestGiverImage= |
||
| + | | QuestGiverText= |
||
| + | | Tasks={{Quests/Task| TaskText=1. Find The Servitor| TaskImage=[[File:Tok9903.png|25px|task]]}}{{Quests/Task| TaskText=2. Free The Servitor| TaskImage=[[File:Tok9904.png|25px|task]]}}{{Quests/Task| TaskText=3. Talk To Servitor Of Anansi| TaskImage=[[File:Npc30428.png|25px|task]]}} |
||
| + | | Locations={{Quests/Location| Location=Temple Of Anansi}} |
||
| + | | Coins= 700,000[[File:Mat001.png|20px]] |
||
| + | | ExperiencePoints= 2,180,000[[File:Sys001.png|20px]] |
||
| + | | Rewards= |
||
| + | | Available=Warrior's Song |
||
| + | | Arrow=[[File:ArrowYd.png|25px|Unlocks next mine|link=]] |
||
| + | }} |
||
| + | |||
| + | {{Quests/Quest |
||
| + | | QuestImage=[[File:Qst2569.png|110px|center|Quest Image]] |
||
| + | | QuestName='''Savannah Poetry''' |
||
| + | | QuestGiverImage= |
||
| + | | QuestGiverText= |
||
| + | | Tasks={{Quests/Task| TaskText=1. Join The Competition| TaskImage=[[File:Tok9905.png|25px|task]]}}{{Quests/Task| TaskText=2. Win The Competition| TaskImage=[[File:Tok9906.png|25px|task]]}}{{Quests/Task| TaskText=3. Talk To Servitor Of Anansi| TaskImage=[[File:Npc30430.png|25px|task]]}} |
||
| + | | Locations={{Quests/Location| Location=Den Of Poets}} |
||
| + | | Coins= 701,000[[File:Mat001.png|20px]] |
||
| + | | ExperiencePoints= 2,187,000[[File:Sys001.png|20px]] |
||
| + | | Rewards= |
||
| + | | Available=Itsy-bitsy Spider |
||
| + | | Arrow=[[File:ArrowYd.png|25px|Unlocks next mine|link=]] |
||
| + | }} |
||
| + | |||
| + | {{Quests/Quest |
||
| + | | QuestImage=[[File:Qst2579.png|110px|center|Quest Image]] |
||
| + | | QuestName='''Quenching The Thirst''' |
||
| + | | QuestGiverImage= |
||
| + | | QuestGiverText= |
||
| + | | Tasks={{Quests/Task| TaskText=1. Check Out The Waterhole| TaskImage=[[File:Tok9959.png|25px|task]]}}{{Quests/Task| TaskText=2. Flood The Valley (3)| TaskImage=[[File:Tok9960.png|25px|task]]}}{{Quests/Task| TaskText=3. Talk To Servitor Of Anansi| TaskImage=[[File:Npc30735.png|25px|task]]}} |
||
| + | | Locations={{Quests/Location| Location=Dry Waterhole}} |
||
| + | | Coins= 702,000[[File:Mat001.png|20px]] |
||
| + | | ExperiencePoints= 2,194,000[[File:Sys001.png|20px]] |
||
| + | | Rewards= |
||
| + | | Available=Savannah Poetry |
||
| + | | Arrow=[[File:ArrowYd.png|25px|Unlocks next mine|link=]] |
||
| + | }} |
||
| + | |||
| + | {{Quests/Quest |
||
| + | | QuestImage=[[File:Qst2580.png|110px|center|Quest Image]] |
||
| + | | QuestName='''Long Live The Queen''' |
||
| + | | QuestGiverImage= |
||
| + | | QuestGiverText= |
||
| + | | Tasks={{Quests/Task| TaskText=1. Get Into The Anthill| TaskImage=[[File:Tok9961.png|25px|task]]}}{{Quests/Task| TaskText=2. Help The Ants (4)| TaskImage=[[File:Tok9962.png|25px|task]]}}{{Quests/Task| TaskText=3. Free The Queen| TaskImage=[[File:Tok9963.png|25px|task]]}}{{Quests/Task| TaskText=4. Talk To Ant Queen| TaskImage=[[File:Npc30736.png|25px|task]]}} |
||
| + | | Locations={{Quests/Location| Location=Huge Anthill}} |
||
| + | | Coins= 703,000[[File:Mat001.png|20px]] |
||
| + | | ExperiencePoints= 2,201,000[[File:Sys001.png|20px]] |
||
| + | | Rewards= |
||
| + | | Available=Quenching The Thirst |
||
| + | | Arrow=[[File:ArrowYd.png|25px|Unlocks next mine|link=]] |
||
| + | }} |
||
| + | |||
| + | {{Quests/Quest |
||
| + | | QuestImage=[[File:Qst2581.png|110px|center|Quest Image]] |
||
| + | | QuestName='''Spider's Truth''' |
||
| + | | QuestGiverImage= |
||
| + | | QuestGiverText= |
||
| + | | Tasks={{Quests/Task| TaskText=1. Find Anansi| TaskImage=[[File:Tok9964.png|25px|task]]}}{{Quests/Task| TaskText=2. Talk To Anansi| TaskImage=[[File:Npc30739.png|25px|task]]}}{{Quests/Task| TaskText=3. Escape The General| TaskImage=[[File:Tok9965.png|25px|task]]}}{{Quests/Task| TaskText=4. Talk To Anansi| TaskImage=[[File:Npc30739.png|25px|task]]}} |
||
| + | | Locations={{Quests/Location| Location=Anthill Depths}} |
||
| + | | Coins= 704,000[[File:Mat001.png|20px]] |
||
| + | | ExperiencePoints= 2,208,000[[File:Sys001.png|20px]] |
||
| + | | Rewards= |
||
| + | | Available=Long Live The Queen |
||
| + | | Arrow=[[File:ArrowYd.png|25px|Unlocks next mine|link=]] |
||
| + | }} |
||
| + | |||
| + | {{Quests/Quest |
||
| + | | QuestImage=[[File:Qst2582.png|110px|center|Quest Image]] |
||
| + | | QuestName='''Reading Is Fundamental!''' |
||
| + | | QuestGiverImage= |
||
| + | | QuestGiverText= |
||
| + | | Tasks={{Quests/Task| TaskText=1. Get The Book| TaskImage=[[File:Tok9966.png|25px|task]]}}{{Quests/Task| TaskText=2. Talk To Anansi| TaskImage=[[File:Npc30739.png|25px|task]]}} |
||
| + | | Locations={{Quests/Location| Location=Anansi's Library}} |
||
| + | | Coins= 705,000[[File:Mat001.png|20px]] |
||
| + | | ExperiencePoints= 2,215,000[[File:Sys001.png|20px]] |
||
| + | | Rewards= |
||
| + | | Available=Spider's Truth |
||
| + | | Arrow=[[File:ArrowYd.png|25px|Unlocks next mine|link=]] |
||
| + | }} |
||
| + | |||
| + | {{Quests/Quest |
||
| + | | QuestImage=[[File:Qst2589.png|110px|center|Quest Image]] |
||
| + | | QuestName='''Diggy The Fixer''' |
||
| + | | QuestGiverImage= |
||
| + | | QuestGiverText= |
||
| + | | Tasks={{Quests/Task| TaskText=1. Talk To Ifeoma| TaskImage=[[File:Npc30962.png|25px|task]]}}{{Quests/Task| TaskText=2. Get A Flying Elephant| TaskImage=[[File:Tok10012.png|25px|task]]}}{{Quests/Task| TaskText=3. Talk To Ifeoma| TaskImage=[[File:Npc30963.png|25px|task]]}}{{Quests/Task| TaskText=4. Get The Pieces Of The Plate (3)| TaskImage=[[File:Tok10013.png|25px|task]]}}{{Quests/Task| TaskText=5. Talk To Anansi| TaskImage=[[File:Npc30964.png|25px|task]]}} |
||
| + | | Locations={{Quests/Location| Location=Merchant Town}} |
||
| + | | Coins= 706,000[[File:Mat001.png|20px]] |
||
| + | | ExperiencePoints= 2,222,000[[File:Sys001.png|20px]] |
||
| + | | Rewards= |
||
| + | | Available=Reading Is Fundamental! |
||
| + | | Arrow=[[File:ArrowYd.png|25px|Unlocks next mine|link=]] |
||
| + | }} |
||
| + | |||
| + | {{Quests/Quest |
||
| + | | QuestImage=[[File:Qst2590.png|110px|center|Quest Image]] |
||
| + | | QuestName='''Spider's Legs''' |
||
| + | | QuestGiverImage= |
||
| + | | QuestGiverText= |
||
| + | | Tasks={{Quests/Task| TaskText=1. Help Anansi With The Ritual| TaskImage=[[File:Tok10014.png|25px|task]]}}{{Quests/Task| TaskText=2. Talk To Anansi| TaskImage=[[File:Npc30739.png|25px|task]]}}{{Quests/Task| TaskText=3. Get Anansi's Leg| TaskImage=[[File:Tok10015.png|25px|task]]}}{{Quests/Task| TaskText=4. Talk To Anansi| TaskImage=[[File:Npc30739.png|25px|task]]}} |
||
| + | | Locations={{Quests/Location| Location=Savannah Sacred Ground}} |
||
| + | | Coins= 707,000[[File:Mat001.png|20px]] |
||
| + | | ExperiencePoints= 2,229,000[[File:Sys001.png|20px]] |
||
| + | | Rewards= |
||
| + | | Available=Diggy The Fixer |
||
| + | | Arrow=[[File:ArrowYd.png|25px|Unlocks next mine|link=]] |
||
| + | }} |
||
| + | |||
| + | {{Quests/Quest |
||
| + | | QuestImage=[[File:Qst2591.png|110px|center|Quest Image]] |
||
| + | | QuestName='''Finding The Healer''' |
||
| + | | QuestGiverImage= |
||
| + | | QuestGiverText= |
||
| + | | Tasks={{Quests/Task| TaskText=1. Take The Musical Instrument| TaskImage=[[File:Tok10016.png|25px|task]]}}{{Quests/Task| TaskText=2. Find Aja| TaskImage=[[File:Tok10017.png|25px|task]]}}{{Quests/Task| TaskText=3. Talk To Aja| TaskImage=[[File:Npc30973.png|25px|task]]}} |
||
| + | | Locations={{Quests/Location| Location=Aja's Jungle}} |
||
| + | | Coins= 708,000[[File:Mat001.png|20px]] |
||
| + | | ExperiencePoints= 2,236,000[[File:Sys001.png|20px]] |
||
| + | | Rewards= 1[[File:Dec1398.png|40px]] |
||
| + | | Available=Spider's Legs |
||
| + | | Arrow=[[File:ArrowYr.png|25px|class=shiny grow|Unlocks a Main Quest-line (Aja: Poisoned Jungle - Shrines Of Aja)|link=Terra_(Quests)#Aja]][[File:ArrowBr.png|25px|class=shiny grow|Unlocks a sidequest line (Anansi|link=Terra_(Quests)#Sidequests:Anansi]] |
||
| + | }} |
||
| + | }} |
||
| + | |||
| + | {| width="100%" |
||
| + | | style="text-align:right" |[[File:NAVtop.png|50px|link=|class=shiny grow|link=#top|Return to Top page]] |
||
| + | |} |
||
| + | |||
| + | ==Sidequests:Anansi== |
||
| + | {{Side-Quests |
||
| + | | QuestsImage= |
||
| + | | QuestList= |
||
| + | |||
| + | {{Quests/Quest |
||
| + | | QuestImage=[[File: Qst2739.png|110px|center|Quest Image]] |
||
| + | | QuestName='''Black Spider''' |
||
| + | | QuestGiverImage= |
||
| + | | QuestGiverText= |
||
| + | | Tasks={{Quests/Task|TaskText=1. Talk To Black Spider|TaskImage=[[File:Npc34006.png|25px]]}}{{Quests/Task|TaskText=2. Talk To Black Spider|TaskImage=[[File:Npc34007.png|25px]]}}{{Quests/Task|TaskText=3. Find Kawanda| TaskImage=[[File:Tok10698.png|25px]]}}{{Quests/Task|TaskText=4. Talk To Black Spider |TaskImage=[[File:Npc34008.png|25px]]}} |
||
| + | | Locations={{Quests/Location| Location=Kawanda Jungle}} |
||
| + | | Coins= 708,000[[File:Mat001.png|20px]] |
||
| + | | ExperiencePoints= 2,236,000[[File:Sys001.png|20px]] |
||
| + | | Rewards= |
||
| + | | Available=[[File:QuestIn.png|22px|Available after |link=]] [[Terra_(Quests)#Anansi|Finding The Healer]]<br>location: Aja's Jungle (last Anansi) |
||
| + | | Arrow=[[File:ArrowBd.png|25px|Unlock next Side Ques mine|link=]] |
||
| + | }} |
||
| + | |||
| + | {{Quests/Quest |
||
| + | | QuestImage=[[File: Qst2740.png|110px|center|Quest Image]] |
||
| + | | QuestName='''Shaman's Task''' |
||
| + | | QuestGiverImage= |
||
| + | | QuestGiverText= |
||
| + | | Tasks={{Quests/Task| TaskText=1. Find The Shaman| TaskImage=[[File: Tok10707.png|25px]]}}{{Quests/Task| TaskText=2. Talk To Uncle Diggster| TaskImage=[[File: Npc34093.png|25px]]}}{{Quests/Task| TaskText=3. Complete Shaman's Task| TaskImage=[[File: Tok10708.png|25px]]}}{{Quests/Task| TaskText=4. Talk To Uncle Diggster| TaskImage=[[File: Npc34094.png|25px]]}} |
||
| + | | Locations={{Quests/Location| Location=City Of Kawanda}} |
||
| + | | Coins= 711,000[[File:Mat001.png|20px]] |
||
| + | | ExperiencePoints= 2,244,000[[File:Sys001.png|20px]] |
||
| + | | Rewards= |
||
| + | | Available=Black Spider |
||
| + | | Arrow=[[File:ArrowBd.png|25px|Unlock next Side Ques mine|link=]] |
||
| + | }} |
||
| + | |||
| + | {{Quests/Quest |
||
| + | | QuestImage=[[File: Qst2741.png|110px|center|Quest Image]] |
||
| + | | QuestName='''King Of Kawanda''' |
||
| + | | QuestGiverImage= |
||
| + | | QuestGiverText= |
||
| + | | Tasks={{Quests/Task| TaskText=1. Find The Crown|TaskImage=[[File:Tok10709.png|25px]]}}{{Quests/Task|TaskText=2. Talk To Black Spider|TaskImage=[[File:Npc34095.png|25px]]}}{{Quests/Task|TaskText=3. Help With The Coronation|TaskImage=[[File:Tok10710.png|25px]]}}{{Quests/Task|TaskText=4. Talk To Black Spider|TaskImage=[[File:Npc34096.png|25px]]}} |
||
| + | | Locations={{Quests/Location|Location=Coronation Room}} |
||
| + | | Coins= 714,000[[File:Mat001.png|20px]] |
||
| + | | ExperiencePoints= 2,252,000[[File:Sys001.png|20px]] |
||
| + | | Rewards= |
||
| + | | Available=Shaman's Task |
||
| + | | Arrow=[[File:ArrowRu.png|25px|End of questline|link=]] |
||
| + | }} |
||
| + | }} |
||
| + | {| width="100%" |
||
| + | | style="text-align:right" |[[File:NAVtop.png|50px|link=|class=shiny grow|link=#top|Return to Top page]] |
||
| + | |} |
||
| + | |||
| + | =='''Aja'''== |
||
| + | {{Quests-yellow |
||
| + | | QuestsImage= |
||
| + | | QuestList= |
||
| + | |||
| + | {{Quests/Quest |
||
| + | | QuestImage=[[File:Qst2616.png|110px|center|Quest Image]] |
||
| + | | QuestName='''Poisoned Jungle''' |
||
| + | | QuestGiverImage= |
||
| + | | QuestGiverText= |
||
| + | | Tasks={{Quests/Task| TaskText=1. Cleanse The Places Of Healing (2)| TaskImage=[[File:Tok10162.png|25px|task]]}}{{Quests/Task| TaskText=2. Talk To Aja| TaskImage=[[File:Npc31627.png|25px|task]]}} |
||
| + | | Locations={{Quests/Location| Location=Shrines Of Aja}} |
||
| + | | Coins= 709,000[[File:Mat001.png|20px]] |
||
| + | | ExperiencePoints= 2,243,000[[File:Sys001.png|20px]] |
||
| + | | Rewards= |
||
| + | | Available=[[File:QuestIn.png|22px|Available after |link=]] [[Terra_(Quests)#Anansi|Finding The Healer]]<br>location: Aja's Jungle (last Anansi) |
||
| + | | Arrow=[[File:ArrowYd.png|25px|Unlocks next mine|link=]] |
||
| + | }} |
||
| + | |||
| + | {{Quests/Quest |
||
| + | | QuestImage=[[File:Qst2617.png|110px|center|Quest Image]] |
||
| + | | QuestName='''Raised By Monkeys''' |
||
| + | | QuestGiverImage= |
||
| + | | QuestGiverText= |
||
| + | | Tasks={{Quests/Task| TaskText=1. Find The Servitor| TaskImage=[[File:Tok10163.png|25px|task]]}}{{Quests/Task| TaskText=2. Help The Servitor| TaskImage=[[File:Tok10164.png|25px|task]]}}{{Quests/Task| TaskText=3. Talk To Servitor Of Aja| TaskImage=[[File:Npc31628.png|25px|task]]}}{{Quests/Task| TaskText=4. Talk To Aja| TaskImage=[[File:Npc31629.png|25px|task]]}} |
||
| + | | Locations={{Quests/Location| Location=Arzan's School<br>Of Advanced Learning}} |
||
| + | | Coins= 710,000[[File:Mat001.png|20px]] |
||
| + | | ExperiencePoints= 2,250,000[[File:Sys001.png|20px]] |
||
| + | | Rewards= |
||
| + | | Available=Poisoned Jungle |
||
| + | | Arrow=[[File:ArrowYd.png|25px|Unlocks next mine|link=]] |
||
| + | }} |
||
| + | |||
| + | {{Quests/Quest |
||
| + | | QuestImage=[[File:Qst2618.png|110px|center|Quest Image]] |
||
| + | | QuestName='''Place Of Healing''' |
||
| + | | QuestGiverImage= |
||
| + | | QuestGiverText= |
||
| + | | Tasks={{Quests/Task| TaskText=1. Talk To Servitor Of Aja| TaskImage=[[File:Npc31630.png|25px|task]]}}{{Quests/Task| TaskText=2. Get Equipment For The Clinic (3)| TaskImage=[[File:Tok10165.png|25px|task]]}}{{Quests/Task| TaskText=3. Talk To Aja| TaskImage=[[File:Npc31631.png|25px|task]]}} |
||
| + | | Locations={{Quests/Location| Location=Aja's Clinic}} |
||
| + | | Coins= 711,000[[File:Mat001.png|20px]] |
||
| + | | ExperiencePoints= 2,257,000[[File:Sys001.png|20px]] |
||
| + | | Rewards= |
||
| + | | Available=Raised By Monkeys |
||
| + | | Arrow=[[File:ArrowYd.png|25px|Unlocks next mine|link=]] |
||
| + | }} |
||
| + | |||
| + | {{Quests/Quest |
||
| + | | QuestImage=[[File:Qst2628.png|110px|center|Quest Image]] |
||
| + | | QuestName='''On The Way To Other Side''' |
||
| + | | QuestGiverImage= |
||
| + | | QuestGiverText= |
||
| + | | Tasks={{Quests/Task| TaskText=1. Find Sundiata| TaskImage=[[File:Tok10178.png|25px|task]]}}{{Quests/Task| TaskText=2. Talk To Sundiata| TaskImage=[[File:Npc31763.png|25px|task]]}}{{Quests/Task| TaskText=3. Solve Sundiata's Riddle| TaskImage=[[File:Tok10179.png|25px|task]]}}{{Quests/Task| TaskText=4. Talk To Sundiata| TaskImage=[[File:Npc31764.png|25px|task]]}} |
||
| + | | Locations={{Quests/Location| Location=The World Of Clouds}} |
||
| + | | Coins= 712,000[[File:Mat001.png|20px]] |
||
| + | | ExperiencePoints= 2,264,000[[File:Sys001.png|20px]] |
||
| + | | Rewards= |
||
| + | | Available=Place Of Healing |
||
| + | | Arrow=[[File:ArrowYd.png|25px|Unlocks next mine|link=]] |
||
| + | }} |
||
| + | |||
| + | {{Quests/Quest |
||
| + | | QuestImage=[[File:Qst2629.png|110px|center|Quest Image]] |
||
| + | | QuestName='''Sundiata's Nemesis''' |
||
| + | | QuestGiverImage= |
||
| + | | QuestGiverText= |
||
| + | | Tasks={{Quests/Task| TaskText=1. Get To The Village| TaskImage=[[File:Tok10180.png|25px|task]]}}{{Quests/Task| TaskText=2. Prepare Sundiata For The Duel| TaskImage=[[File:Tok10181.png|25px|task]]}}{{Quests/Task| TaskText=3. Help Sundiata Defeat The Opponent| TaskImage=[[File:Tok10182.png|25px|task]]}}{{Quests/Task| TaskText=4. Talk To Sundiata| TaskImage=[[File:Npc31765.png|25px|task]]}}{{Quests/Task| TaskText=5. Talk To Aja| TaskImage=[[File:Npc31629.png|25px|task]]}} |
||
| + | | Locations={{Quests/Location| Location=Sundiata's Village}} |
||
| + | | Coins= 713,000[[File:Mat001.png|20px]] |
||
| + | | ExperiencePoints= 2,271,000[[File:Sys001.png|20px]] |
||
| + | | Rewards= |
||
| + | | Available=On The Way To Other Side |
||
| + | | Arrow=[[File:ArrowYd.png|25px|Unlocks next mine|link=]] |
||
| + | }} |
||
| + | |||
| + | {{Quests/Quest |
||
| + | | QuestImage=[[File:Qst2630.png|110px|center|Quest Image]] |
||
| + | | QuestName='''Dangerous Journey''' |
||
| + | | QuestGiverImage= |
||
| + | | QuestGiverText= |
||
| + | | Tasks={{Quests/Task| TaskText=1. Defend Anansi (11)| TaskImage=[[File:Tok10183.png|25px|task]]}}{{Quests/Task| TaskText=2. Get To The Cradle Of Humankind| TaskImage=[[File:Tok10184.png|25px|task]]}}{{Quests/Task| TaskText=3. Talk To Aja| TaskImage=[[File:Npc31766.png|25px|task]]}} |
||
| + | | Locations={{Quests/Location| Location=Across Africa}} |
||
| + | | Coins= 714,000[[File:Mat001.png|20px]] |
||
| + | | ExperiencePoints= 2,278,000[[File:Sys001.png|20px]] |
||
| + | | Rewards= |
||
| + | | Available=Sundiata's Nemesis |
||
| + | | Arrow=[[File:ArrowYd.png|25px|Unlocks next mine|link=]] |
||
| + | }} |
||
| + | |||
| + | {{Quests/Quest |
||
| + | | QuestImage=[[File:Qst2631.png|110px|center|Quest Image]] |
||
| + | | QuestName='''Garden Of Eden''' |
||
| + | | QuestGiverImage= |
||
| + | | QuestGiverText= |
||
| + | | Tasks={{Quests/Task| TaskText=1. Find The Sacred Flower| TaskImage=[[File:Tok10185.png|25px|task]]}}{{Quests/Task| TaskText=2. Get The Sacred Flower| TaskImage=[[File:Tok10186.png|25px|task]]}}{{Quests/Task| TaskText=3. Help Aja With The Ritual| TaskImage=[[File:Tok10187.png|25px|task]]}}{{Quests/Task| TaskText=4. Talk To Aja| TaskImage=[[File:Npc31767.png|25px|task]]}} |
||
| + | | Locations={{Quests/Location| Location=Cradle Of Humankind}} |
||
| + | | Coins= 715 000[[File:Mat001.png|20px]] |
||
| + | | ExperiencePoints= 2,285,000[[File:Sys001.png|20px]] |
||
| + | | Rewards= |
||
| + | | Available=Dangerous Journey |
||
| + | | Arrow=[[File:ArrowYd.png|25px|Unlocks next mine|link=]] |
||
| + | }} |
||
| + | |||
| + | {{Quests/Quest |
||
| + | | QuestImage=[[File:Qst2637.png|110px|center|Quest Image]] |
||
| + | | QuestName='''Pest Control''' |
||
| + | | QuestGiverImage= |
||
| + | | QuestGiverText= |
||
| + | | Tasks={{Quests/Task| TaskText=1. Deal With The Fly Problem (9)| TaskImage=[[File:Tok10215.png|25px|task]]}}{{Quests/Task| TaskText=2. Get The Pieces Of The Plate (3)| TaskImage=[[File:Tok10216.png|25px|task]]}}{{Quests/Task| TaskText=3. Talk To Aja| TaskImage=[[File:Npc31629.png|25px|task]]}} |
||
| + | | Locations={{Quests/Location| Location=Floating Village}} |
||
| + | | Coins= 716 000[[File:Mat001.png|20px]] |
||
| + | | ExperiencePoints= 2,292,000[[File:Sys001.png|20px]] |
||
| + | | Rewards= |
||
| + | | Available=Garden Of Eden |
||
| + | | Arrow=[[File:ArrowYd.png|25px|Unlocks next mine|link=]] |
||
| + | }} |
||
| + | |||
| + | {{Quests/Quest |
||
| + | | QuestImage=[[File:Qst2638.png|110px|center|Quest Image]] |
||
| + | | QuestName='''The Seventh And The Eighth Sphere''' |
||
| + | | QuestGiverImage= |
||
| + | | QuestGiverText= |
||
| + | | Tasks={{Quests/Task| TaskText=1. Get The Sacred Animals (4)| TaskImage=[[File:Tok10217.png|25px|task]]}}{{Quests/Task| TaskText=2. Perform The Ritual| TaskImage=[[File:Tok10218.png|25px|task]]}}{{Quests/Task| TaskText=3. Take Aja's Sphere| TaskImage=[[File:Tok10219.png|25px|task]]}}{{Quests/Task| TaskText=4. Take Anansi's Sphere| TaskImage=[[File:Tok10220.png|25px|task]]}}{{Quests/Task| TaskText=5. Talk To Anansi| TaskImage=[[File:Npc31816.png|25px|task]]}}{{Quests/Task| TaskText=6. Talk To Aja| TaskImage=[[File:Npc31817.png|25px|task]]}} |
||
| + | | Locations={{Quests/Location| Location=Aja's Sanctuary}} |
||
| + | | Coins= 717 000[[File:Mat001.png|20px]] |
||
| + | | ExperiencePoints= 2,299,000[[File:Sys001.png|20px]] |
||
| + | | Rewards= |
||
| + | | Available=Pest Control |
||
| + | | Arrow=[[File:ArrowYd.png|25px|Unlocks next mine|link=]] |
||
| + | }} |
||
| + | |||
| + | {{Quests/Quest |
||
| + | | QuestImage=[[File:Qst2639.png|110px|center|Quest Image]] |
||
| + | | QuestName='''Holey Pouch''' |
||
| + | | QuestGiverImage= |
||
| + | | QuestGiverText= |
||
| + | | Tasks={{Quests/Task| TaskText=1. Find The Lost Explorer| TaskImage=[[File:Tok10221.png|25px|task]]}}{{Quests/Task| TaskText=2. Talk To Lost Explorer| TaskImage=[[File:Npc31818.png|25px|task]]}}{{Quests/Task| TaskText=3. Follow The Clues (18)| TaskImage=[[File:Tok10222.png|25px|task]]}}{{Quests/Task| TaskText=4. Talk To Petr NovÁk| TaskImage=[[File:Npc31819.png|25px|task]]}}{{Quests/Task| TaskText=5. Find Out Where To Go Next| TaskImage=[[File:Tok10223.png|25px|task]]}}{{Quests/Task| TaskText=6. Talk To Petr NovÁk| TaskImage=[[File:Npc31823.png|25px|task]]}} |
||
| + | | Locations={{Quests/Location| Location=Dense Jungle}} |
||
| + | | Coins= 718,000[[File:Mat001.png|20px]] |
||
| + | | ExperiencePoints= 2,306,000[[File:Sys001.png|20px]] |
||
| + | | Rewards= 1[[File:Dec1429.png|40px]] |
||
| + | | Available=The Seventh And The Eighth Sphere |
||
| + | | Arrow=[[File:ArrowYr.png|25px|class=shiny grow|Unlocks a Main Quest-line (Dagda: Harp Of Four Seasons - Dagda's Barrow)|link=Terra_(Quests)#Dagda]] [[File:ArrowOr.png|25px|class=shiny grow|Unlocks a Father Quest ()|link=Terra_(Quests)#stage_4]] |
||
| + | }} |
||
| + | }} |
||
| + | |||
| + | {| width="100%" |
||
| + | | style="text-align:right" |[[File:NAVtop.png|50px|link=|class=shiny grow|link=#top|Return to Top page]] |
||
| + | |} |
||
| + | |||
| + | =='''Dagda'''== |
||
| + | {{Quests-yellow |
||
| + | | QuestsImage= |
||
| + | | QuestList= |
||
| + | |||
| + | {{Quests/Quest |
||
| + | | QuestImage=[[File:Qst2651.png|110px|center|Quest Image]] |
||
| + | | QuestName='''Harp Of Four Seasons''' |
||
| + | | QuestGiverImage= |
||
| + | | QuestGiverText= |
||
| + | | Tasks={{Quests/Task| TaskText=1. Talk To Cartimandua| TaskImage=[[File:Npc32203.png|25px|task]]}}{{Quests/Task| TaskText=2. Find The Clues| TaskImage=[[File:Tok10293.png|25px|task]]}}{{Quests/Task| TaskText=3. Find Dagda's Harp| TaskImage=[[File:Tok10294.png|25px|task]]}}{{Quests/Task| TaskText=4. Return The Harp To The Barrow| TaskImage=[[File:Tok10295.png|25px|task]]}}{{Quests/Task| TaskText=5. Talk To Dagda| TaskImage=[[File:Npc32204.png|25px|task]]}} |
||
| + | | Locations={{Quests/Location| Location=Dagda's Barrow}} |
||
| + | | Coins= 719,000[[File:Mat001.png|20px]] |
||
| + | | ExperiencePoints= 2,313,000[[File:Sys001.png|20px]] |
||
| + | | Rewards= |
||
| + | | Available=[[File:QuestIn.png|22px|Available after |link=]] [[Terra_(Quests)#Aja|Holey Pouch]]<br>location: Danse Jungle |
||
| + | | Arrow=[[File:ArrowYd.png|25px|Unlocks next mine|link=]] |
||
| + | }} |
||
| + | |||
| + | {{Quests/Quest |
||
| + | | QuestImage=[[File:Qst2652.png|110px|center|Quest Image]] |
||
| + | | QuestName='''Drinking With Honour''' |
||
| + | | QuestGiverImage= |
||
| + | | QuestGiverText= |
||
| + | | Tasks={{Quests/Task| TaskText=1. Find The Servitor| TaskImage=[[File:Tok10296.png|25px|task]]}}{{Quests/Task| TaskText=2. Persuade The Servitor| TaskImage=[[File:Tok10297.png|25px|task]]}}{{Quests/Task| TaskText=3. Talk To Servitor Of Dagda| TaskImage=[[File:Npc32205.png|25px|task]]}}{{Quests/Task| TaskText=4. Talk To Dagda| TaskImage=[[File:Npc32206.png|25px|task]]}} |
||
| + | | Locations={{Quests/Location| Location=Warrior Hamlet}} |
||
| + | | Coins= 720,000[[File:Mat001.png|20px]] |
||
| + | | ExperiencePoints= 2,320,000[[File:Sys001.png|20px]] |
||
| + | | Rewards= |
||
| + | | Available=Harp Of Four Seasons |
||
| + | | Arrow=[[File:ArrowYd.png|25px|Unlocks next mine|link=]] |
||
| + | }} |
||
| + | |||
| + | {{Quests/Quest |
||
| + | | QuestImage=[[File:Qst2653.png|110px|center|Quest Image]] |
||
| + | | QuestName='''Monstrous Gamble''' |
||
| + | | QuestGiverImage= |
||
| + | | QuestGiverText= |
||
| + | | Tasks={{Quests/Task| TaskText=1. Go To The Inn| TaskImage=[[File:Tok10298.png|25px|task]]}}{{Quests/Task| TaskText=2. Get Dagda's Cauldron| TaskImage=[[File:Tok10300.png|25px|task]]}}{{Quests/Task| TaskText=3. Get Dagda's Pigs (2)| TaskImage=[[File:Tok10301.png|25px|task]]}}{{Quests/Task| TaskText=4. Get Dagda's Staff| TaskImage=[[File:Tok10351.png|25px|task]]}}{{Quests/Task| TaskText=5. Talk To Dagda| TaskImage=[[File:Npc32206.png|25px|task]]}} |
||
| + | | Locations={{Quests/Location| Location=Scary Inn}} |
||
| + | | Coins= 721,000[[File:Mat001.png|20px]] |
||
| + | | ExperiencePoints= 2,327,000[[File:Sys001.png|20px]] |
||
| + | | Rewards= |
||
| + | | Available=Drinking With Honour |
||
| + | | Arrow=[[File:ArrowYd.png|25px|Unlocks next mine|link=]] |
||
| + | }} |
||
| + | |||
| + | {{Quests/Quest |
||
| + | | QuestImage=[[File:Qst2654.png|110px|center|Quest Image]] |
||
| + | | QuestName='''Restless Spirits''' |
||
| + | | QuestGiverImage= |
||
| + | | QuestGiverText= |
||
| + | | Tasks={{Quests/Task| TaskText=1. Get The Wood Of Life And Death (2)| TaskImage=[[File:Tok10303.png|25px|task]]}}{{Quests/Task| TaskText=2. Fix The Staff| TaskImage=[[File:Tok10304.png|25px|task]]}}{{Quests/Task| TaskText=3. Talk To Dagda| TaskImage=[[File:Npc32206.png|25px|task]]}} |
||
| + | | Locations={{Quests/Location| Location=Forests Of Life And Death}} |
||
| + | | Coins= 722,000[[File:Mat001.png|20px]] |
||
| + | | ExperiencePoints= 2,334,000[[File:Sys001.png|20px]] |
||
| + | | Rewards= |
||
| + | | Available=Monstrous Gamble |
||
| + | | Arrow=[[File:ArrowYd.png|25px|Unlocks next mine|link=]] |
||
| + | }} |
||
| + | |||
| + | {{Quests/Quest |
||
| + | | QuestImage=[[File:Qst2655.png|110px|center|Quest Image]] |
||
| + | | QuestName='''Fairy Pets''' |
||
| + | | QuestGiverImage= |
||
| + | | QuestGiverText= |
||
| + | | Tasks={{Quests/Task| TaskText=1. Talk To Cartimandua| TaskImage=[[File:Npc32208.png|25px|task]]}}{{Quests/Task| TaskText=2. Find Out What Happened To Corgis| TaskImage=[[File:Tok10305.png|25px|task]]}}{{Quests/Task| TaskText=3. Save The Corgis (8)| TaskImage=[[File:Tok10306.png|25px|task]]}}{{Quests/Task| TaskText=4. Bring The Corgis Back To The Village (8)| TaskImage=[[File:Tok10307.png|25px|task]]}}{{Quests/Task| TaskText=5. Talk To Cartimandua| TaskImage=[[File:Npc32209.png|25px|task]]}} |
||
| + | | Locations={{Quests/Location| Location=Fae Land}} |
||
| + | | Coins= 723,000[[File:Mat001.png|20px]] |
||
| + | | ExperiencePoints= 2,341,000[[File:Sys001.png|20px]] |
||
| + | | Rewards= |
||
| + | | Available=Restless Spirits |
||
| + | | Arrow=[[File:ArrowYd.png|25px|Unlocks next mine|link=]] |
||
| + | }} |
||
| + | |||
| + | {{Quests/Quest |
||
| + | | QuestImage=[[File:Qst2656.png|110px|center|Quest Image]] |
||
| + | | QuestName='''Night Of Bonfires''' |
||
| + | | QuestGiverImage= |
||
| + | | QuestGiverText= |
||
| + | | Tasks={{Quests/Task| TaskText=1. Prepare The Cider| TaskImage=[[File:Tok10308.png|25px|task]]}}{{Quests/Task| TaskText=2. Light The Bonfire| TaskImage=[[File:Tok10310.png|25px|task]]}}{{Quests/Task| TaskText=3. Prepare Food| TaskImage=[[File:Tok10309.png|25px|task]]}}{{Quests/Task| TaskText=4. Start The Festival| TaskImage=[[File:Tok10311.png|25px|task]]}}{{Quests/Task| TaskText=5. Talk To Dagda| TaskImage=[[File:Npc32211.png|25px|task]]}} |
||
| + | | Locations={{Quests/Location| Location=Beltane Festival}} |
||
| + | | Coins= 724 000[[File:Mat001.png|20px]] |
||
| + | | ExperiencePoints= 2 348 000[[File:Sys001.png|20px]] |
||
| + | | Rewards= |
||
| + | | Available=Fairy Pets |
||
| + | | Arrow=[[File:ArrowYd.png|25px|Unlocks next mine|link=]] |
||
| + | }} |
||
| + | |||
| + | {{Quests/Quest |
||
| + | | QuestImage=[[File:Qst2662.png|110px|center|Quest Image]] |
||
| + | | QuestName='''Banshee's Voice''' |
||
| + | | QuestGiverImage= |
||
| + | | QuestGiverText= |
||
| + | | Tasks={{Quests/Task| TaskText=1. Stop The Banshee| TaskImage=[[File:Tok10364.png|25px|task]]}}{{Quests/Task| TaskText=2. Talk To Dagda| TaskImage=[[File:Npc32210.png|25px|task]]}} |
||
| + | | Locations={{Quests/Location| Location=Banshee's Swamp}} |
||
| + | | Coins= 725,000[[File:Mat001.png|20px]] |
||
| + | | ExperiencePoints= 2,355,000[[File:Sys001.png|20px]] |
||
| + | | Rewards= |
||
| + | | Available=Night Of Bonfires |
||
| + | | Arrow=[[File:ArrowYd.png|25px|Unlocks next mine|link=]] |
||
| + | }} |
||
| + | |||
| + | {{Quests/Quest |
||
| + | | QuestImage=[[File:Qst2663.png|110px|center|Quest Image]] |
||
| + | | QuestName='''Thirsty Nephew''' |
||
| + | | QuestGiverImage= |
||
| + | | QuestGiverText= |
||
| + | | Tasks={{Quests/Task| TaskText=1. Talk To Old Druid| TaskImage=[[File:Npc32408.png|25px|task]]}}{{Quests/Task| TaskText=2. Help The Druid's Nephew (3)| TaskImage=[[File:Tok10365.png|25px|task]]}}{{Quests/Task| TaskText=3. Talk To Dagda| TaskImage=[[File:Npc32409.png|25px|task]]}}{{Quests/Task| TaskText=4. Get The Pieces Of The Plate (3)| TaskImage=[[File:Tok10366.png|25px|task]]}}{{Quests/Task| TaskText=5. Talk To Servitor Of Dagda| TaskImage=[[File:Npc32410.png|25px|task]]}} |
||
| + | | Locations={{Quests/Location| Location=Druids' Forest}} |
||
| + | | Coins= 726,000[[File:Mat001.png|20px]] |
||
| + | | ExperiencePoints= 2,362,000[[File:Sys001.png|20px]] |
||
| + | | Rewards= |
||
| + | | Available=Banshee's Voice |
||
| + | | Arrow=[[File:ArrowYd.png|25px|Unlocks next mine|link=]] |
||
| + | }} |
||
| + | |||
| + | {{Quests/Quest |
||
| + | | QuestImage=[[File:Qst2664.png|110px|center|Quest Image]] |
||
| + | | QuestName='''A Wild Night Out''' |
||
| + | | QuestGiverImage= |
||
| + | | QuestGiverText= |
||
| + | | Tasks={{Quests/Task| TaskText=1. Talk To Dagda| TaskImage=[[File:Npc32411.png|25px|task]]}}{{Quests/Task| TaskText=2. Find Dagda's Sphere| TaskImage=[[File:Tok10367.png|25px|task]]}}{{Quests/Task| TaskText=3. Take The Sphere| TaskImage=[[File:Tok10368.png|25px|task]]}}{{Quests/Task| TaskText=4. Talk To Dagda| TaskImage=[[File:Npc32412.png|25px|task]]}} |
||
| + | | Locations={{Quests/Location| Location=Celtic Countryside}} |
||
| + | | Coins= 727,000[[File:Mat001.png|20px]] |
||
| + | | ExperiencePoints= 2,369,000[[File:Sys001.png|20px]] |
||
| + | | Rewards= |
||
| + | | Available=Thirsty Nephew |
||
| + | | Arrow=[[File:ArrowYd.png|25px|Unlocks next mine|link=]] |
||
| + | }} |
||
| + | |||
| + | {{Quests/Quest |
||
| + | | QuestImage=[[File:Qst2665.png|110px|center|Quest Image]] |
||
| + | | QuestName='''Words Of Love''' |
||
| + | | QuestGiverImage= |
||
| + | | QuestGiverText= |
||
| + | | Tasks={{Quests/Task| TaskText=1. Help Dagda Write A Poem| TaskImage=[[File:Tok10369.png|25px|task]]}}{{Quests/Task| TaskText=2. Take The Poem To Morrigan| TaskImage=[[File:Tok10370.png|25px|task]]}}{{Quests/Task| TaskText=3. Talk To Morrigan| TaskImage=[[File:Npc32413.png|25px|task]]}} |
||
| + | | Locations={{Quests/Location| Location=Barrow Of Inspiration}} |
||
| + | | Coins= 728,000[[File:Mat001.png|20px]] |
||
| + | | ExperiencePoints= 2,376,000[[File:Sys001.png|20px]] |
||
| + | | Rewards= 1[[File:Dec1455.png|40px]] |
||
| + | | Available=A Wild Night Out |
||
| + | | Arrow=[[File:ArrowYr.png|25px|class=shiny grow|Unlocks a Main Quest-line (Morrigan: A Show For Morrigan - Larpers' Grove|link=Terra_(Quests)#Morrigan]][[File:ArrowOr.png|25px|class=shiny grow|Unlocks a Father Quest (Father: The Father Of Electricity- Tesla's Research Station)|link=Terra_(Quests)#stage_5]] [[File:ArrowBr.png|25px|class=shiny grow|Unlocks a sidequest line (Dagda|link=Terra_(Quests)#Sidequests:Dagda]] |
||
| + | }} |
||
| + | }} |
||
| + | |||
| + | {| width="100%" |
||
| + | | style="text-align:right" |[[File:NAVtop.png|50px|link=|class=shiny grow|link=#top|Return to Top page]] |
||
| + | |} |
||
| + | |||
| + | ==Sidequests:Dagda== |
||
| + | {{Side-Quests |
||
| + | | QuestsImage= |
||
| + | | QuestList= |
||
| + | |||
| + | {{Quests/Quest |
||
| + | | QuestImage=[[File: Qst2761.png|110px|center|Quest Image]] |
||
| + | | QuestName='''Celts In Trouble''' |
||
| + | | QuestGiverImage= |
||
| + | | QuestGiverText= |
||
| + | | Tasks={{Quests/Task| TaskText=1. Talk To Adonix| TaskImage=[[File: Npc34143.png|25px]]}}{{Quests/Task| TaskText=2. Talk To Alchemix| TaskImage=[[File: Npc34145.png|25px]]}}{{Quests/Task| TaskText=3. Help Prepare The Elixir| TaskImage=[[File: Tok10737.png|25px]]}}{{Quests/Task| TaskText=4. Talk To Adonix| TaskImage=[[File: Npc34146.png|25px]]}} |
||
| + | | Locations={{Quests/Location | Location=Celtic Oppidum}} |
||
| + | | Coins= 688,000[[File:Mat001.png|20px]] |
||
| + | | ExperiencePoints= 2,096,000[[File:Sys001.png|20px]] |
||
| + | | Rewards= |
||
| + | | Available=[[File:QuestIn.png|22px|Available after |link=]] [[Terra_(Quests)#Dagda|Words Of Love]]<br>location: Barrow Of Inspiration (last Dagda) |
||
| + | | Arrow=[[File:ArrowBd.png|25px|Unlock next Side Ques mine|link=]] |
||
| + | }} |
||
| + | |||
| + | {{Quests/Quest |
||
| + | | QuestImage=[[File: Qst2762.png|110px|center|Quest Image]] |
||
| + | | QuestName='''A Huge Romantic''' |
||
| + | | QuestGiverImage= |
||
| + | | QuestGiverText= |
||
| + | | Tasks={{Quests/Task| TaskText=1. Find Megafix| TaskImage=[[File: Tok10738.png|25px]]}}{{Quests/Task| TaskText=2. Talk To Megafix| TaskImage=[[File: Npc34147.png|20px]]}}{{Quests/Task| TaskText=3. Help Megafix| TaskImage=[[File: Tok10739.png|25px]]}}{{Quests/Task| TaskText=4. Talk To Breanna|TaskImage=[[File: Npc34148.png|25px]]}} |
||
| + | | Locations={{Quests/Location| Location=Quiet Forest}} |
||
| + | | Coins= 691,000[[File:Mat001.png|20px]] |
||
| + | | ExperiencePoints= 2,104,000[[File:Sys001.png|20px]] |
||
| + | | Rewards= |
||
| + | | Available=Celts In Trouble |
||
| + | | Arrow=[[File:ArrowBd.png|25px|Unlock next Side Ques mine|link=]] |
||
| + | }} |
||
| + | |||
| + | {{Quests/Quest |
||
| + | | QuestImage=[[File: Qst2763.png|110px|center|Quest Image]] |
||
| + | | QuestName='''Warmongering Romans''' |
||
| + | | QuestGiverImage= |
||
| + | | QuestGiverText= |
||
| + | | Tasks={{Quests/Task| TaskText=1. Defeat The Romans| TaskImage=[[File: Tok10740.png|25px]]}}{{Quests/Task| TaskText=2. Talk To Megafix| TaskImage=[[File: Npc34150.png|20px]]}}{{Quests/Task| TaskText=3. Get Things Ready For The Party| TaskImage=[[File: Tok10741.png|25px]]}}{{Quests/Task| TaskText=4. Talk To Adonix| TaskImage=[[File: Npc34149.png|25px]]}} |
||
| + | | Locations= {{Quests/Location| Location=Celtic Battleground}} |
||
| + | | Coins= 694,000[[File:Mat001.png|20px]] |
||
| + | | ExperiencePoints= 2,112,000[[File:Sys001.png|20px]] |
||
| + | | Rewards= |
||
| + | | Available=A Huge Romantic |
||
| + | | Arrow=[[File:ArrowRu.png|25px|End of questline|link=]] |
||
| + | }} |
||
| + | }} |
||
| + | |||
| + | {| width="100%" |
||
| + | | style="text-align:right" |[[File:NAVtop.png|50px|link=|class=shiny grow|link=#top|Return to Top page]] |
||
| + | |} |
||
| + | |||
| + | =='''Morrigan'''== |
||
| + | {{Quests-yellow |
||
| + | | QuestsImage= |
||
| + | | QuestList= |
||
| + | |||
| + | {{Quests/Quest |
||
| + | | QuestImage=[[File:Qst2666.png|110px|center|Quest Image]] |
||
| + | | QuestName='''A Show For Morrigan''' |
||
| + | | QuestGiverImage= |
||
| + | | QuestGiverText= |
||
| + | | Tasks={{Quests/Task| TaskText=1. Find The Larpers| TaskImage=[[File:Tok10387.png|25px|task]]}}{{Quests/Task| TaskText=2. Help The Larpers (9)| TaskImage=[[File:Tok10388.png|25px|task]]}}{{Quests/Task| TaskText=3. Talk To Morrigan| TaskImage=[[File:Npc32472.png|25px|task]]}} |
||
| + | | Locations={{Quests/Location| Location=Larpers' Grove}} |
||
| + | | Coins= 729,000[[File:Mat001.png|20px]] |
||
| + | | ExperiencePoints= 2,383,000[[File:Sys001.png|20px]] |
||
| + | | Rewards= |
||
| + | | Available=[[File:QuestIn.png|22px|Available after |link=]] [[Terra_(Quests)#Dagda|Words Of Love]]<br>location: Barrow of Inspiration (last Dagda) |
||
| + | | Arrow=[[File:ArrowYd.png|25px|Unlocks next mine|link=]] |
||
| + | }} |
||
| + | |||
| + | {{Quests/Quest |
||
| + | | QuestImage=[[File:Qst2667.png|110px|center|Quest Image]] |
||
| + | | QuestName='''Once In A Millenium''' |
||
| + | | QuestGiverImage= |
||
| + | | QuestGiverText= |
||
| + | | Tasks={{Quests/Task| TaskText=1. Find The Servitor| TaskImage=[[File:Tok10389.png|25px|task]]}}{{Quests/Task| TaskText=2. Get The Book| TaskImage=[[File:Tok10390.png|25px|task]]}}{{Quests/Task| TaskText=3. Give The Book To The Druid| TaskImage=[[File:Tok10392.png|25px|task]]}}{{Quests/Task| TaskText=4. Talk To Servitor Of Morrigan| TaskImage=[[File:Npc32474.png|25px|task]]}}{{Quests/Task| TaskText=5. Talk To Morrigan| TaskImage=[[File:Npc32475.png|25px|task]]}} |
||
| + | | Locations={{Quests/Location| Location=Druid Ancestral Tomb}} |
||
| + | | Coins= 730,000[[File:Mat001.png|20px]] |
||
| + | | ExperiencePoints= 2,390,000[[File:Sys001.png|20px]] |
||
| + | | Rewards= |
||
| + | | Available=A Show For Morrigan |
||
| + | | Arrow=[[File:ArrowYd.png|25px|Unlocks next mine|link=]] |
||
| + | }} |
||
| + | |||
| + | {{Quests/Quest |
||
| + | | QuestImage=[[File:Qst2668.png|110px|center|Quest Image]] |
||
| + | | QuestName='''Morrigan's Prophecies''' |
||
| + | | QuestGiverImage= |
||
| + | | QuestGiverText= |
||
| + | | Tasks={{Quests/Task| TaskText=1. Help Morrigan With The Prophecies (4)| TaskImage=[[File:Tok10391.png|25px|task]]}}{{Quests/Task| TaskText=2. Talk To Morrigan| TaskImage=[[File:Npc32466.png|25px|task]]}} |
||
| + | | Locations={{Quests/Location| Location=Celtic Land}} |
||
| + | | Coins= 731,000[[File:Mat001.png|20px]] |
||
| + | | ExperiencePoints= 2,397,000[[File:Sys001.png|20px]] |
||
| + | | Rewards= |
||
| + | | Available=Once In A Millenium |
||
| + | | Arrow=[[File:ArrowYd.png|25px|Unlocks next mine|link=]] |
||
| + | }} |
||
| + | |||
| + | {{Quests/Quest |
||
| + | | QuestImage=[[File:Qst2678.png|110px|center|Quest Image]] |
||
| + | | QuestName='''Plague Of Crows''' |
||
| + | | QuestGiverImage= |
||
| + | | QuestGiverText= |
||
| + | | Tasks={{Quests/Task| TaskText=1. Go To Morrigan's Mansion| TaskImage=[[File:Tok10426.png|25px|task]]}}{{Quests/Task| TaskText=2. Clean The Mansion (50)| TaskImage=[[File:Tok10427.png|25px|task]]}}{{Quests/Task| TaskText=3. Collect The Crows (12)| TaskImage=[[File:Tok10428.png|25px|task]]}}{{Quests/Task| TaskText=4. Return The Crows To The Aviaries (12)| TaskImage=[[File:Tok10429.png|25px|task]]}}{{Quests/Task| TaskText=5. Talk To Morrigan| TaskImage=[[File:Npc32613.png|25px|task]]}} |
||
| + | | Locations={{Quests/Location| Location=Morrigan's Mansion}} |
||
| + | | Coins= 732,000[[File:Mat001.png|20px]] |
||
| + | | ExperiencePoints= 2,404,000[[File:Sys001.png|20px]] |
||
| + | | Rewards= |
||
| + | | Available=Morrigan's Prophecies |
||
| + | | Arrow=[[File:ArrowYd.png|25px|Unlocks next mine|link=]] |
||
| + | }} |
||
| + | |||
| + | {{Quests/Quest |
||
| + | | QuestImage=[[File:Qst2679.png|110px|center|Quest Image]] |
||
| + | | QuestName='''Lake Demon''' |
||
| + | | QuestGiverImage= |
||
| + | | QuestGiverText= |
||
| + | | Tasks={{Quests/Task| TaskText=1. Catch Kelpie| TaskImage=[[File:Tok10430.png|25px|task]]}}{{Quests/Task| TaskText=2. Bring The Kelpie To Morrigan| TaskImage=[[File:Tok10431.png|25px|task]]}}{{Quests/Task| TaskText=3. Talk To Morrigan| TaskImage=[[File:Npc32614.png|25px|task]]}} |
||
| + | | Locations={{Quests/Location| Location=Misty Lakes}} |
||
| + | | Coins= 733,000[[File:Mat001.png|20px]] |
||
| + | | ExperiencePoints= 2,411,000[[File:Sys001.png|20px]] |
||
| + | | Rewards= |
||
| + | | Available=Plague Of Crows |
||
| + | | Arrow=[[File:ArrowYd.png|25px|Unlocks next mine|link=]] |
||
| + | }} |
||
| + | |||
| + | {{Quests/Quest |
||
| + | | QuestImage=[[File:Qst2680.png|110px|center|Quest Image]] |
||
| + | | QuestName='''Failed Romance''' |
||
| + | | QuestGiverImage= |
||
| + | | QuestGiverText= |
||
| + | | Tasks={{Quests/Task| TaskText=1. Find CÚchulainn| TaskImage=[[File:Tok10433.png|25px|task]]}}{{Quests/Task| TaskText=2. Talk To CÚchulainn| TaskImage=[[File:Npc32615.png|25px|task]]}}{{Quests/Task| TaskText=3. Find CÚchulainn's Heart| TaskImage=[[File:Tok10432.png|25px|task]]}}{{Quests/Task| TaskText=4. Talk To CÚchulainn| TaskImage=[[File:Npc32616.png|25px|task]]}} |
||
| + | | Locations={{Quests/Location| Location=Warrior Underworld}} |
||
| + | | Coins= 734,000[[File:Mat001.png|20px]] |
||
| + | | ExperiencePoints= 2,418,000[[File:Sys001.png|20px]] |
||
| + | | Rewards= |
||
| + | | Available=Lake Demon |
||
| + | | Arrow=[[File:ArrowYd.png|25px|Unlocks next mine|link=]] |
||
| + | }} |
||
| + | |||
| + | {{Quests/Quest |
||
| + | | QuestImage=[[File:Qst2681.png|110px|center|Quest Image]] |
||
| + | | QuestName='''Druid Trade-off''' |
||
| + | | QuestGiverImage= |
||
| + | | QuestGiverText= |
||
| + | | Tasks={{Quests/Task| TaskText=1. Talk To Old Druid| TaskImage=[[File:Npc32617.png|25px|task]]}}{{Quests/Task| TaskText=2. Help The Druids (4)| TaskImage=[[File:Tok10434.png|25px|task]]}}{{Quests/Task| TaskText=3. Talk To Old Druid| TaskImage=[[File:Npc32618.png|25px|task]]}}{{Quests/Task| TaskText=4. Prepare The Battlefield (2)| TaskImage=[[File:Tok10435.png|25px|task]]}}{{Quests/Task| TaskText=5. Talk To Morrigan| TaskImage=[[File:Npc32475.png|25px|task]]}} |
||
| + | | Locations={{Quests/Location| Location=Sacred Battlefield}} |
||
| + | | Coins= 735,000[[File:Mat001.png|20px]] |
||
| + | | ExperiencePoints= 2,425,000[[File:Sys001.png|20px]] |
||
| + | | Rewards= |
||
| + | | Available=Failed Romance |
||
| + | | Arrow=[[File:ArrowYd.png|25px|Unlocks next mine|link=]] |
||
| + | }} |
||
| + | |||
| + | {{Quests/Quest |
||
| + | | QuestImage=[[File:Qst2700.png|110px|center|Quest Image]] |
||
| + | | QuestName='''Of Gods And Tentacles''' |
||
| + | | QuestGiverImage= |
||
| + | | QuestGiverText= |
||
| + | | Tasks={{Quests/Task| TaskText=1. Defeat General's Minions (8)| TaskImage=[[File:Tok10458.png|25px|task]]}}{{Quests/Task| TaskText=2. Catch The General| TaskImage=[[File:Tok10459.png|25px|task]]}}{{Quests/Task| TaskText=3. Talk To Morrigan| TaskImage=[[File:Npc32732.png|25px|task]]}} |
||
| + | | Locations={{Quests/Location| Location=Slimy Canyon}} |
||
| + | | Coins= 736,000[[File:Mat001.png|20px]] |
||
| + | | ExperiencePoints= 2,432,000[[File:Sys001.png|20px]] |
||
| + | | Rewards= |
||
| + | | Available=Druid Trade-off |
||
| + | | Arrow=[[File:ArrowYd.png|25px|Unlocks next mine|link=]] |
||
| + | }} |
||
| + | |||
| + | {{Quests/Quest |
||
| + | | QuestImage=[[File:Qst2701.png|110px|center|Quest Image]] |
||
| + | | QuestName='''To Fear Morrigan''' |
||
| + | | QuestGiverImage= |
||
| + | | QuestGiverText= |
||
| + | | Tasks={{Quests/Task| TaskText=1. Help The Villagers| TaskImage=[[File:Tok10460.png|25px|task]]}}{{Quests/Task| TaskText=2. Get The Pieces Of The Plate (3)| TaskImage=[[File:Tok10461.png|25px|task]]}}{{Quests/Task| TaskText=3. Talk To Morrigan| TaskImage=[[File:Npc32475.png|25px|task]]}} |
||
| + | | Locations={{Quests/Location| Location=Messy Hamlet}} |
||
| + | | Coins= 737,000[[File:Mat001.png|20px]] |
||
| + | | ExperiencePoints= 2,439,000[[File:Sys001.png|20px]] |
||
| + | | Rewards= |
||
| + | | Available=Of Gods And Tentacles |
||
| + | | Arrow=[[File:ArrowYd.png|25px|Unlocks next mine|link=]] |
||
| + | }} |
||
| + | |||
| + | {{Quests/Quest |
||
| + | | QuestImage=[[File:Qst2702.png|110px|center|Quest Image]] |
||
| + | | QuestName='''The Last Sphere''' |
||
| + | | QuestGiverImage= |
||
| + | | QuestGiverText= |
||
| + | | Tasks={{Quests/Task| TaskText=1. Go To The Shrine| TaskImage=[[File:Tok10462.png|25px|task]]}}{{Quests/Task| TaskText=2. Talk To Morrigan| TaskImage=[[File:Npc32733.png|25px|task]]}}{{Quests/Task| TaskText=3. Prevent The Sphere's Destruction| TaskImage=[[File:Tok10463.png|25px|task]]}}{{Quests/Task| TaskText=4. Talk To Morrigan| TaskImage=[[File:Npc32734.png|25px|task]]}} |
||
| + | | Locations={{Quests/Location| Location=Dark Shrine}} |
||
| + | | Coins= 738,000[[File:Mat001.png|20px]] |
||
| + | | ExperiencePoints= 2,446,000[[File:Sys001.png|20px]] |
||
| + | | Rewards= 1[[File:Dec1468.png|40px]] |
||
| + | | Available=To Fear Morrigan |
||
| + | | Arrow=[[File:ArrowYr.png|25px|class=shiny grow|Unlocks a Main Quest-line (Main: Saving Terra- Hidden Underground Facility|link=Terra_(Quests)#main stage_2]][[File:ArrowOr.png|25px|class=shiny grow|Unlocks a Father Quest (Father: Is Anybody There? - Aboard The Spaceship)|link=Terra_(Quests)#stage_6]] |
||
| + | }} |
||
| + | }} |
||
| + | |||
| + | {| width="100%" |
||
| + | | style="text-align:right" |[[File:NAVtop.png|50px|link=|class=shiny grow|link=#top|Return to Top page]] |
||
| + | |} |
||
| + | |||
| + | ==Side Quests 7== |
||
| + | ===<div style="font-size:60%">Side1:Amaterasu</div>=== |
||
| + | {{Side-Quests |
||
| + | | QuestsImage= |
||
| + | | QuestList= |
||
| + | |||
| + | {{Quests/Quest |
||
| + | | QuestImage=[[File: Qst2729.png|110px|center|Quest Image]] |
||
| + | | QuestName='''Potential Champion''' |
||
| + | | QuestGiverImage= |
||
| + | | QuestGiverText= |
||
| + | | Tasks={{Quests/Task|TaskText=1. Join The Competition|TaskImage=[[File: Tok10628.png|25px]]}}{{Quests/Task|TaskText=2. Get Through The Challenges|TaskImage=[[File: Tok10629.png|25px]]}}{{Quests/Task|TaskText=3. Talk To Kateshi|TaskImage=[[File: Npc34004.png|25px]]}} |
||
| + | | Locations= {{Quests/Location|Location=Outside Kateshi's Castle}} |
||
| + | | Coins= 648,000[[File:Mat001.png|20px]]<br> |
||
| + | | ExperiencePoints= 1,816,000[[File:Sys001.png|20px]]<br> |
||
| + | | Rewards= |
||
| + | | Available=[[File:QuestIn.png|22px|Available after |link=]] [[Terra_(Quests)#Amaterasu|Divine Protectress]]<br>location: Wrecked City (last Amaterasu) |
||
| + | | Arrow=[[File:ArrowBd.png|25px|Unlock next Side Ques mine|link=]] |
||
| + | }} |
||
| + | |||
| + | {{Quests/Quest |
||
| + | | QuestImage=[[File: Qst2730.png|110px|center|Quest Image]] |
||
| + | | QuestName='''In The Belly Of The Beast''' |
||
| + | | QuestGiverImage= |
||
| + | | QuestGiverText= |
||
| + | | Tasks={{Quests/Task|TaskText=1. Get Through The Challenges|TaskImage=[[File: Tok10630.png|25px]]}} |
||
| + | | Locations={{Quests/Location|Location=Kateshi's Castle}} |
||
| + | | Coins= 651,000[[File:Mat001.png|20px]]<br> |
||
| + | | ExperiencePoints= 1,824,000[[File:Sys001.png|20px]]<br> |
||
| + | | Rewards= |
||
| + | | Available=Potential Champion |
||
| + | | Arrow=[[File:ArrowBd.png|25px|Unlock next Side Ques mine|link=]] |
||
| + | }} |
||
| + | |||
| + | {{Quests/Quest |
||
| + | | QuestImage=[[File: Qst2731.png|110px|center|Quest Image]] |
||
| + | | QuestName='''Winner Takes All''' |
||
| + | | QuestGiverImage= |
||
| + | | QuestGiverText= |
||
| + | | Tasks={{Quests/Task|TaskText=1. Win The Competition|TaskImage=[[File: Tok10631.png|25px]]}}{{Quests/Task|TaskText=2. Talk To Kateshi|TaskImage=[[File: Npc33551.png|25px]]}} |
||
| + | | Locations= {{Quests/Location|Location=Centre Of Kateshi's Castle}} |
||
| + | | Coins= 654,000[[File:Mat001.png|20px]]<br> |
||
| + | | ExperiencePoints= 1,832,000[[File:Sys001.png|20px]]<br> |
||
| + | | Rewards= |
||
| + | | Available=In The Belly Of The Beast |
||
| + | | Arrow=[[File:ArrowRu.png|25px|End of questline|link=]] |
||
| + | }} |
||
| + | }} |
||
| + | |||
| + | ===<div style="font-size:60%">Side2:Kane</div>=== |
||
| + | {{Side-Quests |
||
| + | | QuestsImage= |
||
| + | | QuestList= |
||
| + | |||
| + | {{Quests/Quest |
||
| + | | QuestImage=[[File: Qst2736.png|110px|center|Quest Image]] |
||
| + | | QuestName='''A Day At The Beach''' |
||
| + | | QuestGiverImage= |
||
| + | | QuestGiverText= |
||
| + | | Tasks={{Quests/Task| TaskText=1. Talk To Dr C. Archaros| TaskImage=[[File: Npc34005.png|25px]]}}{{Quests/Task| TaskText=2. Talk To Dr C. Archaros| TaskImage=[[File: Npc33700.png|25px]]}}{{Quests/Task| TaskText=3. Search The Beach| TaskImage=[[File: Tok10653.png|25px]]}}{{Quests/Task| TaskText=4. Talk To Dr C. Archaros| TaskImage=[[File: Npc33701.png|25px]]}} |
||
| + | | Locations={{Quests/Location| Location=Sandy Beach}} |
||
| + | | Coins= 678,000[[File:Mat001.png|20px]]<br> |
||
| + | | ExperiencePoints= 2,026,000[[File:Sys001.png|20px]]<br> |
||
| + | | Rewards= |
||
| + | | Available=[[File:QuestIn.png|22px|Available after |link=]] [[Terra_(Quests)#Kane|Touch Of Winter]]<br>location: Radar Room (last Kane) |
||
| + | | Arrow=[[File:ArrowBd.png|25px|Unlock next Side Ques mine|link=]] |
||
| + | }} |
||
| + | |||
| + | {{Quests/Quest |
||
| + | | QuestImage=[[File: Qst2737.png|110px|center|Quest Image]] |
||
| + | | QuestName='''Shark Hunt''' |
||
| + | | QuestGiverImage= |
||
| + | | QuestGiverText= |
||
| + | | Tasks={{Quests/Task| TaskText=1. Get A Crew (3)| TaskImage=[[File: Tok10654.png|25px]]}}{{Quests/Task| TaskText=2. Track Megalodon| TaskImage=[[File: Tok10655.png|25px]]}}{{Quests/Task| TaskText=3. Escape Megalodon| TaskImage=[[File: Tok10656.png|25px]]}}{{Quests/Task| TaskText=4. Talk To Captain| TaskImage=[[File: Npc33702.png|25px]]}} |
||
| + | | Locations={{Quests/Location| Location=Shelf Sea}} |
||
| + | | Coins= 681,000[[File:Mat001.png|20px]]<br> |
||
| + | | ExperiencePoints= 2,034,000[[File:Sys001.png|20px]]<br> |
||
| + | | Rewards= |
||
| + | | Available=A Day At The Beach |
||
| + | | Arrow=[[File:ArrowBd.png|25px|Unlock next Side Ques mine|link=]] |
||
| + | }} |
||
| + | |||
| + | {{Quests/Quest |
||
| + | | QuestImage=[[File: Qst2738.png|110px|center|Quest Image]] |
||
| + | | QuestName='''Jaws From The Past''' |
||
| + | | QuestGiverImage= |
||
| + | | QuestGiverText= |
||
| + | | Tasks={{Quests/Task| TaskText=1. Find Megalodon's Lair| TaskImage=[[File: Tok10657.png|25px]]}}{{Quests/Task| TaskText=2. Chase Away Kraken| TaskImage=[[File: Tok10658.png|25px]]}}{{Quests/Task| TaskText=3. Talk To Captain| TaskImage=[[File: Npc33703.png|25px]]}} |
||
| + | | Locations={{Quests/Location| Location=Bottom Of Mariana Trench}} |
||
| + | | Coins= 684,000[[File:Mat001.png|20px]]<br> |
||
| + | | ExperiencePoints= 2,042,000[[File:Sys001.png|20px]]<br> |
||
| + | | Rewards= |
||
| + | | Available=Shark Hunt |
||
| + | | Arrow=[[File:ArrowRu.png|25px|End of questline|link=]] |
||
| + | }} |
||
| + | }} |
||
| + | |||
| + | ===<div style="font-size:60%">Side3:Nanook</div>=== |
||
| + | {{Side-Quests |
||
| + | | QuestsImage= |
||
| + | | QuestList= |
||
| + | |||
| + | {{Quests/Quest |
||
| + | | QuestImage=[[File: Qst2751.png|110px|center|Quest Image]] |
||
| + | | QuestName='''The Freezing Egyptian''' |
||
| + | | QuestGiverImage= |
||
| + | | QuestGiverText= |
||
| + | | Tasks={{Quests/Task| TaskText=1. Talk To Sneferu's Family| TaskImage=[[File: Npc34108.png|25px]]}}{{Quests/Task| TaskText=2. Find Out What Happened| TaskImage=[[File: Tok10722.png|25px]]}}{{Quests/Task| TaskText=3. Save Sneferu| TaskImage=[[File: Tok10723.png|25px]]}}{{Quests/Task| TaskText=4. Talk To Sneferu| TaskImage=[[File: Npc34109.png|25px]]}} |
||
| + | | Locations={{Quests/Location| Location=Icy Cove}} |
||
| + | | Coins= 688,000[[File:Mat001.png|20px]] |
||
| + | | ExperiencePoints= 2,096,000[[File:Sys001.png|20px]] |
||
| + | | Rewards= |
||
| + | | Available=[[File:QuestIn.png|22px|Available after |link=]] [[Terra_(Quests)#Nanook|The Sea Wolf]]<br>location: The Arctic Ocean (last Nanook) |
||
| + | |Arrow=[[File:ArrowBd.png|25px|Unlock next Side Ques mine|link=]] |
||
| + | }} |
||
| + | |||
| + | {{Quests/Quest |
||
| + | | QuestImage=[[File: Qst2752.png|110px|center|Quest Image]] |
||
| + | | QuestName='''Possessive Penguins''' |
||
| + | | QuestGiverImage= |
||
| + | | QuestGiverText= |
||
| + | | Tasks={{Quests/Task| TaskText=1. Find Mrs Sneferu| TaskImage=[[File: Tok10724.png|25px]]}}{{Quests/Task| TaskText=2. Talk To Mrs Sneferu| TaskImage=[[File: Npc34110.png|25px]]}}{{Quests/Task| TaskText=3. Fix The Submarine| TaskImage=[[File: Tok10725.png|25px]]}}{{Quests/Task| TaskText=4. Talk To Mrs Sneferu| TaskImage=[[File: Npc34111.png|25px]]}} |
||
| + | | Locations={{Quests/Location| Location=Old Submarine}} |
||
| + | | Coins= 691,000[[File:Mat001.png|20px]] |
||
| + | | ExperiencePoints= 2,104,000[[File:Sys001.png|20px]] |
||
| + | | Rewards= |
||
| + | | Available=The Freezing Egyptian |
||
| + | |Arrow=[[File:ArrowBd.png|25px|Unlock next Side Ques mine|link=]] |
||
| + | }} |
||
| + | |||
| + | {{Quests/Quest |
||
| + | | QuestImage=[[File: Qst2753.png|110px|center|Quest Image]] |
||
| + | | QuestName='''Move It, Move It''' |
||
| + | | QuestGiverImage= |
||
| + | | QuestGiverText= |
||
| + | | Tasks={{Quests/Task| TaskText=1. Talk To Sneferu's Son| TaskImage=[[File: Npc34112.png|25px]]}}{{Quests/Task| TaskText=2. Teach The Seals To Dance (8)| TaskImage=[[File: Tok10726.png|25px]]}}{{Quests/Task| TaskText=3. Talk To Sneferu's Son| TaskImage=[[File: Npc34113.png|25px]]}} |
||
| + | | Locations={{Quests/Location| Location=Arctic Icebergs}} |
||
| + | | Coins= 694,000[[File:Mat001.png|20px]] |
||
| + | | ExperiencePoints= 2,112,000[[File:Sys001.png|20px]] |
||
| + | | Rewards= |
||
| + | | Available=Possessive Penguins |
||
| + | |Arrow=[[File:ArrowRu.png|25px|End of questline|link=]] |
||
| + | }} |
||
| + | }} |
||
| + | |||
| + | ===<div style="font-size:60%">Side4:Anansi</div>=== |
||
| + | {{Side-Quests |
||
| + | | QuestsImage= |
||
| + | | QuestList= |
||
| + | |||
| + | {{Quests/Quest |
||
| + | | QuestImage=[[File: Qst2739.png|110px|center|Quest Image]] |
||
| + | | QuestName='''Black Spider''' |
||
| + | | QuestGiverImage= |
||
| + | | QuestGiverText= |
||
| + | | Tasks={{Quests/Task|TaskText=1. Talk To Black Spider|TaskImage=[[File: Npc34006.png|25px]]}}{{Quests/Task| TaskText=2. Talk To Black Spider| TaskImage=[[File: Npc34007.png|25px]]}}{{Quests/Task| TaskText=3. Find Kawanda| TaskImage=[[File: Tok10698.png|25px]]}}{{Quests/Task| TaskText=4. Talk To Black Spider | TaskImage=[[File: Npc34008.png|25px]]}} |
||
| + | | Locations={{Quests/Location| Location=Kawanda Jungle}} |
||
| + | | Coins= 708,000[[File:Mat001.png|20px]] |
||
| + | | ExperiencePoints= 2,236,000[[File:Sys001.png|20px]] |
||
| + | | Rewards= |
||
| + | | Available=[[File:QuestIn.png|22px|Available after |link=]] [[Terra_(Quests)#Anansi|Finding The Healer]]<br>location: Aja's Jungle (last Anansi) |
||
| + | | Arrow=[[File:ArrowBd.png|25px|Unlock next Side Ques mine|link=]] |
||
| + | }} |
||
| + | |||
| + | {{Quests/Quest |
||
| + | | QuestImage=[[File: Qst2740.png|110px|center|Quest Image]] |
||
| + | | QuestName='''Shaman's Task''' |
||
| + | | QuestGiverImage= |
||
| + | | QuestGiverText= |
||
| + | | Tasks={{Quests/Task| TaskText=1. Find The Shaman| TaskImage=[[File: Tok10707.png|25px]]}}{{Quests/Task| TaskText=2. Talk To Uncle Diggster| TaskImage=[[File: Npc34093.png|25px]]}}{{Quests/Task| TaskText=3. Complete Shaman's Task| TaskImage=[[File: Tok10708.png|25px]]}}{{Quests/Task| TaskText=4. Talk To Uncle Diggster| TaskImage=[[File: Npc34094.png|25px]]}} |
||
| + | | Locations={{Quests/Location| Location=City Of Kawanda}} |
||
| + | | Coins= 711,000[[File:Mat001.png|20px]] |
||
| + | | ExperiencePoints= 2,244,000[[File:Sys001.png|20px]] |
||
| + | | Rewards= |
||
| + | | Available=Black Spider |
||
| + | | Arrow=[[File:ArrowBd.png|25px|Unlock next Side Ques mine|link=]] |
||
| + | }} |
||
| + | |||
| + | {{Quests/Quest |
||
| + | | QuestImage=[[File: Qst2741.png|110px|center|Quest Image]] |
||
| + | | QuestName='''King Of Kawanda''' |
||
| + | | QuestGiverImage= |
||
| + | | QuestGiverText= |
||
| + | | Tasks={{Quests/Task| TaskText=1. Find The Crown|TaskImage=[[File:Tok10709.png|25px]]}}{{Quests/Task|TaskText=2. Talk To Black Spider|TaskImage=[[File:Npc34095.png|25px]]}}{{Quests/Task|TaskText=3. Help With The Coronation|TaskImage=[[File:Tok10710.png|25px]]}}{{Quests/Task|TaskText=4. Talk To Black Spider|TaskImage=[[File:Npc34096.png|25px]]}} |
||
| + | | Locations={{Quests/Location|Location=Coronation Room}} |
||
| + | | Coins= 714,000[[File:Mat001.png|20px]] |
||
| + | | ExperiencePoints= 2,252,000[[File:Sys001.png|20px]] |
||
| + | | Rewards= |
||
| + | | Available=Shaman's Task |
||
| + | | Arrow=[[File:ArrowRu.png|25px|End of questline|link=]] |
||
| + | }} |
||
| + | }} |
||
| + | |||
| + | ===<div style="font-size:60%">Side5:Dagda</div>=== |
||
| + | {{Side-Quests |
||
| + | | QuestsImage= |
||
| + | | QuestList= |
||
| + | |||
| + | {{Quests/Quest |
||
| + | | QuestImage=[[File: Qst2761.png|110px|center|Quest Image]] |
||
| + | | QuestName='''Celts In Trouble''' |
||
| + | | QuestGiverImage= |
||
| + | | QuestGiverText= |
||
| + | | Tasks={{Quests/Task| TaskText=1. Talk To Adonix| TaskImage=[[File: Npc34143.png|25px]]}}{{Quests/Task| TaskText=2. Talk To Alchemix| TaskImage=[[File: Npc34145.png|25px]]}}{{Quests/Task| TaskText=3. Help Prepare The Elixir| TaskImage=[[File: Tok10737.png|25px]]}}{{Quests/Task| TaskText=4. Talk To Adonix| TaskImage=[[File: Npc34146.png|25px]]}} |
||
| + | | Locations={{Quests/Location | Location=Celtic Oppidum}} |
||
| + | | Coins= 688,000[[File:Mat001.png|20px]] |
||
| + | | ExperiencePoints= 2,096,000[[File:Sys001.png|20px]] |
||
| + | | Rewards= |
||
| + | | Available=[[File:QuestIn.png|22px|Available after |link=]] [[Terra_(Quests)#Dagda|Words Of Love]]<br>location: Barrow Of Inspiration (last Dagda) |
||
| + | | Arrow=[[File:ArrowBd.png|25px|Unlock next Side Ques mine|link=]] |
||
| + | }} |
||
| + | |||
| + | {{Quests/Quest |
||
| + | | QuestImage=[[File: Qst2762.png|110px|center|Quest Image]] |
||
| + | | QuestName='''A Huge Romantic''' |
||
| + | | QuestGiverImage= |
||
| + | | QuestGiverText= |
||
| + | | Tasks={{Quests/Task| TaskText=1. Find Megafix| TaskImage=[[File: Tok10738.png|25px]]}}{{Quests/Task| TaskText=2. Talk To Megafix| TaskImage=[[File: Npc34147.png|20px]]}}{{Quests/Task| TaskText=3. Help Megafix| TaskImage=[[File: Tok10739.png|25px]]}}{{Quests/Task| TaskText=4. Talk To Breanna|TaskImage=[[File: Npc34148.png|25px]]}} |
||
| + | | Locations={{Quests/Location| Location=Quiet Forest}} |
||
| + | | Coins= 691,000[[File:Mat001.png|20px]] |
||
| + | | ExperiencePoints= 2,104,000[[File:Sys001.png|20px]] |
||
| + | | Rewards= |
||
| + | | Available=Celts In Trouble |
||
| + | | Arrow=[[File:ArrowBd.png|25px|Unlock next Side Ques mine|link=]] |
||
| + | }} |
||
| + | |||
| + | {{Quests/Quest |
||
| + | | QuestImage=[[File: Qst2763.png|110px|center|Quest Image]] |
||
| + | | QuestName='''Warmongering Romans''' |
||
| + | | QuestGiverImage= |
||
| + | | QuestGiverText= |
||
| + | | Tasks={{Quests/Task| TaskText=1. Defeat The Romans| TaskImage=[[File: Tok10740.png|25px]]}}{{Quests/Task| TaskText=2. Talk To Megafix| TaskImage=[[File: Npc34150.png|20px]]}}{{Quests/Task| TaskText=3. Get Things Ready For The Party| TaskImage=[[File: Tok10741.png|25px]]}}{{Quests/Task| TaskText=4. Talk To Adonix| TaskImage=[[File: Npc34149.png|25px]]}} |
||
| + | | Locations= {{Quests/Location| Location=Celtic Battleground}} |
||
| + | | Coins= 694,000[[File:Mat001.png|20px]] |
||
| + | | ExperiencePoints= 2,112,000[[File:Sys001.png|20px]] |
||
| + | | Rewards= |
||
| + | | Available=A Huge Romantic |
||
| + | | Arrow=[[File:ArrowRu.png|25px|End of questline|link=]] |
||
| + | }} |
||
| + | }} |
||
| + | |||
| + | ===<div style="font-size:60%">Side6:Terra Challenges</div>=== |
||
| + | {{Side-Quests |
||
| + | | QuestsImage= |
||
| + | | QuestList= |
||
| + | |||
| + | {{Quests/Quest |
||
| + | | QuestImage=[[File: Qst2771.png|110px|center|Quest Image]] |
||
| + | | QuestName='''Divine Guardian Challenges 1''' |
||
| + | | QuestGiverImage= |
||
| + | | QuestGiverText= |
||
| + | | Tasks={{Quests/Task| TaskText=1. Complete Amaterasu's Challenge (4)| TaskImage=[[File: Tok10747.png|35px]]}}{{Quests/Task| TaskText=2. Complete Susanoo's Challenge| TaskImage=[[File: Tok10748.png|35px]]}}{{Quests/Task| TaskText=3. Complete Kane's Challenge| TaskImage=[[File: Tok10749.png|35px]]}} |
||
| + | | Locations={{Quests/Location|Location=Amaterasu's Challenge<br>Susanoo's Challenge<br>Kane's Challenge}} |
||
| + | | Coins= 1,000,000[[File:Mat001.png|20px]] |
||
| + | | ExperiencePoints= 6,000,000[[File:Sys001.png|20px]] |
||
| + | | Rewards= 1[[File: Mat401.png|35px]] |
||
| + | | Available=[[File:QuestIn.png|22px|Available after |link=]] [[Terra_(Quests)#Kane|Touch Of Winter]]<br>location: Radar Room (last Kane) |
||
| + | |Arrow=[[File:ArrowRu.png|25px|End of questline|link=]] |
||
| + | }} |
||
| + | }} |
||
| + | |||
| + | {{Side-Quests |
||
| + | | QuestsImage= |
||
| + | | QuestList= |
||
| + | |||
| + | {{Quests/Quest |
||
| + | | QuestImage=[[File: Qst2777.png|110px|center|Quest Image]] |
||
| + | | QuestName='''Divine Guardian Challenges 2''' |
||
| + | | QuestGiverImage= |
||
| + | | QuestGiverText= |
||
| + | | Tasks={{Quests/Task| TaskText=1. Complete Pele's Challenge| TaskImage=[[File: Tok10789.png|35px]]}}{{Quests/Task| TaskText=2. Complete Nanook's Challenge| TaskImage=[[File: Tok10790.png|35px]]}}{{Quests/Task| TaskText=3. Complete Akhlut's Challenge| TaskImage=[[File: Tok10791.png|35px]]}} |
||
| + | | Locations={{Quests/Location| Location=Pele's Challenge<br>Nanook's Challenge<br>Akhlut's Challenge}} |
||
| + | | Coins= 1,500,000[[File:Mat001.png|20px]] |
||
| + | | ExperiencePoints= 6,500,000[[File:Sys001.png|20px]] |
||
| + | | Rewards= 1[[File: Mat401.png|35px]]<br> |
||
| + | | Available=[[Terra_(Quests)#Challenges_1/3|Divine Guardian Challenges 1]] &<br> [[File:QuestIn.png|22px|Available after |link=]] [[Terra_(Quests)#Kane|General's Research]]<br>location: Confiscated Submarine (last Akhlut) |
||
| + | |Arrow=[[File:ArrowRu.png|25px|End of questline|link=]] |
||
| + | }} |
||
| + | }} |
||
| + | {| width="100%" |
||
| + | | style="text-align:right" |[[File:NAVtop.png|50px|link=|class=shiny grow|link=#top|Return to Top page]] |
||
| + | |} |
||
| + | __NOTOC__ |
||
| − | =Disclaimer= |
||
| − | <br /> |
||
| − | In case your group fits the criteria |
||
| − | -International non-secret group with 200+ members |
||
| − | -National non-secret group with active members |
||
| − | and you can´t find it in this list, please let me know at rbanic@pixelfederation.com |
||
| + | [[Category:Quests]] |
||
| − | <br /> |
||
| − | [[Category:Game]] |
||
Revision as of 15:46, 19 September 2022


|
| This page shows information about the quests and tasks as shown in game in the task windows. Yellow arrows for Main Quests, Orange arrows for Father Quests, Blue arrows for optional Side Quests. |
Main map
| IMAGE | QUEST | LOCATION | START | TASKS | QUEST BONUS | ||
|---|---|---|---|---|---|---|---|
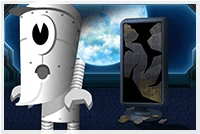 |
Trouble On Board | Camp Damaged Spaceship |
|
627,000 |
1,669,000 | ||
| Available after: location: Pyramid Of Restoration (last Hades) |
|||||||
 |
Building The Shuttle | Camp Spaceship's Engineering |
(Camp) |
|
628,000 |
1,676,000 | |
| Available after: Trouble On Board | |||||||
 |
Sweet And Starchy | Camp Sweet Potato Coast |
(Camp) |
|
629,000 |
1,683,000 | |
| Available after: Building The Shuttle | Unlocks | ||||||
 |
Jewels of Meadows | Camp Flowery Garden |
(Camp) |
|
630,000 |
1,690,000 | |
| Available after: Sweet And Starchy | Unlocks | ||||||
 |
Goliath Fish | Camp Icy Coast |
(Camp) |
|
631,000 |
1,697,000 | |
| Available after: Jewels of Meadows | Unlocks | ||||||
 |
Eternal And Shiny | Camp Chromite Mine |
(Camp) |
|
632,000 |
1,704,000 | |
| Available after: Goliath Fish | Unlocks | ||||||
 |
Elder Alder | Camp Forested Mountainside |
(Camp) |
|
633,000 |
1,711,000 | |
| Available after: Eternal And Shiny | Unlocks | ||||||
 |
Have A Gneiss Day! | Camp Forest Quarry |
(Camp) |
|
634,000 |
1,718,000 | |
| Available after: Elder Alder | Unlocks | ||||||
 |
My Precious Opal | Camp Old Shipwrecks |
(Camp) |
|
635,000 |
1,725,000 | |
| Available after: Have A Gneiss Day! | Unlocks | ||||||
 |
Gods' Quarters | Spaceship's Main Deck |
|
636,000 |
1,732,000 | ||
| Available after: My Precious Opal | Unlocks | ||||||
 |
Hello? Rusty Speaking! | Communication Room |
|
637,000 |
1,739,000 | ||
| Available after: Gods' Quarters | |||||||
 |
Source Of The Signal | Hidden Underground Facility |
|
638,000 |
1,746,000 | ||
| Available after: Hello? Rusty Speaking! | |||||||
main stage 2
| IMAGE | QUEST | LOCATION | START | TASKS | QUEST BONUS | ||
|---|---|---|---|---|---|---|---|
 |
Saving Terra | Multiple Locations Hidden Underground Facility |
|
650,000 |
1,760,000 | ||
| Available after: Source Of The Signal | Unlocks ??? | ||||||

|
Father
stage 1
| IMAGE | QUEST | LOCATION | START | TASKS | QUEST BONUS | ||
|---|---|---|---|---|---|---|---|
 |
Magnetic Man | Town Of Yahagi |
|
739,000 |
2,453,000 | ||
| Available after: location: Mount Fuji (last Susanoo) |
|||||||
stage 2
| IMAGE | QUEST | LOCATION | START | TASKS | QUEST BONUS | ||
|---|---|---|---|---|---|---|---|
 |
Slime Out Of Space | Secret Laboratory |
|
740,000 |
2,460,000 | ||
| Available after: location: Kane's Workshop (last Pele) |
|||||||
stage 3
| IMAGE | QUEST | LOCATION | START | TASKS | QUEST BONUS | ||
|---|---|---|---|---|---|---|---|
 |
Secrets In Ice | Arctic Wilderness |
|
741,000 |
2,467,000 | ||
| Available after: location: Confiscated Submarine (last Akhlut) |
|||||||
stage 4
| IMAGE | QUEST | LOCATION | START | TASKS | QUEST BONUS | ||
|---|---|---|---|---|---|---|---|
 |
Ancient Wisdom | Near Timbuktu |
|
742,000 |
2,474,000 | ||
| Available after: location: Dense Jungle (last Aja) |
|||||||
stage 5
| IMAGE | QUEST | LOCATION | START | TASKS | QUEST BONUS | ||
|---|---|---|---|---|---|---|---|
 |
The Father Of Electricity | Tesla's Research Station |
|
743,000 |
2,481,000 | ||
| Available after: location: Barrow of Inspiration (last Dagda) |
|||||||
stage 6
| IMAGE | QUEST | LOCATION | START | TASKS | QUEST BONUS | ||
|---|---|---|---|---|---|---|---|
 |
Is Anybody There? | Aboard The Spaceship |
|
744,000 |
2,488,000 | ||
| Available after: location: Dark Shrine (lastMorrigan) |
|||||||
|
|
Amaterasu
| IMAGE | QUEST | LOCATION | START | TASKS | QUEST BONUS | ||
|---|---|---|---|---|---|---|---|
 |
Mechanical Buddy | Peaceful Japanese Village |
|
639,000 |
1,753,000 | ||
| Available after: location: Hidden Underground Facility (last main) |
|||||||
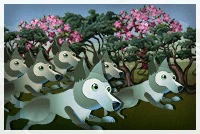 |
Among The Wolves | Wolf Hills |
|
639,000 |
1,753,000 | ||
| Available after: Mechanical Buddy | |||||||
 |
Sun's Shyness | Heavenly Cave |
|
641,000 |
1,767,000 | ||
| Available after: Among The Wolves | |||||||
 |
She's Back! | Sacred Village |
|
642,000 |
1,774,000 | ||
| Available after: Sun's Shyness | |||||||
 |
Impudent Demons | Haunted Hamlet |
|
643,000 |
1,781,000 | ||
| Available after: She's Back! | |||||||
 |
Broken Sword | All Across Japan |
|
644,000 |
1,788,000 | ||
| Available after: Impudent Demons | |||||||
 |
Legendary Smith | Hattori Hanzo's Forge |
|
645,000 |
1,795,000 | ||
| Available after: Broken Sword | |||||||
 |
Susanoo's Tsunami | Flooded Coast |
|
646,000 |
1,802,000 | ||
| Available after: Legendary Smith | |||||||
 |
The First Divine Sphere | Temple Of Amaterasu |
|
647,000 |
1,809,000 | ||
| Available after: Susanoo's Tsunami | |||||||
 |
Divine Protectress | Wrecked City |
|
648,000 |
1,816,000 | ||
| Available after: The First Divine Sphere | |||||||
|
|
Sidequests:Amaterasu
| IMAGE | QUEST | LOCATION | START | TASKS | QUEST BONUS | ||
|---|---|---|---|---|---|---|---|
 |
Potential Champion | Outside Kateshi's Castle |
|
648,000 |
1,816,000 | ||
| Available after: location: Wrecked City (last Amaterasu) |
|||||||
 |
In The Belly Of The Beast | Kateshi's Castle | 651,000 |
1,824,000 | |||
| Available after: Potential Champion | |||||||
 |
Winner Takes All | Centre Of Kateshi's Castle |
|
654,000 |
1,832,000 | ||
| Available after: In The Belly Of The Beast | |||||||
|
|
Susanoo
| IMAGE | QUEST | LOCATION | START | TASKS | QUEST BONUS | ||
|---|---|---|---|---|---|---|---|
 |
Susanoo's Right Hand | Spaceship's Laboratory |
|
649,000 |
1,823,000 | ||
| Available after: location: Wrecked City (last Amaterasu) |
|||||||
 |
Chasing The Storm | Village In Turmoil |
|
650,000 |
1,830,000 | ||
| Available after: Susanoo's Right Hand | |||||||
 |
Way Of The Samurai | Samurai School |
|
651,000 |
1,837,000 | ||
| Available after: Chasing The Storm | |||||||
 |
In The Eye Of The Storm | Susanoo's Fortress |
|
652,000 |
1,844,000 | ||
| Available after: Way Of The Samurai | |||||||
 |
Tainted Memories | M.T.R. |
|
653,000 |
1,851,000 | ||
| Available after: In The Eye Of The Storm | |||||||
 |
The Regretful God | Japanese Seaside Town |
|
654,000 |
1,858,000 | ||
| Available after: Tainted Memories | |||||||
 |
The Thirsty Dragon | The Serpent Road |
|
655,000 |
1,865,000 | ||
| Available after: The Regretful God | |||||||
 |
Dead Keeper | Misty Underworld |
|
656,000 |
1,872,000 | ||
| Available after: The Thirsty Dragon | |||||||
 |
The Second Divine Sphere | Secluded Sanctuary |
|
657,000 |
1,879,000 | ||
| Available after: Dead Keeper | |||||||
 |
Where To Next? | Mount Fuji |
|
658,000 |
1,886,000 | ||
| Available after: The Second Divine Sphere | |||||||
 |
The Nameless One |
|
330,000 |
945,000 | |||
| Available after: Where To Next? | |||||||
|
|
Pele
| IMAGE | QUEST | LOCATION | START | TASKS | QUEST BONUS | ||
|---|---|---|---|---|---|---|---|
 |
Raging Volcano | Burning Hawaiian Village |
|
659,000 |
1,893,000 | ||
| Available after: location: Mount Fuji (last Susanoo) |
|||||||
 |
Servitor Unaccounted For | Place of Serenity |
|
660,000 |
1,900,000 | ||
| Available after: Raging Volcano | |||||||
 |
The Fiery Goddess | Halema‘Uma‘U |
|
661,000 |
1,907,000 | ||
| Available after: Servitor Unaccounted For | |||||||
 |
Lost Children | Tahiti |
|
662,000 |
1,914,000 | ||
| Available after: The Fiery Goddess | |||||||
 |
Secrets Of The Pacific | On the Ocean Floor |
|
663,000 |
1,921,000 | ||
| Available after: Lost Children | |||||||
 |
General's Gambit | General's Fortress |
|
664,000 |
1,928,000 | ||
| Available after: Secrets Of The Pacific | |||||||
 |
Fire And Water | Deep-Sea Facility |
|
665,000 |
1,935,000 | ||
| Available after: General's Gambit | |||||||
 |
Fiery Race | Mauna Kea |
|
666,000 |
1,942,000 | ||
| Available after: Fire And Water | |||||||
 |
The Third Divine Sphere | Temple Of Pele |
|
667,000 |
1,949,000 | ||
| Available after: Fire And Water | |||||||
 |
Like Mother Like Daughters | Kane's Workshop |
|
668,000 |
1,956,000 | ||
| Available after: The Third Divine Sphere | |||||||
|
|
Kane
| IMAGE | QUEST | LOCATION | START | TASKS | QUEST BONUS | ||
|---|---|---|---|---|---|---|---|
 |
Power Of Creation | Village of Plenty |
|
669,000 |
1,963,000 | ||
| Available after: location: Kane's Workshop (last Pele) |
|||||||
 |
The Last Wave | Surfers Paradise |
|
670,000 |
1,970,000 | ||
| Available after: Power Of Creation | |||||||
 |
Crustacean's Treasure | Crabby Coast |
|
671,000 |
1,977,000 | ||
| Available after: The Last Wave | |||||||
 |
From Head To Toe | Spaceship's Workshop |
|
672,000 |
1,984,000 | ||
| Available after: Crustacean's Treasure | |||||||
 |
The Other Side Of The Coin | Kaho'olawe |
|
673,000 |
1,991,000 | ||
| Available after: From Head To Toe | |||||||
 |
General's Curse | Blighted Village |
|
674,000 |
1,998,000 | ||
| Available after: The Other Side Of The Coin | |||||||
 |
Doing And Undoing | Tainted Land |
|
675,000 |
2,005,000 | ||
| Available after: General's Curse | |||||||
 |
The Springs Of Life | Land of Springs |
|
676,000 |
2,012,000 | ||
| Available after: Doing And Undoing | |||||||
 |
The Fourth Divine Sphere | Ka ʻaina a Kane-Huna-Moku |
|
677,000 |
2,019,000 | ||
| Available after: Land of Springs | |||||||
 |
Touch Of Winter | Radar Room |
|
678,000 |
2,026,000 | ||
| Available after: The Fourth Divine Sphere | |||||||
Sidequests:Kane
| IMAGE | QUEST | LOCATION | START | TASKS | QUEST BONUS | ||
|---|---|---|---|---|---|---|---|
 |
A Day At The Beach | Sandy Beach |
|
678,000 |
2,026,000 | ||
| Available after: location: Radar Room (last Kane) |
|||||||
 |
Shark Hunt | Shelf Sea |
|
681,000 |
2,034,000 | ||
| Available after: A Day At The Beach | |||||||
 |
Jaws From The Past | Bottom Of Mariana Trench |
|
684,000 |
2,042,000 | ||
| Available after: Shark Hunt | |||||||
Challenges 1/3
| IMAGE | QUEST | LOCATION | START | TASKS | QUEST BONUS | ||
|---|---|---|---|---|---|---|---|
 |
Divine Guardian Challenges 1 | Amaterasu's Challenge Susanoo's Challenge Kane's Challenge |
|
1,000,000 |
6,000,000 | ||
| Available after: location: Radar Room (last Kane) |
1 | ||||||
|
|
Nanook
| IMAGE | QUEST | LOCATION | START | TASKS | QUEST BONUS | ||
|---|---|---|---|---|---|---|---|
 |
The Northern Connection | Arctic Base |
|
679,000 |
2,033,000 | ||
| Available after: location: Radar Room (last KAne) |
|||||||
 |
Tracking Nanook | Land Of Ice |
|
680,000 |
2,040,000 | ||
| Available after: The Northern Connection | |||||||
 |
Of Stars And Spirits | Spirit World |
|
681,000 |
2,047,000 | ||
| Available after: Tracking Nanook | |||||||
 |
Furballs In Trouble | Massive Iceberg |
|
682,000 |
2,054,000 | ||
| Available after: Of Stars And Spirits | |||||||
 |
Human Or Bear? | Igloo Village |
|
683,000 |
2,061,000 | ||
| Available after: Furballs In Trouble | |||||||
 |
Battle On Icebergs | Icy Battlefield |
|
684,000 |
2,068,000 | ||
| Available after: Human Or Bear? | |||||||
 |
Broken Ice | Arctic Coast |
|
685,000 |
2,075,000 | ||
| Available after: Battle On Icebergs | |||||||
 |
Nanook's Secrets | Nanook's Shuttle |
|
686,000 |
2,082,000 | ||
| Available after: Broken Ice | |||||||
 |
The Fifth Divine Sphere | Spirit World Outskirts |
|
687,000 |
2,089,000 | ||
| Available after: Nanook's Secrets | |||||||
 |
The Sea Wolf | The Arctic Ocean |
|
688,000 |
2,096,000 | ||
| Available after: The Fifth Divine Sphere | 1 | ||||||
Sidequests:Nanook
| IMAGE | QUEST | LOCATION | START | TASKS | QUEST BONUS | ||
|---|---|---|---|---|---|---|---|
 |
The Freezing Egyptian | Icy Cove |
|
688,000 |
2,096,000 | ||
| Available after: location: The Arctic Ocean (last Nanook) |
|||||||
 |
Possessive Penguins | Old Submarine |
|
691,000 |
2,104,000 | ||
| Available after: The Freezing Egyptian | |||||||
 |
Move It, Move It | Arctic Icebergs |
|
694,000 |
2,112,000 | ||
| Available after: Possessive Penguins | |||||||
|
|
Akhlut
| IMAGE | QUEST | LOCATION | START | TASKS | QUEST BONUS | ||
|---|---|---|---|---|---|---|---|
 |
Akhlut's Right Fin | Akhlut's Workshop |
|
689,000 |
2,103,000 | ||
| Available after: location: The Arctic Ocean (last Nanook) |
|||||||
 |
Against His Will | General's Factory |
|
690,000 |
2,110,000 | ||
| Available after: Akhlut's Right Fin | |||||||
 |
Ocean Hide-and-seek | Deep Ocean |
|
691,000 |
2,117,000 | ||
| Available after: Against His Will | |||||||
 |
Crystal Clear | Murky Waters |
|
692,000 |
2,124,000 | ||
| Available after: Ocean Hide-and-seek | |||||||
 |
Sea World From Hell | Ocean Prison |
|
693,000 |
2,131,000 | ||
| Available after: Crystal Clear | |||||||
 |
Akhlut's Army | Underwater Training Grounds |
|
694,000 |
2,138,000 | ||
| Available after: Sea World From Hell | |||||||
 |
Ocean Strikes Back | Ocean Fortress |
|
695,000 |
2,145,000 | ||
| Available after: Akhlut's Army | |||||||
 |
The Legend Of Akhlut | Theatre On Ice |
|
696,000 |
2,152,000 | ||
| Available after: Ocean Strikes Back | |||||||
 |
The Sixth Divine Sphere | Orca Racing Track |
|
697,000 |
2,159,000 | ||
| Available after: The Legend Of Akhlut | |||||||
 |
General's Research | Confiscated Submarine |
|
698,000 |
2,166,000 | ||
| Available after: The Sixth Divine Sphere | 1 | ||||||
Sidequests:Ahklut
Challenges 2/3
| IMAGE | QUEST | LOCATION | START | TASKS | QUEST BONUS | ||
|---|---|---|---|---|---|---|---|
 |
Divine Guardian Challenges 2 | Pele's Challenge Nanook's Challenge Akhlut's Challenge |
|
1,500,000 |
6,500,000 | ||
| Available after: Divine Guardian Challenges 1 & location: Confiscated Submarine (last Akhlut) |
1 | ||||||
|
|
Anansi
| IMAGE | QUEST | LOCATION | START | TASKS | QUEST BONUS | ||
|---|---|---|---|---|---|---|---|
 |
Warrior's Song | Savannah Town |
|
699,000 |
2,173,000 | ||
| Available after: location: Confiscated Sbmarine (last Ahklut) |
|||||||
 |
Itsy-bitsy Spider | Temple Of Anansi |
|
700,000 |
2,180,000 | ||
| Available after: Warrior's Song | |||||||
 |
Savannah Poetry | Den Of Poets |
|
701,000 |
2,187,000 | ||
| Available after: Itsy-bitsy Spider | |||||||
 |
Quenching The Thirst | Dry Waterhole |
|
702,000 |
2,194,000 | ||
| Available after: Savannah Poetry | |||||||
 |
Long Live The Queen | Huge Anthill |
|
703,000 |
2,201,000 | ||
| Available after: Quenching The Thirst | |||||||
 |
Spider's Truth | Anthill Depths |
|
704,000 |
2,208,000 | ||
| Available after: Long Live The Queen | |||||||
 |
Reading Is Fundamental! | Anansi's Library |
|
705,000 |
2,215,000 | ||
| Available after: Spider's Truth | |||||||
 |
Diggy The Fixer | Merchant Town |
|
706,000 |
2,222,000 | ||
| Available after: Reading Is Fundamental! | |||||||
 |
Spider's Legs | Savannah Sacred Ground |
|
707,000 |
2,229,000 | ||
| Available after: Diggy The Fixer | |||||||
 |
Finding The Healer | Aja's Jungle |
|
708,000 |
2,236,000 | ||
| Available after: Spider's Legs | 1 | ||||||
|
|
Sidequests:Anansi
| IMAGE | QUEST | LOCATION | START | TASKS | QUEST BONUS | ||
|---|---|---|---|---|---|---|---|
 |
Black Spider | Kawanda Jungle |
|
708,000 |
2,236,000 | ||
| Available after: location: Aja's Jungle (last Anansi) |
|||||||
 |
Shaman's Task | City Of Kawanda |
|
711,000 |
2,244,000 | ||
| Available after: Black Spider | |||||||
 |
King Of Kawanda | Coronation Room |
|
714,000 |
2,252,000 | ||
| Available after: Shaman's Task | |||||||
|
|
Aja
| IMAGE | QUEST | LOCATION | START | TASKS | QUEST BONUS | ||
|---|---|---|---|---|---|---|---|
 |
Poisoned Jungle | Shrines Of Aja |
|
709,000 |
2,243,000 | ||
| Available after: location: Aja's Jungle (last Anansi) |
|||||||
 |
Raised By Monkeys | Arzan's School Of Advanced Learning |
|
710,000 |
2,250,000 | ||
| Available after: Poisoned Jungle | |||||||
 |
Place Of Healing | Aja's Clinic |
|
711,000 |
2,257,000 | ||
| Available after: Raised By Monkeys | |||||||
 |
On The Way To Other Side | The World Of Clouds |
|
712,000 |
2,264,000 | ||
| Available after: Place Of Healing | |||||||
 |
Sundiata's Nemesis | Sundiata's Village |
|
713,000 |
2,271,000 | ||
| Available after: On The Way To Other Side | |||||||
 |
Dangerous Journey | Across Africa |
|
714,000 |
2,278,000 | ||
| Available after: Sundiata's Nemesis | |||||||
 |
Garden Of Eden | Cradle Of Humankind |
|
715 000 |
2,285,000 | ||
| Available after: Dangerous Journey | |||||||
 |
Pest Control | Floating Village |
|
716 000 |
2,292,000 | ||
| Available after: Garden Of Eden | |||||||
 |
The Seventh And The Eighth Sphere | Aja's Sanctuary |
|
717 000 |
2,299,000 | ||
| Available after: Pest Control | |||||||
 |
Holey Pouch | Dense Jungle |
|
718,000 |
2,306,000 | ||
| Available after: The Seventh And The Eighth Sphere | 1 | ||||||
|
|
Dagda
| IMAGE | QUEST | LOCATION | START | TASKS | QUEST BONUS | ||
|---|---|---|---|---|---|---|---|
 |
Harp Of Four Seasons | Dagda's Barrow |
|
719,000 |
2,313,000 | ||
| Available after: location: Danse Jungle |
|||||||
 |
Drinking With Honour | Warrior Hamlet |
|
720,000 |
2,320,000 | ||
| Available after: Harp Of Four Seasons | |||||||
 |
Monstrous Gamble | Scary Inn |
|
721,000 |
2,327,000 | ||
| Available after: Drinking With Honour | |||||||
 |
Restless Spirits | Forests Of Life And Death |
|
722,000 |
2,334,000 | ||
| Available after: Monstrous Gamble | |||||||
 |
Fairy Pets | Fae Land |
|
723,000 |
2,341,000 | ||
| Available after: Restless Spirits | |||||||
 |
Night Of Bonfires | Beltane Festival |
|
724 000 |
2 348 000 | ||
| Available after: Fairy Pets | |||||||
 |
Banshee's Voice | Banshee's Swamp |
|
725,000 |
2,355,000 | ||
| Available after: Night Of Bonfires | |||||||
 |
Thirsty Nephew | Druids' Forest |
|
726,000 |
2,362,000 | ||
| Available after: Banshee's Voice | |||||||
 |
A Wild Night Out | Celtic Countryside |
|
727,000 |
2,369,000 | ||
| Available after: Thirsty Nephew | |||||||
 |
Words Of Love | Barrow Of Inspiration |
|
728,000 |
2,376,000 | ||
| Available after: A Wild Night Out | 1 | ||||||
|
|
Sidequests:Dagda
| IMAGE | QUEST | LOCATION | START | TASKS | QUEST BONUS | ||
|---|---|---|---|---|---|---|---|
 |
Celts In Trouble | Celtic Oppidum |
|
688,000 |
2,096,000 | ||
| Available after: location: Barrow Of Inspiration (last Dagda) |
|||||||
 |
A Huge Romantic | Quiet Forest |
|
691,000 |
2,104,000 | ||
| Available after: Celts In Trouble | |||||||
 |
Warmongering Romans | Celtic Battleground |
|
694,000 |
2,112,000 | ||
| Available after: A Huge Romantic | |||||||
|
|
Morrigan
| IMAGE | QUEST | LOCATION | START | TASKS | QUEST BONUS | ||
|---|---|---|---|---|---|---|---|
 |
A Show For Morrigan | Larpers' Grove |
|
729,000 |
2,383,000 | ||
| Available after: location: Barrow of Inspiration (last Dagda) |
|||||||
 |
Once In A Millenium | Druid Ancestral Tomb |
|
730,000 |
2,390,000 | ||
| Available after: A Show For Morrigan | |||||||
 |
Morrigan's Prophecies | Celtic Land |
|
731,000 |
2,397,000 | ||
| Available after: Once In A Millenium | |||||||
 |
Plague Of Crows | Morrigan's Mansion |
|
732,000 |
2,404,000 | ||
| Available after: Morrigan's Prophecies | |||||||
 |
Lake Demon | Misty Lakes |
|
733,000 |
2,411,000 | ||
| Available after: Plague Of Crows | |||||||
 |
Failed Romance | Warrior Underworld |
|
734,000 |
2,418,000 | ||
| Available after: Lake Demon | |||||||
 |
Druid Trade-off | Sacred Battlefield |
|
735,000 |
2,425,000 | ||
| Available after: Failed Romance | |||||||
 |
Of Gods And Tentacles | Slimy Canyon |
|
736,000 |
2,432,000 | ||
| Available after: Druid Trade-off | |||||||
 |
To Fear Morrigan | Messy Hamlet |
|
737,000 |
2,439,000 | ||
| Available after: Of Gods And Tentacles | |||||||
 |
The Last Sphere | Dark Shrine |
|
738,000 |
2,446,000 | ||
| Available after: To Fear Morrigan | 1 | ||||||
|
|
Side Quests 7
Side1:Amaterasu
| IMAGE | QUEST | LOCATION | START | TASKS | QUEST BONUS | ||
|---|---|---|---|---|---|---|---|
|
Potential Champion | Outside Kateshi's Castle |
|
648,000 |
1,816,000 | ||
| Available after: location: Wrecked City (last Amaterasu) |
|||||||
|
In The Belly Of The Beast | Kateshi's Castle | 651,000 |
1,824,000 | |||
| Available after: Potential Champion | |||||||
|
Winner Takes All | Centre Of Kateshi's Castle |
|
654,000 |
1,832,000 | ||
| Available after: In The Belly Of The Beast | |||||||
Side2:Kane
| IMAGE | QUEST | LOCATION | START | TASKS | QUEST BONUS | ||
|---|---|---|---|---|---|---|---|
|
A Day At The Beach | Sandy Beach |
|
678,000 |
2,026,000 | ||
| Available after: location: Radar Room (last Kane) |
|||||||
|
Shark Hunt | Shelf Sea |
|
681,000 |
2,034,000 | ||
| Available after: A Day At The Beach | |||||||
|
Jaws From The Past | Bottom Of Mariana Trench |
|
684,000 |
2,042,000 | ||
| Available after: Shark Hunt | |||||||
Side3:Nanook
| IMAGE | QUEST | LOCATION | START | TASKS | QUEST BONUS | ||
|---|---|---|---|---|---|---|---|
|
The Freezing Egyptian | Icy Cove |
|
688,000 |
2,096,000 | ||
| Available after: location: The Arctic Ocean (last Nanook) |
|||||||
|
Possessive Penguins | Old Submarine |
|
691,000 |
2,104,000 | ||
| Available after: The Freezing Egyptian | |||||||
|
Move It, Move It | Arctic Icebergs |
|
694,000 |
2,112,000 | ||
| Available after: Possessive Penguins | |||||||
Side4:Anansi
| IMAGE | QUEST | LOCATION | START | TASKS | QUEST BONUS | ||
|---|---|---|---|---|---|---|---|
|
Black Spider | Kawanda Jungle |
|
708,000 |
2,236,000 | ||
| Available after: location: Aja's Jungle (last Anansi) |
|||||||
|
Shaman's Task | City Of Kawanda |
|
711,000 |
2,244,000 | ||
| Available after: Black Spider | |||||||
|
King Of Kawanda | Coronation Room |
|
714,000 |
2,252,000 | ||
| Available after: Shaman's Task | |||||||
Side5:Dagda
| IMAGE | QUEST | LOCATION | START | TASKS | QUEST BONUS | ||
|---|---|---|---|---|---|---|---|
|
Celts In Trouble | Celtic Oppidum |
|
688,000 |
2,096,000 | ||
| Available after: location: Barrow Of Inspiration (last Dagda) |
|||||||
|
A Huge Romantic | Quiet Forest |
|
691,000 |
2,104,000 | ||
| Available after: Celts In Trouble | |||||||
|
Warmongering Romans | Celtic Battleground |
|
694,000 |
2,112,000 | ||
| Available after: A Huge Romantic | |||||||
Side6:Terra Challenges
| IMAGE | QUEST | LOCATION | START | TASKS | QUEST BONUS | ||
|---|---|---|---|---|---|---|---|
|
Divine Guardian Challenges 1 | Amaterasu's Challenge Susanoo's Challenge Kane's Challenge |
|
1,000,000 |
6,000,000 | ||
| Available after: location: Radar Room (last Kane) |
1 | ||||||
| IMAGE | QUEST | LOCATION | START | TASKS | QUEST BONUS | ||
|---|---|---|---|---|---|---|---|
|
Divine Guardian Challenges 2 | Pele's Challenge Nanook's Challenge Akhlut's Challenge |
|
1,500,000 |
6,500,000 | ||
| Available after: Divine Guardian Challenges 1 & location: Confiscated Submarine (last Akhlut) |
1 | ||||||
|
|