Home Camp is your base which is filled with equipment needed to play Diggy's. This is where you will use your regeneration and capacity equipment. Also located here is your Kitchen, Foundry, Craftsman, and Caravan which produce items needed in the game. As well as space to place your decorations.
Camp Equipment[]
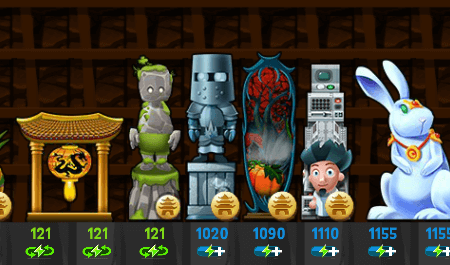
Buying and regularly updating your Camp equipment is the number 1 factor to good progression in the game. There are 2 types: 1 cap(acity) = storage  2 regeneration = rate at which energy is created
  . the equip come in 4 heights 1,2,3,4 and 4 widths 1 - 4... The key is to create a good balance between cap and regen for your game playing style.
Items Available In Shop[]
Achievement[]
Tutorial Video[]
https://www.youtube.com/watch?v=JUCgMJoKH38
Professor's Switch System[]
The PSS allows you to have 2 setups with your camp equipment. Generally this would be used for a playtime mode and an away from keyboard mode (eg. sleeping or working). While this can be accomplished manually by storing and placing your equipment individually, as you progress in the game and digging out your home camp having the switch system saves time.
| Name | Lvl | |
|---|---|---|
| Professor's Switch System | 27 | 250 |
kut
Set Up[]
- To properly set up your camp when you purchase this you will be using several game tools
- Power of Equipment button

- Energy bar information window (mouse held over the green energy bar at the top of your game screen)
- To see the effect of your equipment in either mode while setting up the PSS it is best to have an empty (or close to) energy bar.
- Power of Equipment button

- You will also need to know the types of equipment available to use
- Capacity this increases the max amount of energy you can hold or "store" before you will stop making energy.
- Regeneration this equipment will increase how much energy per hour you can create without cooking
- Capacity
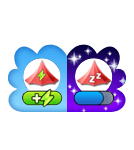
- Starting with an empty camp, look at the top of your game screen to see which mode you are in. There will be a button next to the theme change (red tent icon with arrows).
- Day Mode -
- Night Mode -
- Day Mode -
- Keeping an eye on your energy information window as you place your equipment for the two modes follow these general concepts. Depending on your type of play and the equipment available to you, you will need to adjust as needed.
- Day mode - Very little capacity, all your highest regeneration equipment. Recommended is the amethyst cart for 2000 capacity (or if you are able to purchase the ruby cart for 3000 capacity)the rest of your camp is regeneration equipment, everything you can fit.
- Night mode - This is a balancing act. You need to place out amounts of both equipment so that depending on the length of time you are expecting to be away from the computer you will fill your energy but not over fill and not be waiting days for it to fill up. So if you typically sleep 8 hours you want to watch your energy information window as you place your equipment. Recommended is to place one capacity - one energy piece at a time checking the energy info after each until your camp is full and your energy capacity will refill in the amount of time you will be gone. Give yourself wiggle room of 30 minutes if you need it.
Examples of Setup[]
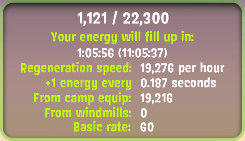 Notice if you scroll your mouse over the green bar at the top of your game screen you will see something similar to this pop up.
- YOUR ENERGY: How much energy you currently have (1,121) / how much you can store before you stop regenerating energy (22,300)
- REGENERATION SPEED: (19,276 per hour) This is how fast you will regenerate energy
- FROM CAMP EQUIPMENT: Once you purchase equipment this number will change
- FROM WINDMILLS: Starting out if a neighbor has given you windmills this is where you can see how much energy you receive from them. This player has 0 windmills with an output of 0 energy each per hour
- BASIC RATE: Regardless of how much equipment you have or do not have out you will always receive this.

- This is an example of the same player if they were to change out one piece of capacity equipment. YOUR ENERGY WILL FILL UP IN will tell you how long you will continue to regenerate energy (1 hour 08 minutes 50 seconds) and that at (21:24:06) in the evening they will be full.

- This is an example of the same player if they were to change out one piece of regeneration equipment. The energy will regenerate faster, but caps earlier. So the plater has to (A) expend energy or (B) place out capacity equipment. Here also take note how that one piece of equipment affects the Regeneration Speed. They have gone from 18,926 per hour (+1 energy every 0.191 seconds) to 19,518 per hour (+1 energy every 0.185 seconds)
- How you set up your camp is up to each individual player. General rules of thumb are when playing have your equipment set up to fill in one hour, over night fill to your normal sleep time (ie: 8 hours) plus 30 minutes leeway (or 8.5 hours). Initial set up of the PSS you will need to work and tweek your equipment until it comes out right. Work from the outside in with your highest equipment to the outside. This way if you need to replace a capacity with a regeneration (or vice versa) it is easy enough to switch them out and you know your best pieces are always out.
Tutorial Video[]
https://www.youtube.com/watch?v=jornvL8x-Fo
Additional Information[]
- To switch between the 2 modes simply click the button give your camp a few seconds to save itself before exiting out of the game. It is recommended that you refresh your game to make sure night mode was saved before leaving the computer.
- You use the same items in both modes, the system saves the setting of your items, you can use the same ones in both modes. You do not need to buy different items for them
- Anytime you purchase new equipment and place it in your camp your switch system will automatically update to that new setup. Don't forget to add it to both modes if needed.
Grid Unlock[]
You will need to dig out grids or debris from the 3 levels in your camp to add more equipment to help you progress further. Each grid you dig out will allow you to place more equipment out thus creating or storing more energy and allowing you to dig in the mines longer. Clearing your debris is also an achievement in the game. It is recommended that you keep your foundry making iron and bronze for those later grids and keep them on hand.
Cost Per Grid[]
Achievement[]
Decorations[]
Spruce up your camp by collecting decorations from in-game events or buying them in the shop. Treasures found in the mines can also be displayed in your home camp.
Decorations Use In Game[]
Achievement[]
Decode[]
During your journey in Diggy's Adventure, you will collect various journal pages from Diggy's father. These are required, at certain points in the game, to be decoded by Rusty. Once decoded they will send you further in the search for D.A.D.
Table[]
Caravan[]
Caravans are additional means of acquiring various materials in Diggy's Adventures. In order to use caravans players have to first purchase them, you can have up to 6 caravans in your camp. The prices of each caravan are listed here: Camp_Equipment#Extras
List of items acquirable with caravans[]
| Name | Qty | Qty | Qty | |||||||
|---|---|---|---|---|---|---|---|---|---|---|
| Coin | 20-45 | 0:10 | 30 | 90-150 | 2:00 | 100 | - | - | - | |
| Sugar | 5 | 0:30 | 30 | - | - | - | - | - | - | |
| Flour | 5 | 0:30 | 30 | - | - | - | - | - | - | |
| Lumber | 1 | 0:30 | 50 | 3 | 2:00 | 150 | 10 | 8:00 | 500 | |
| Apple | 8 | 0:30 | 25 | 20 | 2:00 | 75 | 50 | 8:00 | 250 | |
| Coal | 1 | 0:30 | 100 | 3 | 2:00 | 300 | 10 | 8:00 | 1000 | |
| Stone | 1 | 0:30 | 75 | 3 | 2:00 | 225 | 10 | 8:00 | 750 | |
| Experience Points | 5000 | 12:00 | 4000 | - | - | - | - | - | - |
Popular Caravan Strategies[]
Achievement Strategy[]
This strategy is the fastest way to finish the Caravan Skipper Achievement It is recommended to anyone who hasn't completed the achievement. The 10 minute option to send caravan for coins is the only one that is free (you usually break even, or earn a small sum of money). As you can see on the picture below, the caravans will bring back exactly the same number of coins that was invested in it (150).

Coin Earning[]
For earning coins using the caravans, the 2 hour option is actually better. While the theoretical profit can be bigger from the 10-minute trip, also the risk is a lot higher. With 2-hour trips it's almost impossible to lose and usually you will be making profit. They are also good if you want to "set it and forget it" and still let it bring some small profits. The picture below illustrates the caravans earning the player 84 coins.

Apple Strategy[]
Sending your caravans for apples is by far the most popular and the most optimal way of using them. Most high level players choose to send their beasts of burden for apples. The reason is simple - the coins used to pay the tax for the caravan would convert into a lot less experience than the apples do, in all time options.
Below you can see a set of caravans going for apples, using the 30 minute trip. The total cost in coins is 150. For this price you will get 48 apples, which translates into 456 experience when spent on the apple crown. The downside to this strategy is that it is actually quite slow (900 experience per hour, at the cost of 300 coins).

Sugar & Flour[]
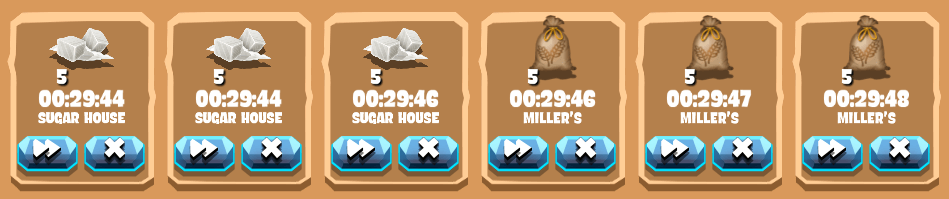
Cooking is one of the most important aspects of energy generation. Flour & Sugar are needed for most of the dishes, the best way to acquire more of them is to send a couple caravan runs for them.
Other (not recommended) strategies[]
Materials such as Lumber, Stone, Coal[]
- Their price is very high and materials gathered in such way don't help improve the gathering achievements. Gathering materials via caravan is recommended only when a player is in dire need of them. For example when you need 3 stones for your next space in camp and all repeatables are currently on cooldown. Using this method to amass materials for longer periods of time will quickly make you go bankrupt. If you decide to use this method, 30 minute trips are recommended because they guarantee you 1 of the specific material.
Experience[]
There are couple examples of ways to convert your coins into experience in Diggy's Adventure. This way of gaining experience is, however, only recommended to high level players who know what they're doing and how much money they can throw away.
Kitchen[]
- This is your kitchen which will cook food (6 items at a time) for you. Materials for the recipes can be found in the mines both repeatable and regular mines and can also be sent for by caravan. Event cooking can be found at the end of the pages. You will need to unlock the recipes as you reach areas and/or regions that unlock and use those recipes.
Video Guide[]
Pots[]
You will need to purchase pots to cook your recipes in. There are 6 pots available to purchase and you only have to buy them the one time. Certain levels and/or regions are required to purchase the pots.

|
| Pot | Level | |||
|---|---|---|---|---|
| Pot 1 | Free | 1 | ||
| Pot 2 | 300 | 11 | ||
| Pot 3 | 800 | 22 | ||
| Pot 4 | 1500 | 31 | ||
| Pot 5 | 3000 | 40 | ||
| Pot 6 | 10 000 | 70 |
Food (Energy)[]
See the Kitchen page for all recipes.
Pillar : Food Ratio
In simple words, this could be explained as "how many times the pillar is better than food" or "how many times more experience do the pillars provide than the food". In general, the higher the ratio, the better the pillars are over cooking the listed dish. Please note the pillar : food ratio isn't simply an indication you should get the pillar instead, but that you can use this ratio to compare the different foods to see which is more efficient to cook.
So, here's how to interpret the ratio numbers, above:
- Below 1 (adv: Food) - food provides X times more experience than using the same ingredients to make the pillars for such items. The only instance of this is Olive Bread, a dish in Greece.
- Exactly 1 (same exp.) - food provides exactly the same number of experience in energy as the pillar. The closest example is the Olive Bread.
- Above 1 (adv: Pillars) - pillars provide X times more experience than the food. For example, Bowl of Rice (2.55) provides 2.55 times less experience than making pillars; Kung Pao Chicken (4.19) provides about 4x less experience than making pillars (or, stated the other way, pillars are 4x better than cooking the items).
| Return To Top |
Foundry (Metallurgist)[]
With hammer in hand the metallurgist can forge items for you needed in the game.
See the Foundry page for more information.