No edit summary Tags: Manual revert Source edit |
No edit summary Tag: Source edit |
||
| Line 1: | Line 1: | ||
__NOTOC__ |
__NOTOC__ |
||
| − | <div class="event-list" style="padding:5px;width: |
+ | <div class="event-list" style="padding:5px;width:1000px;white-space:nowrap;margin-left:8px"> |
{| |
{| |
||
|style="padding-left:8px"|[[File:Nav_back.png|41px|class=shiny grow|link=Event-Quests|Go Back]] |
|style="padding-left:8px"|[[File:Nav_back.png|41px|class=shiny grow|link=Event-Quests|Go Back]] |
||
| − | |[[File:Nav_2022.png| |
+ | |[[File:Nav_2022.png|72px|class= shiny grow|link=Event-Quests-2022]] |
| − | |[[File:Nav_2021.png| |
+ | |[[File:Nav_2021.png|72px|class= shiny grow|link=Event-Quests-2021]] |
| − | |[[File:Nav_2020.png| |
+ | |[[File:Nav_2020.png|72px|class= shiny grow|link=Event-Quests-2020]] |
| − | |[[File:Nav_2019.png| |
+ | |[[File:Nav_2019.png|72px|class= shiny grow|link=Event-Quests-2019]] |
| − | |[[File:Nav_2018.png| |
+ | |[[File:Nav_2018.png|72px|class= shiny grow|link=Event-Quests-2018]] |
| − | |[[File:Nav_2017.png| |
+ | |[[File:Nav_2017.png|72px|class= shiny grow|link=Event-Quests-2017]] |
| − | |[[File:Nav_2016.png| |
+ | |[[File:Nav_2016.png|72px|class= shiny grow|link=Event-Quests-2016]] |
| − | |[[File:Nav_2015.png| |
+ | |[[File:Nav_2015.png|72px|class=bw|link=]] |
| − | |[[File:Nav_2014.png| |
+ | |[[File:Nav_2014.png|72px|class= shiny grow|link=Event-Quests-2014]] |
| − | |[[File:Nav_2013.png| |
+ | |[[File:Nav_2013.png|72px|class= shiny grow|link=Event-Quests-2013]] |
| − | |[[File:Nav_2012.png| |
+ | |[[File:Nav_2012.png|72px|class= shiny grow|link=Event-Quests-2012]] |
|[[File:Nav_events.png|95px|class= shiny grow|link=https://diggysadventure.fandom.com/wiki/Events|Open the Events Page with information about all events ever released]] |
|[[File:Nav_events.png|95px|class= shiny grow|link=https://diggysadventure.fandom.com/wiki/Events|Open the Events Page with information about all events ever released]] |
||
|} |
|} |
||
| Line 21: | Line 21: | ||
|- |
|- |
||
|style="vertical-align:top"| |
|style="vertical-align:top"| |
||
| − | {{ButtonLink|width= |
+ | {{ButtonLink|width=15|height=2|link=Event-Quests-2015#VIVA_LAS_VEGAS|image=Loc1035|text=VIVA LAS VEGAS}} |
| − | {{ButtonLink|width= |
+ | {{ButtonLink|width=15|height=2|link=Event-Quests-2015#VALENTINE_2015|image=Loc1057|text=VALENTINE 2015}} |
| − | {{ButtonLink|width= |
+ | {{ButtonLink|width=15|height=2|link=Event-Quests-2015#PINK_PUMA|image=Loc1077|text=PINK PUMA}} |
| − | {{ButtonLink|width= |
+ | {{ButtonLink|width=15|height=2|link=Event-Quests-2015#EASTER_2015|image=Loc1098|text=EASTER 2015}} |
|style="vertical-align:top"| |
|style="vertical-align:top"| |
||
{{ButtonLink|width=15|height=2|link=Event-Quests-2015#SNOW_WHITE|image=Loc1121|text=SNOW WHITE}} |
{{ButtonLink|width=15|height=2|link=Event-Quests-2015#SNOW_WHITE|image=Loc1121|text=SNOW WHITE}} |
||
Revision as of 12:28, 20 June 2022
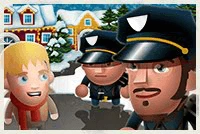
CHRISTMAS 2015
| IMAGE | QUEST | LOCATION | TASKS | QUEST BONUS | REWARDS | |
|---|---|---|---|---|---|---|
 |
Crunchy Ice Cream | Junk Food Stall Under The Christmas Tree |
|
300 |
500 |
1 |
| Available after: Continuing The Adventure | ||||||
 |
Christmas Vouchers | Christmas Terminal | 150 |
300 |
1 | |
| Available after: Crunchy Ice Cream | ||||||
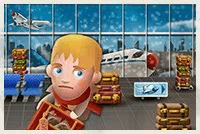 |
Alone At The Airport | Illinois Airport Christmas Challenge 1 |
|
550 |
770 |
1 |
| Available after: Crunchy Ice Cream | ||||||
 |
Keep The Change | Five Star Hotel |
|
710 |
1 200 |
1 |
| Available after: Alone At The Airport | ||||||
 |
Christmas Wish | New York Shopping Mall Christmas Challenge 2 |
|
1 080 |
1 800 |
1 |
| Available after: Keep The Change | ||||||
 |
In Bandits' Footsteps | Snowy Zoo |
|
1 600 |
2 400 |
1 |
| Available after: Christmas Wish | ||||||
 |
Toy Store Thievery | Danken's Toy Store Christmas Challenge 3 |
|
2 100 |
3 100 |
1 |
| Available after: In Bandits' Footsteps | ||||||
 |
Baiting Bandits | New York Streets Christmas Challenge 4 |
|
2 600 |
3 700 |
1 |
| Available after: Toy Store Thievery | ||||||
 |
Kelvin's Revenge | Traphouse Christmas Challenge 5 |
|
3 200 |
4 400 |
1 |
| Available after: Baiting Bandits | ||||||
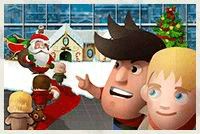
 |
The Tree Of Miracles | Rockefeller Plaza |
|
3 800 |
5 300 |
1 |
| Available after: Kelvin's Revenge | ||||||
 |
Christmas Surprise | Christmas Challenge 6 Christmas Challenge 7 Christmas Challenge 8 Christmas Challenge 9 |
|
1 000 |
2 000 |
1 |
| Available after: Kelvin's Revenge | ||||||
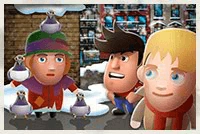
 |
Family Vacation | Uncle Freddie's House |
|
4 000 |
5 800 |
1 |
| Available after: The Tree Of Miracles | ||||||
 |
Neighbourhood Inspection | Winterville Suburbs |
|
4 300 |
6 400 |
1 |
| Available after: Family Vacation | ||||||
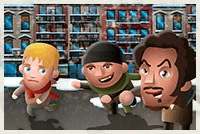
 |
House Defense | Kelvin's Traphouse |
|
4 600 |
6 900 |
1 |
| Available after: Neighbourhood Inspection | ||||||
 |
Kelvin On The Run | Winterville Village |
|
5 000 |
7 500 |
1 |
| Available after: House Defense | ||||||
 |
Holiday Cheer | Godmother's Pantry | 150 |
300 |
1 | |
| Available after: The Tree Of Miracles | ||||||
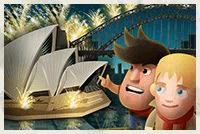 |
Fireworks In Sydney | Sydney Harbour New Year's Challenge 1 |
|
1 000 |
1 500 |
1 |
| Available after: Kelvin On The Run | ||||||
 |
Foggy New Year | Streets Of London |
|
1 300 |
2 100 |
1 |
| Available after: Fireworks In Sydney | ||||||
 |
Family Chase | Coast Of Cuba New Year's Challenge 2 |
|
1 700 |
2 700 |
1 |
| Available after: Foggy New Year | ||||||
 |
Happy New Year 2016! | Statue Of Liberty |
|
1 800 |
3 500 |
1 |
| Available after: Family Chase | ||||||

|
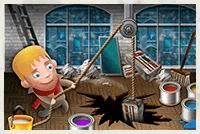
MACGAINER
| IMAGE | QUEST | LOCATION | TASKS | QUEST BONUS | REWARDS | |
|---|---|---|---|---|---|---|
 |
Poisoned Plantation | Free Trade Plantation Macgainer's Challenge 1 |
|
1 500 |
3 000 |
|
| Available after: Continuing The Adventure | ||||||
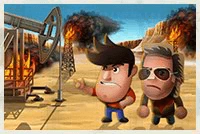 |
Oil On Fire | Indian Oil Field Macgainer's Challenge 2 |
|
2 200 |
4 200 |
|
| Available after: Poisoned Plantation | ||||||
 |
Polar Threat | Antarctica Station Macgainer's Challenge 3 |
|
3 050 |
5 300 |
|
| Available after: Oil On Fire | ||||||
 |
Timebomb Ticking | Toxic Waste Power Station |
|
4 300 |
6 400 |
|
| Available after: Polar Threat | ||||||
|
|
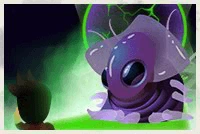
HALLOWEEN 2015
| IMAGE | QUEST | LOCATION | TASKS | QUEST BONUS | REWARDS | |
|---|---|---|---|---|---|---|
 |
Halloween Party | Occult Library Halloween Challenge 1 |
|
300 |
500 |
|
| Available after: Continuing The Adventure | ||||||
 |
Who You Gonna Call? | New York University |
|
800 |
1 800 |
|
| Available after: Halloween Party | ||||||
 |
Headless Horseman | Waking Hollow Halloween Challenge 2 |
|
1 500 |
3 100 |
|
| Available after: Who You Gonna Call? | ||||||
 |
Haunted Videotape | Japanese Villa |
|
3 060 |
4 600 |
|
| Available after: Headless Horseman | ||||||
 |
White Lady | Hudson Castle Halloween Challenge 3 |
|
3 800 |
5 300 |
|
| Available after: Haunted Videotape | ||||||
 |
Ghost Ship | New York Harbour Halloween Challenge 4 |
|
4 300 |
6 040 |
|
| Available after: White Lady | ||||||
 |
Capturing Presidents | Central Park Halloween Challenge 5 |
|
5 070 |
7 000 |
|
| Available after: Ghost Ship | ||||||
 |
The Necronomicon | 8th Circle Of Hell |
|
6 300 |
8 300 |
|
| Available after: Capturing Presidents | ||||||
|
|
PIRATES
| IMAGE | QUEST | LOCATION | TASKS | QUEST BONUS | REWARDS | |
|---|---|---|---|---|---|---|
 |
Coconut Refreshment | Coconut Orchard |
|
790 |
1 370 |
|
| Available after: Continuing The Adventure | ||||||
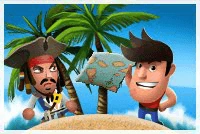
 |
Searching For Treasure | Island Of Crystal Skulls |
|
1 810 |
2 380 |
|
| Available after: Coconut Refreshment | ||||||
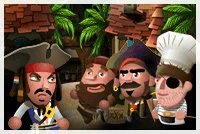 |
Jack Deep's Crew | Tortuga Bay Pirate Challenge 1 |
|
2 900 |
4 290 |
|
| Available after: Searching For Treasure | ||||||
 |
Jack On The Run | Fortress Of Escape |
|
5 250 |
6 500 |
|
| Available after: Jack Deep's Crew | ||||||
 |
Sea Battle | Pacific Current Pirate Challenge 2 |
|
7 300 |
8 370 |
|
| Available after: Jack On The Run | ||||||
 |
Voodoo Priestess | Swamp Island Pirate Challenge 3 |
|
8 600 |
10 060 |
|
| Available after: Sea Battle | ||||||
 |
Saving Soldiers | Shipwreck Bay Pirate Challenge 4 |
|
10 100 |
11 800 |
|
| Available after: Voodoo Priestess | ||||||
 |
In The Belly Of The Beast | Kraken Coast Pirate Challenge 5 |
|
12 200 |
13 100 |
|
| Available after: Saving Soldiers | ||||||
 |
7 Crystal Skulls | Cave Of Bones Sextant Island |
|
13 900 |
16 690 |
|
| Available after: In The Belly Of The Beast | ||||||
 |
Hidden Pirate Treasure | 700 |
1 300 |
|||
| Available after: 7 Crystal Skulls | ||||||
|
|
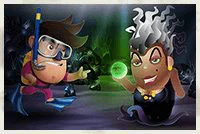
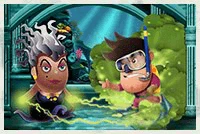
LITTLE MERMAID
| IMAGE | QUEST | LOCATION | TASKS | QUEST BONUS | REWARDS | |
|---|---|---|---|---|---|---|
 |
Oyster Delicacy | Oyster Field |
|
770 |
1 300 |
|
| Available after: Continuing The Adventure | ||||||
 |
Trip To Village | Seaside Village |
|
1 800 |
2 300 |
|
| Available after: Oyster Delicacy | ||||||
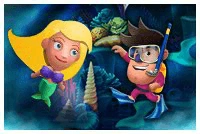 |
Rescuing Prince | Vortex Island Vortex Island Challenge |
|
2 820 |
4 200 |
|
| Available after: Trip To Village | ||||||
 |
Magical Potion | Pursula's Secret Laboratory Pursula's Secret Laboratory Challenge |
|
5 050 |
6 100 |
|
| Available after: Rescuing Prince | ||||||
 |
Chasing After Prince | Royal Countryside |
|
7 090 |
8 170 |
|
| Available after: Magical Potion | ||||||
 |
Wedding Ball | Prince's Palace Prince's Palace Challenge |
|
8 280 |
9 800 |
|
| Available after: Chasing After Prince | ||||||
 |
From Prince To Merman | Isle Of Transformation |
|
9 900 |
11 500 |
|
| Available after: Wedding Ball | ||||||
 |
Free Mariel! | Pursula's Cave Pursula's Cave Challenge |
|
11 910 |
13 010 |
|
| Available after: From Prince To Merman | ||||||
 |
Love Always Wins | Trident's Kingdom Trident's Kingdom Challenge |
|
13 300 |
16 030 |
|
| Available after: Free Mariel! | ||||||
|
|
JAMES BLOND
| IMAGE | QUEST | LOCATION | TASKS | QUEST BONUS | REWARDS | |
|---|---|---|---|---|---|---|
 |
Dr. Nope | The Island Of Doctor Nope |
|
750 |
1 250 |
|
| Available after: Continuing The Adventure | ||||||
 |
Casino Royale | Monaco City Centre |
|
1 600 |
2 060 |
|
| Available after: Dr. Nope | ||||||
 |
A View To Kill | Plastic Valley |
|
2 700 |
3 900 |
|
| Available after: Casino Royale | ||||||
 |
Moonraker | Fleming's Space Station |
|
4 010 |
5 900 |
|
| Available after: A View To Kill | ||||||
 |
In Her Majesty's Secret Service | Wheatland Farm |
|
5 350 |
8 030 |
|
| Available after: Moonraker | ||||||
 |
From Russia With Love | Snow Mountains |
|
7 900 |
9 260 |
|
| Available after: In Her Majesty's Secret Service | ||||||
 |
Goldfinger | Fort Knox |
|
9 400 |
11 100 |
|
| Available after: From Russia With Love | ||||||
 |
The World Is Not Enough | Bunker Under London |
|
11 500 |
14 050 |
|
| Available after: Goldfinger | ||||||
|
|
INDEPENDENCE DAY
| IMAGE | QUEST | LOCATION | TASKS | QUEST BONUS | REWARDS | |
|---|---|---|---|---|---|---|
 |
Space Attacks! | Chillmark Village |
|
300 |
730 |
|
| Available after: Continuing The Adventure | ||||||
 |
Mystery Files | New York In Ruins |
|
760 |
1 200 |
|
| Available after: Space Attacks! | ||||||
 |
President In Peril | White House Under Attack |
|
1 620 |
2 270 |
|
| Available after: Mystery Files | ||||||
 |
Making Saucers Fly | Area 15 |
|
2 400 |
4 620 |
|
| Available after: President In Peril | ||||||
 |
Finding Will Schmidt | Nevada Desert |
|
3 300 |
6 030 |
|
| Available after: Making Saucers Fly | ||||||
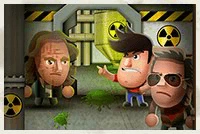
 |
Nuclear Threat | Bikini Beach |
|
4 300 |
7 400 |
|
| Available after: Finding Will Schmidt | ||||||
 |
Space Walk | International Space Stations |
|
5 650 |
9 200 |
|
| Available after: Nuclear Threat | ||||||
 |
Saving The World | Mothership |
|
6 220 |
11 200 |
|
| Available after: Space Walk | ||||||
 |
Alien Challenge | Alien Challenge | 200 |
520 |
||
| Available after: Saving The World | ||||||
|
|
3RD BIRTHDAY
| IMAGE | QUEST | LOCATION | TASKS | QUEST BONUS | REWARDS | |
|---|---|---|---|---|---|---|
 |
Sweet Delight | Mascarpone Manufacture |
|
300 |
500 |
|
| Available after: Continuing The Adventure | ||||||
 |
Birthday Party | Pixel Federation |
|
750 |
1 300 |
|
| Available after: Sweet Delight | ||||||
 |
Lost And Found | Megatest Level |
|
1 010 |
2 000 |
|
| Available after: Birthday Party | ||||||
 |
Diggy The Ghost Buster | Old World |
|
2 900 |
4 800 |
|
| Available after: Lost And Found | ||||||
 |
Daily Crisis | City Of Trouble |
|
3 620 |
5 450 |
|
| Available after: Diggy The Ghost Buster | ||||||
 |
Seeding And Diggying | Farm Simulation |
|
4 350 |
6 100 |
|
| Available after: Daily Crisis | ||||||
 |
Mad Chase | The Racing Tracks |
|
4 820 |
6 930 |
|
| Available after: Seeding And Diggying | ||||||
 |
Connection Lost | The Interweb |
|
5 230 |
8 200 |
|
| Available after: Mad Chase | ||||||
 |
The Mission Possible | Mojmir's Digital Fortress |
|
5 500 |
9 100 |
|
| Available after: Connection Lost | ||||||
|
|
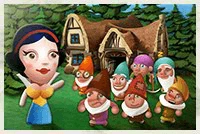
SNOW WHITE
| IMAGE | QUEST | LOCATION | TASKS | QUEST BONUS | REWARDS | |
|---|---|---|---|---|---|---|
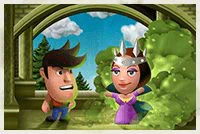
 |
Snow White | Snow White's Castle |
|
300 |
500 |
|
| Available after: Continuing The Adventure | ||||||
 |
Huntsman With A Heart | Forest Of The Unwanted |
|
800 |
2 250 |
|
| Available after: Snow White | ||||||
 |
Sublease From A Fairy Tale | Fairy Tale Real-estate |
|
1 500 |
3 500 |
|
| Available after: Huntsman With A Heart | ||||||
 |
Garden Gnomes | Dwarven Forest |
|
3 000 |
5 000 |
|
| Available after: Sublease From A Fairy Tale | ||||||
 |
Giant Preparations For A Dwarf Feast | Market Under The Castle |
|
3 750 |
5 500 |
|
| Available after: Garden Gnomes | ||||||
 |
Dwarven Banquet | Dwarfyard |
|
4 500 |
6 000 |
|
| Available after: Giant Preparations For A Dwarf Feast | ||||||
 |
Reversed Courtship | Princely Path |
|
4 750 |
7 000 |
|
| Available after: Dwarven Banquet | ||||||
 |
Fairest Of Them All | Evil Queen's Tower |
|
5 000 |
8 000 |
|
| Available after: Reversed Courtship | ||||||
|
|
EASTER 2015
| IMAGE | QUEST | LOCATION | TASKS | QUEST BONUS | REWARDS | |
|---|---|---|---|---|---|---|
 |
Monica's Carrots | Bunny Ear Garden |
|
300 |
500 |
|
| Available after: Continuing The Adventure | ||||||
 |
Messy Hen-coop | Dirty Hen-coop |
|
700 |
1 000 |
|
| Available after: Monica's Carrots | ||||||
 |
External Sources | Eggislands |
|
1 000 |
2 000 |
|
| Available after: Messy Hen-coop | ||||||
 |
Egg-olution | Revolting Hen-coops |
|
1 500 |
3 000 |
|
| Available after: External Sources | ||||||
 |
Hens, Bunnies And Assembly Lines | Poultry Farms |
|
2 000 |
4 000 |
|
| Available after: Egg-olution | ||||||
 |
Bunny Mafia | Weasel Hideout |
|
3 000 |
5 000 |
|
| Available after: Hens, Bunnies And Assembly Lines | ||||||
 |
Baron Ram | Shopping Centre |
|
3 500 |
6 000 |
|
| Available after: Bunny Mafia | ||||||
 |
Ram The Baron | Secret Chalet |
|
4 000 |
6 500 |
|
| Available after: Baron Ram | ||||||
 |
Diggy's Easter Hunt | Easter Picnic |
|
4 500 |
7 000 |
|
| Available after: Ram The Baron | ||||||
 |
Easter Challenge | Easter Challenge | 5 000 |
8 000 |
||
| Available after: Diggy's Easter Hunt | ||||||
|
|
PINK PUMA
| IMAGE | QUEST | LOCATION | TASKS | QUEST BONUS | REWARDS | |
|---|---|---|---|---|---|---|
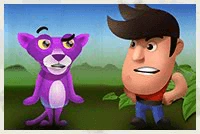 |
Purple Puma | Raspberry Grove |
|
200 |
250 |
|
| Available after: Continuing The Adventure | ||||||
 |
The Robbery | Metropolitan Gallery |
|
300 |
450 |
|
| Available after: Purple Puma | ||||||
 |
Investigation At The Ball | Benefit Ball |
|
500 |
650 |
|
| Available after: The Robbery | ||||||
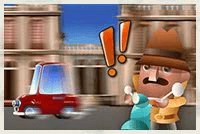 |
The Car Chase | Parisian Streets |
|
800 |
950 |
|
| Available after: Investigation At The Ball | ||||||
 |
The Home Of The Phantom | Phantom's Alpine Castle |
|
1 000 |
1 800 |
|
| Available after: The Car Chase | ||||||
 |
The Mental Asylum | Mental Asylum |
|
1 600 |
2 800 |
|
| Available after: The Home Of The Phantom | ||||||
 |
Gang Infiltration | Antwerp |
|
2 400 |
3 800 |
|
| Available after: The Mental Asylum | ||||||
 |
Acquiring The Diamond | Lugash National Museum |
|
3 300 |
4 800 |
|
| Available after: Gang Infiltration | ||||||
 |
The Reveal | Lugash Palace |
|
4 000 |
6 000 |
|
| Available after: Acquiring The Diamond | ||||||
 |
Closet's Thank You | Lugash Jewellery | 1 000 |
3 000 |
||
| Available after: The Reveal | ||||||
|
|
VALENTINE 2015
| IMAGE | QUEST | LOCATION | TASKS | QUEST BONUS | REWARDS | |
|---|---|---|---|---|---|---|
 |
Cherry Blossom | Cherry Orchard |
|
150 |
200 |
|
| Available after: Continuing The Adventure | ||||||
 |
Precious Necklaces | Garden Of Love |
|
350 |
500 |
|
| Available after: Cherry Blossom | ||||||
 |
Romeo And Juliet | Verona Market |
|
550 |
700 |
|
| Available after: Precious Necklaces | ||||||
 |
The Capulet Ball | Capulet Ball |
|
750 |
1 000 |
|
| Available after: Romeo And Juliet | ||||||
 |
The Balcony Scene | Juliet's Gardens |
|
1 200 |
2 000 |
|
| Available after: The Capulet Ball | ||||||
 |
The Secret Wedding | Verona Chapel |
|
1 800 |
3 000 |
|
| Available after: The Balcony Scene | ||||||
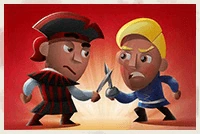 |
The Duel | Streets Of Verona |
|
2 500 |
4 000 |
|
| Available after: The Secret Wedding | ||||||
 |
The Wedding Night | Capulet Mansion |
|
3 500 |
5 000 |
|
| Available after: The Duel | ||||||
 |
The Poison | Lawrence's Alchemical Laboratory |
|
4 500 |
6 000 |
|
| Available after: The Wedding Night | ||||||
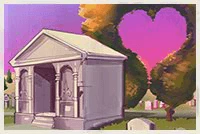 |
The Happy End | Verona Cemetery |
|
5 500 |
7 000 |
|
| Available after: The Poison | ||||||
|
|
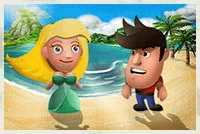
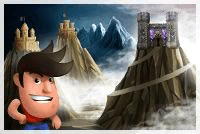
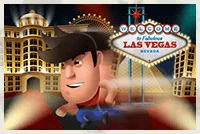
VIVA LAS VEGAS
| IMAGE | QUEST | LOCATION | TASKS | QUEST BONUS | REWARDS | |
|---|---|---|---|---|---|---|
 |
Sneferu's Oranges | Orange Garden |
|
400 |
500 |
|
| Available after: Continuing The Adventure | ||||||
 |
Pearls Of Mrs. Sneferu | Pawn Shop |
|
700 |
1 000 |
|
| Available after: Sneferu's Oranges | ||||||
 |
Casino In Las Vegas | Pharaoh's Palace |
|
1 000 |
1 750 |
|
| Available after: Pearls Of Mrs. Sneferu | ||||||
 |
The White Tiger | Cabaret Mirage |
|
1 700 |
3 000 |
|
| Available after: Casino In Las Vegas | ||||||
 |
Bank Heist | Las Vegas Bank |
|
2 400 |
4 000 |
|
| Available after: The White Tiger | ||||||
 |
Memory Lost | Belaggio Ceremonial Hall |
|
3 000 |
5 000 |
|
| Available after: Bank Heist | ||||||
|
|