No edit summary Tag: Source edit |
No edit summary Tag: Source edit |
||
| (15 intermediate revisions by the same user not shown) | |||
| Line 1: | Line 1: | ||
| + | {{DISPLAYTITLE:<span style="position: absolute; clip: rect(1px 1px 1px 1px); clip: rect(1px, 1px, 1px, 1px);">{{FULLPAGENAME}}</span>}} |
||
| ⚫ | |||
| + | <center>[[File:Event-Quests.png|800x45px|link=]] [[File:Nav_2015.png|800x60px|class=bw|link=]]<br> |
||
| − | <div class="event-list" style="padding:5px;width:61.5em; white-space:nowrap;margin-left:8px"> |
||
| + | |||
| − | {|style="padding:0px" |
||
| + | {| |
||
| − | |style="padding-left:8px"|[[File:Nav_back.png|41px|class=shiny grow|link=Event-Quests|Go Back]] |
||
| − | |[[File: |
+ | |style="padding-left:8px"|[[File:Nav_2023.png|800x35px|class= shiny grow|link=Event-Quests-2023]] |
| − | |[[File: |
+ | |[[File:Nav_2022.png|800x35px|class= shiny grow|link=Event-Quests-2022]] |
| − | |[[File: |
+ | |[[File:Nav_2021.png|800x35px|class= shiny grow|link=Event-Quests-2021]] |
| − | |[[File: |
+ | |[[File:Nav_2020.png|800x35px|class= shiny grow|link=Event-Quests-2020]] |
| − | |[[File: |
+ | |[[File:Nav_2019.png|800x35px|class= shiny grow|link=Event-Quests-2019]] |
| − | |[[File: |
+ | |[[File:Nav_2018.png|800x35px|class= shiny grow|link=Event-Quests-2018]] |
| − | |[[File: |
+ | |[[File:Nav_2017.png|800x35px|class= shiny grow|link=Event-Quests-2017]] |
| − | |[[File: |
+ | |[[File:Nav_2016.png|800x35px|class= shiny grow|link=Event-Quests-2016]] |
| − | |[[File: |
+ | |[[File:Nav_2015.png|800x35px|class=bw|link=]] |
| − | |[[File: |
+ | |[[File:Nav_2014.png|800x35px|class= shiny grow|link=Event-Quests-2014]] |
| − | |[[File: |
+ | |[[File:Nav_2013.png|800x35px|class= shiny grow|link=Event-Quests-2013]] |
| − | |[[File: |
+ | |[[File:Nav_2012.png|800x35px|class= shiny grow|link=Event-Quests-2012]] |
| + | |[[File:Nav_Events.png|800x47px|class= shiny grow|link=https://diggysadventure.fandom.com/wiki/Events|Open the Events Page with information about all events ever released]] |
||
|} |
|} |
||
| + | |||
| − | </div> |
||
{| |
{| |
||
|colspan="4"| |
|colspan="4"| |
||
|- |
|- |
||
|style="vertical-align:top"| |
|style="vertical-align:top"| |
||
| − | {{ButtonLink|width= |
+ | {{ButtonLink|width=15|height=2|link=Event-Quests-2015#VIVA_LAS_VEGAS|image=Loc1035|text=VIVA LAS VEGAS}} |
| − | {{ButtonLink|width= |
+ | {{ButtonLink|width=15|height=2|link=Event-Quests-2015#VALENTINE_2015|image=Loc1057|text=VALENTINE 2015}} |
| − | {{ButtonLink|width= |
+ | {{ButtonLink|width=15|height=2|link=Event-Quests-2015#PINK_PUMA|image=Loc1077|text=PINK PUMA}} |
| − | {{ButtonLink|width= |
+ | {{ButtonLink|width=15|height=2|link=Event-Quests-2015#EASTER_2015|image=Loc1098|text=EASTER 2015}} |
|style="vertical-align:top"| |
|style="vertical-align:top"| |
||
{{ButtonLink|width=15|height=2|link=Event-Quests-2015#SNOW_WHITE|image=Loc1121|text=SNOW WHITE}} |
{{ButtonLink|width=15|height=2|link=Event-Quests-2015#SNOW_WHITE|image=Loc1121|text=SNOW WHITE}} |
||
| Line 38: | Line 39: | ||
{{ButtonLink|width=15|height=2|link=Event-Quests-2015#CHRISTMAS_2015|image=Loc1312|text=CHRISTMAS 2015}} |
{{ButtonLink|width=15|height=2|link=Event-Quests-2015#CHRISTMAS_2015|image=Loc1312|text=CHRISTMAS 2015}} |
||
|} |
|} |
||
| + | </center> |
||
---- |
---- |
||
| Line 56: | Line 58: | ||
| ExperiencePoints= 500[[File:Sys001.png|link=|20px]] |
| ExperiencePoints= 500[[File:Sys001.png|link=|20px]] |
||
| Rewards= 1[[File:Mat078.png|link=|35px]] |
| Rewards= 1[[File:Mat078.png|link=|35px]] |
||
| − | | Available=Continuing The Adventure |
+ | | Available=[https://diggysadventure.fandom.com/wiki/Egypt_(Quests)#Isis Continuing The Adventure] |
}} |
}} |
||
| Line 93: | Line 95: | ||
| Locations={{Quests/Location| Location=Five Star Hotel}} |
| Locations={{Quests/Location| Location=Five Star Hotel}} |
||
| Coins= 710[[File:Mat001.png|link=|20px]] |
| Coins= 710[[File:Mat001.png|link=|20px]] |
||
| − | | ExperiencePoints= 1 |
+ | | ExperiencePoints= 1,200[[File:Sys001.png|link=|20px]] |
| Rewards= 1[[File:Mat078.png|link=|35px]] |
| Rewards= 1[[File:Mat078.png|link=|35px]] |
||
| Available=Alone At The Airport |
| Available=Alone At The Airport |
||
| Line 105: | Line 107: | ||
| Locations={{Quests/Location| Location=New York Shopping Mall<br>Christmas Challenge 2}} |
| Locations={{Quests/Location| Location=New York Shopping Mall<br>Christmas Challenge 2}} |
||
| Coins= 1 080[[File:Mat001.png|link=|20px]] |
| Coins= 1 080[[File:Mat001.png|link=|20px]] |
||
| − | | ExperiencePoints= 1 |
+ | | ExperiencePoints= 1,800[[File:Sys001.png|link=|20px]] |
| Rewards= 1[[File:Mat078.png|link=|35px]] |
| Rewards= 1[[File:Mat078.png|link=|35px]] |
||
| Available=Keep The Change |
| Available=Keep The Change |
||
| Line 116: | Line 118: | ||
| Tasks={{Quests/Task| TaskText=1. Talk To Kelvin| TaskImage=[[File:Npc6174.png|link=|35px]]}}{{Quests/Task| TaskText=2. Track Down The Bandits| TaskImage=[[File:Tok3500.png|link=|35px]]}}{{Quests/Task| TaskText=3. Listen In On The Bandits Talking| TaskImage=[[File:Tok3501.png|link=|35px]]}}{{Quests/Task| TaskText=4. Talk To Kelvin| TaskImage=[[File:Npc6175.png|link=|35px]]}} |
| Tasks={{Quests/Task| TaskText=1. Talk To Kelvin| TaskImage=[[File:Npc6174.png|link=|35px]]}}{{Quests/Task| TaskText=2. Track Down The Bandits| TaskImage=[[File:Tok3500.png|link=|35px]]}}{{Quests/Task| TaskText=3. Listen In On The Bandits Talking| TaskImage=[[File:Tok3501.png|link=|35px]]}}{{Quests/Task| TaskText=4. Talk To Kelvin| TaskImage=[[File:Npc6175.png|link=|35px]]}} |
||
| Locations={{Quests/Location| Location=Snowy Zoo}} |
| Locations={{Quests/Location| Location=Snowy Zoo}} |
||
| − | | Coins= 1 |
+ | | Coins= 1,600[[File:Mat001.png|link=|20px]] |
| − | | ExperiencePoints= 2 |
+ | | ExperiencePoints= 2,400[[File:Sys001.png|link=|20px]] |
| Rewards= 1[[File:Mat078.png|link=|35px]] |
| Rewards= 1[[File:Mat078.png|link=|35px]] |
||
| Available=Christmas Wish |
| Available=Christmas Wish |
||
| Line 128: | Line 130: | ||
| Tasks={{Quests/Task| TaskText=1. Talk To Kelvin| TaskImage=[[File:Npc6176.png|link=|35px]]}}{{Quests/Task| TaskText=2. Find The Bandits| TaskImage=[[File:Tok3502.png|link=|35px]]}}{{Quests/Task| TaskText=3. Connect The Alarm| TaskImage=[[File:Tok3503.png|link=|35px]]}}{{Quests/Task| TaskText=4. Sound The Alarm| TaskImage=[[File:Tok3504.png|link=|35px]]}}{{Quests/Task| TaskText=5. Flee Through The Exit| TaskImage=[[File:Tok3505.png|link=|35px]]}}{{Quests/Task| TaskText=6. Visit Christmas Challenge| TaskImage=[[File: Loc1322.png|link=|35px]]}} |
| Tasks={{Quests/Task| TaskText=1. Talk To Kelvin| TaskImage=[[File:Npc6176.png|link=|35px]]}}{{Quests/Task| TaskText=2. Find The Bandits| TaskImage=[[File:Tok3502.png|link=|35px]]}}{{Quests/Task| TaskText=3. Connect The Alarm| TaskImage=[[File:Tok3503.png|link=|35px]]}}{{Quests/Task| TaskText=4. Sound The Alarm| TaskImage=[[File:Tok3504.png|link=|35px]]}}{{Quests/Task| TaskText=5. Flee Through The Exit| TaskImage=[[File:Tok3505.png|link=|35px]]}}{{Quests/Task| TaskText=6. Visit Christmas Challenge| TaskImage=[[File: Loc1322.png|link=|35px]]}} |
||
| Locations={{Quests/Location| Location=Danken's Toy Store<br>Christmas Challenge 3}} |
| Locations={{Quests/Location| Location=Danken's Toy Store<br>Christmas Challenge 3}} |
||
| − | | Coins= 2 |
+ | | Coins= 2,100[[File:Mat001.png|link=|20px]] |
| − | | ExperiencePoints= 3 |
+ | | ExperiencePoints= 3,100[[File:Sys001.png|link=|20px]] |
| Rewards= 1[[File:Mat078.png|link=|35px]] |
| Rewards= 1[[File:Mat078.png|link=|35px]] |
||
| Available=In Bandits' Footsteps |
| Available=In Bandits' Footsteps |
||
| Line 140: | Line 142: | ||
| Tasks={{Quests/Task| TaskText=1. Help Kelvin Flee| TaskImage=[[File:Tok3506.png|link=|35px]]}}{{Quests/Task| TaskText=2. Get Inside The House| TaskImage=[[File:Tok3507.png|link=|35px]]}}{{Quests/Task| TaskText=3. Talk To Kelvin| TaskImage=[[File:Npc6177.png|link=|35px]]}}{{Quests/Task| TaskText=4. Visit Christmas Challenge| TaskImage=[[File: Loc1323.png|link=|35px]]}} |
| Tasks={{Quests/Task| TaskText=1. Help Kelvin Flee| TaskImage=[[File:Tok3506.png|link=|35px]]}}{{Quests/Task| TaskText=2. Get Inside The House| TaskImage=[[File:Tok3507.png|link=|35px]]}}{{Quests/Task| TaskText=3. Talk To Kelvin| TaskImage=[[File:Npc6177.png|link=|35px]]}}{{Quests/Task| TaskText=4. Visit Christmas Challenge| TaskImage=[[File: Loc1323.png|link=|35px]]}} |
||
| Locations={{Quests/Location| Location=New York Streets<br>Christmas Challenge 4}} |
| Locations={{Quests/Location| Location=New York Streets<br>Christmas Challenge 4}} |
||
| − | | Coins= 2 |
+ | | Coins= 2,600[[File:Mat001.png|link=|20px]] |
| − | | ExperiencePoints= 3 |
+ | | ExperiencePoints= 3,700[[File:Sys001.png|link=|20px]] |
| Rewards= 1[[File:Mat078.png|link=|35px]] |
| Rewards= 1[[File:Mat078.png|link=|35px]] |
||
| Available=Toy Store Thievery |
| Available=Toy Store Thievery |
||
| Line 152: | Line 154: | ||
| Tasks={{Quests/Task| TaskText=1. Talk To Kelvin| TaskImage=[[File:Npc6178.png|link=|35px]]}}{{Quests/Task| TaskText=2. Defeat The Bandits (9)| TaskImage=[[File:Tok3508.png|link=|35px]]}}{{Quests/Task| TaskText=3. Get To The Exit| TaskImage=[[File:Tok3509.png|link=|35px]]}}{{Quests/Task| TaskText=4. Talk To Kelvin| TaskImage=[[File:Npc6179.png|link=|35px]]}}{{Quests/Task| TaskText=5. Visit Christmas Challenge| TaskImage=[[File: Loc1324.png|link=|35px]]}} |
| Tasks={{Quests/Task| TaskText=1. Talk To Kelvin| TaskImage=[[File:Npc6178.png|link=|35px]]}}{{Quests/Task| TaskText=2. Defeat The Bandits (9)| TaskImage=[[File:Tok3508.png|link=|35px]]}}{{Quests/Task| TaskText=3. Get To The Exit| TaskImage=[[File:Tok3509.png|link=|35px]]}}{{Quests/Task| TaskText=4. Talk To Kelvin| TaskImage=[[File:Npc6179.png|link=|35px]]}}{{Quests/Task| TaskText=5. Visit Christmas Challenge| TaskImage=[[File: Loc1324.png|link=|35px]]}} |
||
| Locations={{Quests/Location| Location=Traphouse<br>Christmas Challenge 5}} |
| Locations={{Quests/Location| Location=Traphouse<br>Christmas Challenge 5}} |
||
| − | | Coins= 3 |
+ | | Coins= 3,200[[File:Mat001.png|link=|20px]] |
| − | | ExperiencePoints= 4 |
+ | | ExperiencePoints= 4,400[[File:Sys001.png|link=|20px]] |
| Rewards= 1[[File:Mat078.png|link=|35px]] |
| Rewards= 1[[File:Mat078.png|link=|35px]] |
||
| Available=Baiting Bandits |
| Available=Baiting Bandits |
||
| Line 164: | Line 166: | ||
| Tasks={{Quests/Task| TaskText=1. Escape The Bandits| TaskImage=[[File:Tok3510.png|link=|35px]]}}{{Quests/Task| TaskText=2. Defeat The Bandits| TaskImage=[[File:Tok3511.png|link=|35px]]}}{{Quests/Task| TaskText=3. Talk To Kelvin| TaskImage=[[File:Npc6180.png|link=|35px]]}}{{Quests/Task| TaskText=4. Get To The Christmas Tree| TaskImage=[[File:Tok3512.png|link=|35px]]}}{{Quests/Task| TaskText=5. Put The Gift Under The Tree| TaskImage=[[File:Tok3513.png|link=|35px]]}}{{Quests/Task| TaskText=6. Talk To Fairy Godmother| TaskImage=[[File:Npc6301.png|link=|35px]]}} |
| Tasks={{Quests/Task| TaskText=1. Escape The Bandits| TaskImage=[[File:Tok3510.png|link=|35px]]}}{{Quests/Task| TaskText=2. Defeat The Bandits| TaskImage=[[File:Tok3511.png|link=|35px]]}}{{Quests/Task| TaskText=3. Talk To Kelvin| TaskImage=[[File:Npc6180.png|link=|35px]]}}{{Quests/Task| TaskText=4. Get To The Christmas Tree| TaskImage=[[File:Tok3512.png|link=|35px]]}}{{Quests/Task| TaskText=5. Put The Gift Under The Tree| TaskImage=[[File:Tok3513.png|link=|35px]]}}{{Quests/Task| TaskText=6. Talk To Fairy Godmother| TaskImage=[[File:Npc6301.png|link=|35px]]}} |
||
| Locations={{Quests/Location| Location=Rockefeller Plaza}} |
| Locations={{Quests/Location| Location=Rockefeller Plaza}} |
||
| − | | Coins= 3 |
+ | | Coins= 3,800[[File:Mat001.png|link=|20px]] |
| − | | ExperiencePoints= 5 |
+ | | ExperiencePoints= 5,300[[File:Sys001.png|link=|20px]] |
| Rewards= 1[[File:Mat078.png|link=|35px]] |
| Rewards= 1[[File:Mat078.png|link=|35px]] |
||
| Available=Kelvin's Revenge |
| Available=Kelvin's Revenge |
||
| Line 176: | Line 178: | ||
| Tasks={{Quests/Task| TaskText=1. Talk To Fairy Godmother| TaskImage=[[File:Npc6162.png|link=|35px]]}}{{Quests/Task| TaskText=2. Visit Christmas Challenge| TaskImage=[[File: Loc1328.png|link=|35px]]}}{{Quests/Task| TaskText=3. Visit Christmas Challenge| TaskImage=[[File: Loc1329.png|link=|35px]]}}{{Quests/Task| TaskText=4. Visit Christmas Challenge| TaskImage=[[File: Loc1330.png|link=|35px]]}}{{Quests/Task| TaskText=5. Visit Christmas Challenge| TaskImage=[[File: Loc1331.png|link=|35px]]}} |
| Tasks={{Quests/Task| TaskText=1. Talk To Fairy Godmother| TaskImage=[[File:Npc6162.png|link=|35px]]}}{{Quests/Task| TaskText=2. Visit Christmas Challenge| TaskImage=[[File: Loc1328.png|link=|35px]]}}{{Quests/Task| TaskText=3. Visit Christmas Challenge| TaskImage=[[File: Loc1329.png|link=|35px]]}}{{Quests/Task| TaskText=4. Visit Christmas Challenge| TaskImage=[[File: Loc1330.png|link=|35px]]}}{{Quests/Task| TaskText=5. Visit Christmas Challenge| TaskImage=[[File: Loc1331.png|link=|35px]]}} |
||
| Locations={{Quests/Location| Location=Christmas Challenge 6<br>Christmas Challenge 7<br>Christmas Challenge 8<br>Christmas Challenge 9}} |
| Locations={{Quests/Location| Location=Christmas Challenge 6<br>Christmas Challenge 7<br>Christmas Challenge 8<br>Christmas Challenge 9}} |
||
| − | | Coins= 1 |
+ | | Coins= 1,000[[File:Mat001.png|link=|20px]] |
| − | | ExperiencePoints= 2 |
+ | | ExperiencePoints= 2,000[[File:Sys001.png|link=|20px]] |
| Rewards= 1[[File:Mat078.png|link=|35px]] |
| Rewards= 1[[File:Mat078.png|link=|35px]] |
||
| Available=Kelvin's Revenge |
| Available=Kelvin's Revenge |
||
| Line 188: | Line 190: | ||
| Tasks={{Quests/Task| TaskText=1. Talk To Kelvin| TaskImage=[[File:Npc6390.png|link=|35px]]}}{{Quests/Task| TaskText=2. Get To Santa| TaskImage=[[File:Tok3603.png|link=|35px]]}}{{Quests/Task| TaskText=3. Get On The Bus| TaskImage=[[File:Tok3604.png|link=|35px]]}}{{Quests/Task| TaskText=4. Get To Uncle's House| TaskImage=[[File:Tok3605.png|link=|35px]]}}{{Quests/Task| TaskText=5. Search The Rooms (10)| TaskImage=[[File:Tok3606.png|link=|35px]]}}{{Quests/Task| TaskText=6. Talk To Kelvin| TaskImage=[[File:Npc6391.png|link=|35px]]}} |
| Tasks={{Quests/Task| TaskText=1. Talk To Kelvin| TaskImage=[[File:Npc6390.png|link=|35px]]}}{{Quests/Task| TaskText=2. Get To Santa| TaskImage=[[File:Tok3603.png|link=|35px]]}}{{Quests/Task| TaskText=3. Get On The Bus| TaskImage=[[File:Tok3604.png|link=|35px]]}}{{Quests/Task| TaskText=4. Get To Uncle's House| TaskImage=[[File:Tok3605.png|link=|35px]]}}{{Quests/Task| TaskText=5. Search The Rooms (10)| TaskImage=[[File:Tok3606.png|link=|35px]]}}{{Quests/Task| TaskText=6. Talk To Kelvin| TaskImage=[[File:Npc6391.png|link=|35px]]}} |
||
| Locations={{Quests/Location| Location=Uncle Freddie's House}} |
| Locations={{Quests/Location| Location=Uncle Freddie's House}} |
||
| − | | Coins= 4 |
+ | | Coins= 4,000[[File:Mat001.png|link=|20px]] |
| − | | ExperiencePoints= 5 |
+ | | ExperiencePoints= 5,800[[File:Sys001.png|link=|20px]] |
| Rewards= 1[[File:Mat078.png|link=|35px]] |
| Rewards= 1[[File:Mat078.png|link=|35px]] |
||
| Available=The Tree Of Miracles |
| Available=The Tree Of Miracles |
||
| Line 200: | Line 202: | ||
| Tasks={{Quests/Task| TaskText=1. Talk To Policeman| TaskImage=[[File:Npc6392.png|link=|35px]]}}{{Quests/Task| TaskText=2. Find A Way Into The Houses (4)| TaskImage=[[File:Tok3607.png|link=|35px]]}}{{Quests/Task| TaskText=3. Open The Doors For The Policemen (4)| TaskImage=[[File:Tok3608.png|link=|35px]]}}{{Quests/Task| TaskText=4. Talk To Kelvin| TaskImage=[[File:Npc6454.png|link=|35px]]}}{{Quests/Task| TaskText=5. Free Kelvin| TaskImage=[[File:Tok3609.png|link=|35px]]}}{{Quests/Task| TaskText=6. Talk To Kelvin| TaskImage=[[File:Npc6454.png|link=|35px]]}} |
| Tasks={{Quests/Task| TaskText=1. Talk To Policeman| TaskImage=[[File:Npc6392.png|link=|35px]]}}{{Quests/Task| TaskText=2. Find A Way Into The Houses (4)| TaskImage=[[File:Tok3607.png|link=|35px]]}}{{Quests/Task| TaskText=3. Open The Doors For The Policemen (4)| TaskImage=[[File:Tok3608.png|link=|35px]]}}{{Quests/Task| TaskText=4. Talk To Kelvin| TaskImage=[[File:Npc6454.png|link=|35px]]}}{{Quests/Task| TaskText=5. Free Kelvin| TaskImage=[[File:Tok3609.png|link=|35px]]}}{{Quests/Task| TaskText=6. Talk To Kelvin| TaskImage=[[File:Npc6454.png|link=|35px]]}} |
||
| Locations={{Quests/Location| Location=Winterville Suburbs}} |
| Locations={{Quests/Location| Location=Winterville Suburbs}} |
||
| − | | Coins= 4 |
+ | | Coins= 4,300[[File:Mat001.png|link=|20px]] |
| − | | ExperiencePoints= 6 |
+ | | ExperiencePoints= 6,400[[File:Sys001.png|link=|20px]] |
| Rewards= 1[[File:Mat078.png|link=|35px]] |
| Rewards= 1[[File:Mat078.png|link=|35px]] |
||
| Available=Family Vacation |
| Available=Family Vacation |
||
| Line 212: | Line 214: | ||
| Tasks={{Quests/Task| TaskText=1. Talk To Kelvin| TaskImage=[[File:Npc6395.png|link=|35px]]}}{{Quests/Task| TaskText=2. Defeat The Bandits (9)| TaskImage=[[File:Tok3610.png|link=|35px]]}}{{Quests/Task| TaskText=3. Help Kelvin Flee| TaskImage=[[File:Tok3611.png|link=|35px]]}} |
| Tasks={{Quests/Task| TaskText=1. Talk To Kelvin| TaskImage=[[File:Npc6395.png|link=|35px]]}}{{Quests/Task| TaskText=2. Defeat The Bandits (9)| TaskImage=[[File:Tok3610.png|link=|35px]]}}{{Quests/Task| TaskText=3. Help Kelvin Flee| TaskImage=[[File:Tok3611.png|link=|35px]]}} |
||
| Locations={{Quests/Location| Location=Kelvin's Traphouse}} |
| Locations={{Quests/Location| Location=Kelvin's Traphouse}} |
||
| − | | Coins= 4 |
+ | | Coins= 4,600[[File:Mat001.png|link=|20px]] |
| − | | ExperiencePoints= 6 |
+ | | ExperiencePoints= 6,900[[File:Sys001.png|link=|20px]] |
| Rewards= 1[[File:Mat078.png|link=|35px]] |
| Rewards= 1[[File:Mat078.png|link=|35px]] |
||
| Available=Neighbourhood Inspection |
| Available=Neighbourhood Inspection |
||
| Line 224: | Line 226: | ||
| Tasks={{Quests/Task| TaskText=1. Help Kelvin Flee| TaskImage=[[File:Tok3612.png|link=|35px]]}}{{Quests/Task| TaskText=2. Call The Police| TaskImage=[[File:Tok3613.png|link=|35px]]}}{{Quests/Task| TaskText=3. Get To The Church| TaskImage=[[File:Tok3614.png|link=|35px]]}}{{Quests/Task| TaskText=4. Talk To Kelvin| TaskImage=[[File:Npc6397.png|link=|35px]]}} |
| Tasks={{Quests/Task| TaskText=1. Help Kelvin Flee| TaskImage=[[File:Tok3612.png|link=|35px]]}}{{Quests/Task| TaskText=2. Call The Police| TaskImage=[[File:Tok3613.png|link=|35px]]}}{{Quests/Task| TaskText=3. Get To The Church| TaskImage=[[File:Tok3614.png|link=|35px]]}}{{Quests/Task| TaskText=4. Talk To Kelvin| TaskImage=[[File:Npc6397.png|link=|35px]]}} |
||
| Locations={{Quests/Location| Location=Winterville Village}} |
| Locations={{Quests/Location| Location=Winterville Village}} |
||
| − | | Coins= 5 |
+ | | Coins= 5,000[[File:Mat001.png|link=|20px]] |
| − | | ExperiencePoints= 7 |
+ | | ExperiencePoints= 7,500[[File:Sys001.png|link=|20px]] |
| Rewards= 1[[File:Mat078.png|link=|35px]] |
| Rewards= 1[[File:Mat078.png|link=|35px]] |
||
| Available=House Defense |
| Available=House Defense |
||
| Line 248: | Line 250: | ||
| Tasks={{Quests/Task| TaskText=1. Talk To Kelvin| TaskImage=[[File:Npc6530.png|link=|35px]]}}{{Quests/Task| TaskText=2. Set Off Fireworks| TaskImage=[[File:Tok3615.png|link=|35px]]}}{{Quests/Task| TaskText=3. Find Kelvin's Family| TaskImage=[[File:Tok3616.png|link=|35px]]}}{{Quests/Task| TaskText=4. Talk To Kelvin| TaskImage=[[File:Npc6531.png|link=|35px]]}}{{Quests/Task| TaskText=5. Visit New Year's Challenge| TaskImage=[[File: Loc1346.png|link=|35px]]}} |
| Tasks={{Quests/Task| TaskText=1. Talk To Kelvin| TaskImage=[[File:Npc6530.png|link=|35px]]}}{{Quests/Task| TaskText=2. Set Off Fireworks| TaskImage=[[File:Tok3615.png|link=|35px]]}}{{Quests/Task| TaskText=3. Find Kelvin's Family| TaskImage=[[File:Tok3616.png|link=|35px]]}}{{Quests/Task| TaskText=4. Talk To Kelvin| TaskImage=[[File:Npc6531.png|link=|35px]]}}{{Quests/Task| TaskText=5. Visit New Year's Challenge| TaskImage=[[File: Loc1346.png|link=|35px]]}} |
||
| Locations={{Quests/Location| Location=Sydney Harbour<br>New Year's Challenge 1}} |
| Locations={{Quests/Location| Location=Sydney Harbour<br>New Year's Challenge 1}} |
||
| − | | Coins= 1 |
+ | | Coins= 1,000[[File:Mat001.png|link=|20px]] |
| − | | ExperiencePoints= 1 |
+ | | ExperiencePoints= 1,500[[File:Sys001.png|link=|20px]] |
| Rewards= 1[[File:Mat078.png|link=|35px]] |
| Rewards= 1[[File:Mat078.png|link=|35px]] |
||
| Available=Kelvin On The Run |
| Available=Kelvin On The Run |
||
| Line 260: | Line 262: | ||
| Tasks={{Quests/Task| TaskText=1. Talk To Kelvin| TaskImage=[[File:Npc6532.png|link=|35px]]}}{{Quests/Task| TaskText=2. Set Off Fireworks| TaskImage=[[File:Tok3615.png|link=|35px]]}}{{Quests/Task| TaskText=3. Find Kelvin's Family| TaskImage=[[File:Tok3616.png|link=|35px]]}}{{Quests/Task| TaskText=4. Place The Wind Machines (2)| TaskImage=[[File:Tok3656.png|link=|35px]]}}{{Quests/Task| TaskText=5. Talk To Kelvin| TaskImage=[[File:Npc6533.png|link=|35px]]}} |
| Tasks={{Quests/Task| TaskText=1. Talk To Kelvin| TaskImage=[[File:Npc6532.png|link=|35px]]}}{{Quests/Task| TaskText=2. Set Off Fireworks| TaskImage=[[File:Tok3615.png|link=|35px]]}}{{Quests/Task| TaskText=3. Find Kelvin's Family| TaskImage=[[File:Tok3616.png|link=|35px]]}}{{Quests/Task| TaskText=4. Place The Wind Machines (2)| TaskImage=[[File:Tok3656.png|link=|35px]]}}{{Quests/Task| TaskText=5. Talk To Kelvin| TaskImage=[[File:Npc6533.png|link=|35px]]}} |
||
| Locations={{Quests/Location| Location=Streets Of London}} |
| Locations={{Quests/Location| Location=Streets Of London}} |
||
| − | | Coins= 1 |
+ | | Coins= 1,300[[File:Mat001.png|link=|20px]] |
| − | | ExperiencePoints= 2 |
+ | | ExperiencePoints= 2,100[[File:Sys001.png|link=|20px]] |
| Rewards= 1[[File:Mat078.png|link=|35px]] |
| Rewards= 1[[File:Mat078.png|link=|35px]] |
||
| Available=Fireworks In Sydney |
| Available=Fireworks In Sydney |
||
| Line 272: | Line 274: | ||
| Tasks={{Quests/Task| TaskText=1. Talk To Kelvin| TaskImage=[[File:Npc6534.png|link=|35px]]}}{{Quests/Task| TaskText=2. Set Off Fireworks| TaskImage=[[File:Tok3615.png|link=|35px]]}}{{Quests/Task| TaskText=3. Find Kelvin's Family| TaskImage=[[File:Tok3616.png|link=|35px]]}}{{Quests/Task| TaskText=4. Talk To Kelvin| TaskImage=[[File:Npc6535.png|link=|35px]]}}{{Quests/Task| TaskText=5. Visit New Year's Challenge| TaskImage=[[File: Loc1347.png|link=|35px]]}} |
| Tasks={{Quests/Task| TaskText=1. Talk To Kelvin| TaskImage=[[File:Npc6534.png|link=|35px]]}}{{Quests/Task| TaskText=2. Set Off Fireworks| TaskImage=[[File:Tok3615.png|link=|35px]]}}{{Quests/Task| TaskText=3. Find Kelvin's Family| TaskImage=[[File:Tok3616.png|link=|35px]]}}{{Quests/Task| TaskText=4. Talk To Kelvin| TaskImage=[[File:Npc6535.png|link=|35px]]}}{{Quests/Task| TaskText=5. Visit New Year's Challenge| TaskImage=[[File: Loc1347.png|link=|35px]]}} |
||
| Locations={{Quests/Location| Location=Coast Of Cuba<br>New Year's Challenge 2}} |
| Locations={{Quests/Location| Location=Coast Of Cuba<br>New Year's Challenge 2}} |
||
| − | | Coins= 1 |
+ | | Coins= 1,700[[File:Mat001.png|link=|20px]] |
| − | | ExperiencePoints= 2 |
+ | | ExperiencePoints= 2,700[[File:Sys001.png|link=|20px]] |
| Rewards= 1[[File:Mat078.png|link=|35px]] |
| Rewards= 1[[File:Mat078.png|link=|35px]] |
||
| Available=Foggy New Year |
| Available=Foggy New Year |
||
| Line 284: | Line 286: | ||
| Tasks={{Quests/Task| TaskText=1. Talk To Kelvin| TaskImage=[[File:Npc6536.png|link=|35px]]}}{{Quests/Task| TaskText=2. Set Off Fireworks| TaskImage=[[File:Tok3615.png|link=|35px]]}}{{Quests/Task| TaskText=3. Find Kelvin's Family| TaskImage=[[File:Tok3616.png|link=|35px]]}}{{Quests/Task| TaskText=4. Talk To Kelvin| TaskImage=[[File:Npc6537.png|link=|35px]]}} |
| Tasks={{Quests/Task| TaskText=1. Talk To Kelvin| TaskImage=[[File:Npc6536.png|link=|35px]]}}{{Quests/Task| TaskText=2. Set Off Fireworks| TaskImage=[[File:Tok3615.png|link=|35px]]}}{{Quests/Task| TaskText=3. Find Kelvin's Family| TaskImage=[[File:Tok3616.png|link=|35px]]}}{{Quests/Task| TaskText=4. Talk To Kelvin| TaskImage=[[File:Npc6537.png|link=|35px]]}} |
||
| Locations={{Quests/Location| Location=Statue Of Liberty}} |
| Locations={{Quests/Location| Location=Statue Of Liberty}} |
||
| − | | Coins= 1 |
+ | | Coins= 1,800[[File:Mat001.png|link=|20px]] |
| − | | ExperiencePoints= 3 |
+ | | ExperiencePoints= 3,500[[File:Sys001.png|link=|20px]] |
| Rewards= 1[[File:Mat078.png|link=|35px]] |
| Rewards= 1[[File:Mat078.png|link=|35px]] |
||
| Available=Family Chase |
| Available=Family Chase |
||
| Line 306: | Line 308: | ||
| Tasks={{Quests/Task| TaskText=1. Talk To Macgainer| TaskImage=[[File:Npc5965.png|link=|35px]]}}{{Quests/Task| TaskText=2. Talk To Juanita| TaskImage=[[File:Npc5919.png|link=|35px]]}}{{Quests/Task| TaskText=3. Find Radioactive Barrels| TaskImage=[[File:Tok3397.png|link=|35px]]}}{{Quests/Task| TaskText=4. Get Proof| TaskImage=[[File:Tok3398.png|link=|35px]]}}{{Quests/Task| TaskText=5. Talk To Juanita| TaskImage=[[File:Npc5966.png|link=|35px]]}}{{Quests/Task| TaskText=6. Catch Murloc| TaskImage=[[File:Tok3399.png|link=|35px]]}}{{Quests/Task| TaskText=7. Defeat Mutant Ants| TaskImage=[[File:Tok3400.png|link=|35px]]}}{{Quests/Task| TaskText=8. Visit Macgainer's Challenge 1| TaskImage=[[File: Loc1301.png|link=|35px]]}}{{Quests/Task| TaskText=9. Talk To Macgainer| TaskImage=[[File:Npc5965.png|link=|35px]]}} |
| Tasks={{Quests/Task| TaskText=1. Talk To Macgainer| TaskImage=[[File:Npc5965.png|link=|35px]]}}{{Quests/Task| TaskText=2. Talk To Juanita| TaskImage=[[File:Npc5919.png|link=|35px]]}}{{Quests/Task| TaskText=3. Find Radioactive Barrels| TaskImage=[[File:Tok3397.png|link=|35px]]}}{{Quests/Task| TaskText=4. Get Proof| TaskImage=[[File:Tok3398.png|link=|35px]]}}{{Quests/Task| TaskText=5. Talk To Juanita| TaskImage=[[File:Npc5966.png|link=|35px]]}}{{Quests/Task| TaskText=6. Catch Murloc| TaskImage=[[File:Tok3399.png|link=|35px]]}}{{Quests/Task| TaskText=7. Defeat Mutant Ants| TaskImage=[[File:Tok3400.png|link=|35px]]}}{{Quests/Task| TaskText=8. Visit Macgainer's Challenge 1| TaskImage=[[File: Loc1301.png|link=|35px]]}}{{Quests/Task| TaskText=9. Talk To Macgainer| TaskImage=[[File:Npc5965.png|link=|35px]]}} |
||
| Locations={{Quests/Location| Location=Free Trade Plantation<br>Macgainer's Challenge 1}} |
| Locations={{Quests/Location| Location=Free Trade Plantation<br>Macgainer's Challenge 1}} |
||
| − | | Coins= 1 |
+ | | Coins= 1,500[[File:Mat001.png|link=|20px]] |
| − | | ExperiencePoints= 3 |
+ | | ExperiencePoints= 3,000[[File:Sys001.png|link=|20px]] |
| Rewards= |
| Rewards= |
||
| − | | Available=Continuing The Adventure |
+ | | Available=[https://diggysadventure.fandom.com/wiki/Egypt_(Quests)#Isis Continuing The Adventure] |
}} |
}} |
||
| Line 319: | Line 321: | ||
| Tasks={{Quests/Task| TaskText=1. Talk To Chief Odakota| TaskImage=[[File:Tok3401.png|link=|35px]]}}{{Quests/Task| TaskText=2. Free Chief Odakota| TaskImage=[[File:Tok3401.png|link=|35px]]}}{{Quests/Task| TaskText=3. Find Out Who's Sabotaging The Oil Company| TaskImage=[[File:Tok3402.png|link=|35px]]}}{{Quests/Task| TaskText=4. Catch Murloc| TaskImage=[[File:Tok3399.png|link=|35px]]}}{{Quests/Task| TaskText=5. Put Out Oil Well Fires (3)| TaskImage=[[File:Tok3403.png|link=|35px]]}}{{Quests/Task| TaskText=6. Visit Macgainer's Challenge 2| TaskImage=[[File: Loc1302.png|link=|35px]]}}{{Quests/Task| TaskText=7. Talk To Macgainer| TaskImage=[[File:Npc5965.png|link=|35px]]}} |
| Tasks={{Quests/Task| TaskText=1. Talk To Chief Odakota| TaskImage=[[File:Tok3401.png|link=|35px]]}}{{Quests/Task| TaskText=2. Free Chief Odakota| TaskImage=[[File:Tok3401.png|link=|35px]]}}{{Quests/Task| TaskText=3. Find Out Who's Sabotaging The Oil Company| TaskImage=[[File:Tok3402.png|link=|35px]]}}{{Quests/Task| TaskText=4. Catch Murloc| TaskImage=[[File:Tok3399.png|link=|35px]]}}{{Quests/Task| TaskText=5. Put Out Oil Well Fires (3)| TaskImage=[[File:Tok3403.png|link=|35px]]}}{{Quests/Task| TaskText=6. Visit Macgainer's Challenge 2| TaskImage=[[File: Loc1302.png|link=|35px]]}}{{Quests/Task| TaskText=7. Talk To Macgainer| TaskImage=[[File:Npc5965.png|link=|35px]]}} |
||
| Locations={{Quests/Location| Location=Indian Oil Field<br>Macgainer's Challenge 2}} |
| Locations={{Quests/Location| Location=Indian Oil Field<br>Macgainer's Challenge 2}} |
||
| − | | Coins= 2 |
+ | | Coins= 2,200[[File:Mat001.png|link=|20px]] |
| − | | ExperiencePoints= 4 |
+ | | ExperiencePoints= 4,200[[File:Sys001.png|link=|20px]] |
| Rewards= |
| Rewards= |
||
| Available=Poisoned Plantation |
| Available=Poisoned Plantation |
||
| Line 332: | Line 334: | ||
| Tasks={{Quests/Task| TaskText=1. Talk To Scientist Marcel| TaskImage=[[File:Npc5967.png|link=|35px]]}}{{Quests/Task| TaskText=2. Find The Lost Scientists| TaskImage=[[File:Tok3404.png|link=|35px]]}}{{Quests/Task| TaskText=3. Thaw The Scientists (4)| TaskImage=[[File:Tok3405.png|link=|35px]]}}{{Quests/Task| TaskText=4. Catch Murloc| TaskImage=[[File:Tok3399.png|link=|35px]]}}{{Quests/Task| TaskText=5. Build A Plane| TaskImage=[[File:Tok3406.png|link=|35px]]}}{{Quests/Task| TaskText=6. Visit Macgainer's Challenge 3| TaskImage=[[File: Loc1303.png|link=|35px]]}} |
| Tasks={{Quests/Task| TaskText=1. Talk To Scientist Marcel| TaskImage=[[File:Npc5967.png|link=|35px]]}}{{Quests/Task| TaskText=2. Find The Lost Scientists| TaskImage=[[File:Tok3404.png|link=|35px]]}}{{Quests/Task| TaskText=3. Thaw The Scientists (4)| TaskImage=[[File:Tok3405.png|link=|35px]]}}{{Quests/Task| TaskText=4. Catch Murloc| TaskImage=[[File:Tok3399.png|link=|35px]]}}{{Quests/Task| TaskText=5. Build A Plane| TaskImage=[[File:Tok3406.png|link=|35px]]}}{{Quests/Task| TaskText=6. Visit Macgainer's Challenge 3| TaskImage=[[File: Loc1303.png|link=|35px]]}} |
||
| Locations={{Quests/Location| Location=Antarctica Station<br>Macgainer's Challenge 3}} |
| Locations={{Quests/Location| Location=Antarctica Station<br>Macgainer's Challenge 3}} |
||
| − | | Coins= 3 |
+ | | Coins= 3,050[[File:Mat001.png|link=|20px]] |
| − | | ExperiencePoints= 5 |
+ | | ExperiencePoints= 5,300[[File:Sys001.png|link=|20px]] |
| Rewards= |
| Rewards= |
||
| Available=Oil On Fire |
| Available=Oil On Fire |
||
| Line 344: | Line 346: | ||
| Tasks={{Quests/Task| TaskText=1. Get Inside The Control Room| TaskImage=[[File:Tok3407.png|link=|35px]]}}{{Quests/Task| TaskText=2. Catch Murloc| TaskImage=[[File:Tok3399.png|link=|35px]]}}{{Quests/Task| TaskText=3. Deactivate The Bomb| TaskImage=[[File:Tok3408.png|link=|35px]]}}{{Quests/Task| TaskText=4. Talk To Macgainer| TaskImage=[[File:Npc5968.png|link=|35px]]}} |
| Tasks={{Quests/Task| TaskText=1. Get Inside The Control Room| TaskImage=[[File:Tok3407.png|link=|35px]]}}{{Quests/Task| TaskText=2. Catch Murloc| TaskImage=[[File:Tok3399.png|link=|35px]]}}{{Quests/Task| TaskText=3. Deactivate The Bomb| TaskImage=[[File:Tok3408.png|link=|35px]]}}{{Quests/Task| TaskText=4. Talk To Macgainer| TaskImage=[[File:Npc5968.png|link=|35px]]}} |
||
| Locations={{Quests/Location| Location=Toxic Waste Power Station}} |
| Locations={{Quests/Location| Location=Toxic Waste Power Station}} |
||
| − | | Coins= 4 |
+ | | Coins= 4,300[[File:Mat001.png|link=|20px]] |
| − | | ExperiencePoints= 6 |
+ | | ExperiencePoints= 6,400[[File:Sys001.png|link=|20px]] |
| Rewards= |
| Rewards= |
||
| Available=Polar Threat |
| Available=Polar Threat |
||
| Line 369: | Line 371: | ||
| ExperiencePoints= 500[[File:Sys001.png|link=|20px]] |
| ExperiencePoints= 500[[File:Sys001.png|link=|20px]] |
||
| Rewards= |
| Rewards= |
||
| − | | Available=Continuing The Adventure |
+ | | Available=[https://diggysadventure.fandom.com/wiki/Egypt_(Quests)#Isis Continuing The Adventure] |
}} |
}} |
||
| Line 379: | Line 381: | ||
| Locations={{Quests/Location| Location=New York University}} |
| Locations={{Quests/Location| Location=New York University}} |
||
| Coins= 800[[File:Mat001.png|link=|20px]] |
| Coins= 800[[File:Mat001.png|link=|20px]] |
||
| − | | ExperiencePoints= 1 |
+ | | ExperiencePoints= 1,800[[File:Sys001.png|link=|20px]] |
| Rewards= |
| Rewards= |
||
| Available=Halloween Party |
| Available=Halloween Party |
||
| Line 391: | Line 393: | ||
| Tasks={{Quests/Task| TaskText=1. Talk To Dr. Deacon Sprinkler| TaskImage=[[File:Npc5610.png|link=|35px]]}}{{Quests/Task| TaskText=2. Find Headless Horseman's Head| TaskImage=[[File:Tok3280.png|link=|35px]]}}{{Quests/Task| TaskText=3. Capture Headless Horseman| TaskImage=[[File:Tok3281.png|link=|35px]]}}{{Quests/Task| TaskText=4. Visit Halloween Challenge| TaskImage=[[File: Loc1280.png|link=|35px]]}}{{Quests/Task| TaskText=5. Talk To Dr. Peter Wingman| TaskImage=[[File:Npc5609.png|link=|35px]]}} |
| Tasks={{Quests/Task| TaskText=1. Talk To Dr. Deacon Sprinkler| TaskImage=[[File:Npc5610.png|link=|35px]]}}{{Quests/Task| TaskText=2. Find Headless Horseman's Head| TaskImage=[[File:Tok3280.png|link=|35px]]}}{{Quests/Task| TaskText=3. Capture Headless Horseman| TaskImage=[[File:Tok3281.png|link=|35px]]}}{{Quests/Task| TaskText=4. Visit Halloween Challenge| TaskImage=[[File: Loc1280.png|link=|35px]]}}{{Quests/Task| TaskText=5. Talk To Dr. Peter Wingman| TaskImage=[[File:Npc5609.png|link=|35px]]}} |
||
| Locations={{Quests/Location| Location=Waking Hollow<br>Halloween Challenge 2}} |
| Locations={{Quests/Location| Location=Waking Hollow<br>Halloween Challenge 2}} |
||
| − | | Coins= 1 |
+ | | Coins= 1,500[[File:Mat001.png|link=|20px]] |
| − | | ExperiencePoints= 3 |
+ | | ExperiencePoints= 3,100[[File:Sys001.png|link=|20px]] |
| Rewards= |
| Rewards= |
||
| Available=Who You Gonna Call? |
| Available=Who You Gonna Call? |
||
| Line 404: | Line 406: | ||
| Tasks={{Quests/Task| TaskText=1. Talk To Dr. Ray Stance| TaskImage=[[File:Npc5611.png|link=|35px]]}}{{Quests/Task| TaskText=2. Find Sodoko's Videotape| TaskImage=[[File:Tok3282.png|link=|35px]]}}{{Quests/Task| TaskText=3. Capture Sodoko| TaskImage=[[File:Tok3283.png|link=|35px]]}}{{Quests/Task| TaskText=4. Talk To Dr. Peter Wingman| TaskImage=[[File:Npc5609.png|link=|35px]]}} |
| Tasks={{Quests/Task| TaskText=1. Talk To Dr. Ray Stance| TaskImage=[[File:Npc5611.png|link=|35px]]}}{{Quests/Task| TaskText=2. Find Sodoko's Videotape| TaskImage=[[File:Tok3282.png|link=|35px]]}}{{Quests/Task| TaskText=3. Capture Sodoko| TaskImage=[[File:Tok3283.png|link=|35px]]}}{{Quests/Task| TaskText=4. Talk To Dr. Peter Wingman| TaskImage=[[File:Npc5609.png|link=|35px]]}} |
||
| Locations={{Quests/Location| Location=Japanese Villa}} |
| Locations={{Quests/Location| Location=Japanese Villa}} |
||
| − | | Coins= 3 |
+ | | Coins= 3,060[[File:Mat001.png|link=|20px]] |
| − | | ExperiencePoints= 4 |
+ | | ExperiencePoints= 4,600[[File:Sys001.png|link=|20px]] |
| Rewards= |
| Rewards= |
||
| Available=Headless Horseman |
| Available=Headless Horseman |
||
| Line 417: | Line 419: | ||
| Tasks={{Quests/Task| TaskText=1. Talk To Dr. Winston Sadmore| TaskImage=[[File:Npc5612.png|link=|35px]]}}{{Quests/Task| TaskText=2. Find 3 Things (3)| TaskImage=[[File:Tok3284.png|link=|35px]]}}{{Quests/Task| TaskText=3. Capture White Lady| TaskImage=[[File:Tok3287.png|link=|35px]]}}{{Quests/Task| TaskText=4. Visit Halloween Challenge| TaskImage=[[File: Loc1281.png|link=|35px]]}}{{Quests/Task| TaskText=5. Talk To Dr. Peter Wingman| TaskImage=[[File:Npc5609.png|link=|35px]]}} |
| Tasks={{Quests/Task| TaskText=1. Talk To Dr. Winston Sadmore| TaskImage=[[File:Npc5612.png|link=|35px]]}}{{Quests/Task| TaskText=2. Find 3 Things (3)| TaskImage=[[File:Tok3284.png|link=|35px]]}}{{Quests/Task| TaskText=3. Capture White Lady| TaskImage=[[File:Tok3287.png|link=|35px]]}}{{Quests/Task| TaskText=4. Visit Halloween Challenge| TaskImage=[[File: Loc1281.png|link=|35px]]}}{{Quests/Task| TaskText=5. Talk To Dr. Peter Wingman| TaskImage=[[File:Npc5609.png|link=|35px]]}} |
||
| Locations={{Quests/Location| Location=Hudson Castle<br>Halloween Challenge 3}} |
| Locations={{Quests/Location| Location=Hudson Castle<br>Halloween Challenge 3}} |
||
| − | | Coins= 3 |
+ | | Coins= 3,800[[File:Mat001.png|link=|20px]] |
| − | | ExperiencePoints= 5 |
+ | | ExperiencePoints= 5,300[[File:Sys001.png|link=|20px]] |
| Rewards= |
| Rewards= |
||
| Available=Haunted Videotape |
| Available=Haunted Videotape |
||
| Line 430: | Line 432: | ||
| Tasks={{Quests/Task| TaskText=1. Talk To Dr. Deacon Sprinkler| TaskImage=[[File:Npc5613.png|link=|35px]]}}{{Quests/Task| TaskText=2. Find The Ancient Map| TaskImage=[[File:Tok3288.png|link=|35px]]}}{{Quests/Task| TaskText=3. Find The Ancient Compass| TaskImage=[[File:Tok3289.png|link=|35px]]}}{{Quests/Task| TaskText=4. Set Up A Trap On The Ghost Ship| TaskImage=[[File:Tok3290.png|link=|35px]]}}{{Quests/Task| TaskText=5. Capture Flying Dutchman| TaskImage=[[File:Tok3291.png|link=|35px]]}}{{Quests/Task| TaskText=6. Visit Halloween Challenge| TaskImage=[[File: Loc1282.png|link=|35px]]}}{{Quests/Task| TaskText=7. Talk To Dr. Peter Wingman| TaskImage=[[File:Npc5609.png|link=|35px]]}} |
| Tasks={{Quests/Task| TaskText=1. Talk To Dr. Deacon Sprinkler| TaskImage=[[File:Npc5613.png|link=|35px]]}}{{Quests/Task| TaskText=2. Find The Ancient Map| TaskImage=[[File:Tok3288.png|link=|35px]]}}{{Quests/Task| TaskText=3. Find The Ancient Compass| TaskImage=[[File:Tok3289.png|link=|35px]]}}{{Quests/Task| TaskText=4. Set Up A Trap On The Ghost Ship| TaskImage=[[File:Tok3290.png|link=|35px]]}}{{Quests/Task| TaskText=5. Capture Flying Dutchman| TaskImage=[[File:Tok3291.png|link=|35px]]}}{{Quests/Task| TaskText=6. Visit Halloween Challenge| TaskImage=[[File: Loc1282.png|link=|35px]]}}{{Quests/Task| TaskText=7. Talk To Dr. Peter Wingman| TaskImage=[[File:Npc5609.png|link=|35px]]}} |
||
| Locations={{Quests/Location| Location=New York Harbour<br>Halloween Challenge 4}} |
| Locations={{Quests/Location| Location=New York Harbour<br>Halloween Challenge 4}} |
||
| − | | Coins= 4 |
+ | | Coins= 4,300[[File:Mat001.png|link=|20px]] |
| − | | ExperiencePoints= 6 |
+ | | ExperiencePoints= 6,040[[File:Sys001.png|link=|20px]] |
| Rewards= |
| Rewards= |
||
| Available=White Lady |
| Available=White Lady |
||
| Line 443: | Line 445: | ||
| Tasks={{Quests/Task| TaskText=1. Talk To Dr. Winston Sadmore| TaskImage=[[File:Npc5614.png|link=|35px]]}}{{Quests/Task| TaskText=2. Capture Abraham Lincoln| TaskImage=[[File:Tok3293.png|link=|35px]]}}{{Quests/Task| TaskText=3. Capture George Washington| TaskImage=[[File:Tok3292.png|link=|35px]]}}{{Quests/Task| TaskText=4. Capture Richard Nixon| TaskImage=[[File:Tok3294.png|link=|35px]]}}{{Quests/Task| TaskText=5. Visit Halloween Challenge| TaskImage=[[File: Loc1283.png|link=|35px]]}}{{Quests/Task| TaskText=6. Talk To Dr. Peter Wingman| TaskImage=[[File:Npc5609.png|link=|35px]]}} |
| Tasks={{Quests/Task| TaskText=1. Talk To Dr. Winston Sadmore| TaskImage=[[File:Npc5614.png|link=|35px]]}}{{Quests/Task| TaskText=2. Capture Abraham Lincoln| TaskImage=[[File:Tok3293.png|link=|35px]]}}{{Quests/Task| TaskText=3. Capture George Washington| TaskImage=[[File:Tok3292.png|link=|35px]]}}{{Quests/Task| TaskText=4. Capture Richard Nixon| TaskImage=[[File:Tok3294.png|link=|35px]]}}{{Quests/Task| TaskText=5. Visit Halloween Challenge| TaskImage=[[File: Loc1283.png|link=|35px]]}}{{Quests/Task| TaskText=6. Talk To Dr. Peter Wingman| TaskImage=[[File:Npc5609.png|link=|35px]]}} |
||
| Locations={{Quests/Location| Location=Central Park<br>Halloween Challenge 5}} |
| Locations={{Quests/Location| Location=Central Park<br>Halloween Challenge 5}} |
||
| − | | Coins= 5 |
+ | | Coins= 5,070[[File:Mat001.png|link=|20px]] |
| − | | ExperiencePoints= 7 |
+ | | ExperiencePoints= 7,000[[File:Sys001.png|link=|20px]] |
| Rewards= |
| Rewards= |
||
| Available=Ghost Ship |
| Available=Ghost Ship |
||
| Line 455: | Line 457: | ||
| Tasks={{Quests/Task| TaskText=1. Talk To Dr. Peter Wingman| TaskImage=[[File:Npc5615.png|link=|35px]]}}{{Quests/Task| TaskText=2. Get Inside The Hell Dimension| TaskImage=[[File:Tok3296.png|link=|35px]]}}{{Quests/Task| TaskText=3. Put Necronomicon To Sleep| TaskImage=[[File:Tok3297.png|link=|35px]]}}{{Quests/Task| TaskText=4. Talk To Dr. Peter Wingman| TaskImage=[[File:Npc5616.png|link=|35px]]}} |
| Tasks={{Quests/Task| TaskText=1. Talk To Dr. Peter Wingman| TaskImage=[[File:Npc5615.png|link=|35px]]}}{{Quests/Task| TaskText=2. Get Inside The Hell Dimension| TaskImage=[[File:Tok3296.png|link=|35px]]}}{{Quests/Task| TaskText=3. Put Necronomicon To Sleep| TaskImage=[[File:Tok3297.png|link=|35px]]}}{{Quests/Task| TaskText=4. Talk To Dr. Peter Wingman| TaskImage=[[File:Npc5616.png|link=|35px]]}} |
||
| Locations={{Quests/Location| Location=8th Circle Of Hell}} |
| Locations={{Quests/Location| Location=8th Circle Of Hell}} |
||
| − | | Coins= 6 |
+ | | Coins= 6,300[[File:Mat001.png|link=|20px]] |
| − | | ExperiencePoints= 8 |
+ | | ExperiencePoints= 8,300[[File:Sys001.png|link=|20px]] |
| Rewards= |
| Rewards= |
||
| Available=Capturing Presidents |
| Available=Capturing Presidents |
||
| Line 478: | Line 480: | ||
| Locations={{Quests/Location| Location=Coconut Orchard}} |
| Locations={{Quests/Location| Location=Coconut Orchard}} |
||
| Coins= 790[[File:Mat001.png|link=|20px]] |
| Coins= 790[[File:Mat001.png|link=|20px]] |
||
| − | | ExperiencePoints= 1 |
+ | | ExperiencePoints= 1,370[[File:Sys001.png|link=|20px]] |
| Rewards= |
| Rewards= |
||
| − | | Available=Continuing The Adventure |
+ | | Available=[https://diggysadventure.fandom.com/wiki/Egypt_(Quests)#Isis Continuing The Adventure] |
}} |
}} |
||
| Line 490: | Line 492: | ||
| Tasks={{Quests/Task| TaskText=1. Find A Crystal Skull| TaskImage=[[File:Tok3126.png|link=|35px]]}}{{Quests/Task| TaskText=2. Find Jack's Ship| TaskImage=[[File:Tok3127.png|link=|35px]]}}{{Quests/Task| TaskText=3. Clean The Ship (33)| TaskImage=[[File:Tok3128.png|link=|35px]]}}{{Quests/Task| TaskText=4. Talk To Jack Deep| TaskImage=[[File:Npc5264.png|link=|35px]]}} |
| Tasks={{Quests/Task| TaskText=1. Find A Crystal Skull| TaskImage=[[File:Tok3126.png|link=|35px]]}}{{Quests/Task| TaskText=2. Find Jack's Ship| TaskImage=[[File:Tok3127.png|link=|35px]]}}{{Quests/Task| TaskText=3. Clean The Ship (33)| TaskImage=[[File:Tok3128.png|link=|35px]]}}{{Quests/Task| TaskText=4. Talk To Jack Deep| TaskImage=[[File:Npc5264.png|link=|35px]]}} |
||
| Locations={{Quests/Location| Location=Island Of Crystal Skulls}} |
| Locations={{Quests/Location| Location=Island Of Crystal Skulls}} |
||
| − | | Coins= 1 |
+ | | Coins= 1,810[[File:Mat001.png|link=|20px]] |
| − | | ExperiencePoints= 2 |
+ | | ExperiencePoints= 2,380[[File:Sys001.png|link=|20px]] |
| Rewards= |
| Rewards= |
||
| Available=Coconut Refreshment |
| Available=Coconut Refreshment |
||
| Line 502: | Line 504: | ||
| Tasks={{Quests/Task| TaskText=1. Talk To Jack Deep| TaskImage=[[File:Npc5230.png|link=|35px]]}}{{Quests/Task| TaskText=2. Get Pirate Cook To Join In| TaskImage=[[File:Tok3129.png|link=|35px]]}}{{Quests/Task| TaskText=3. Get Barber Pirate To Join In| TaskImage=[[File:Tok3130.png|link=|35px]]}}{{Quests/Task| TaskText=4. Get Pirate Monk To Join In| TaskImage=[[File:Tok3131.png|link=|35px]]}}{{Quests/Task| TaskText=5. Talk To Jack Deep| TaskImage=[[File:Npc5346.png|link=|35px]]}}{{Quests/Task| TaskText=6. Save Pirates (8)| TaskImage=[[File:Tok3132.png|link=|35px]]}}{{Quests/Task| TaskText=7. Find Jack Deep| TaskImage=[[File:Tok3160.png|link=|35px]]}}{{Quests/Task| TaskText=8. Visit Pirate Challenge 1| TaskImage=[[File: Loc1253.png|link=|35px]]}} |
| Tasks={{Quests/Task| TaskText=1. Talk To Jack Deep| TaskImage=[[File:Npc5230.png|link=|35px]]}}{{Quests/Task| TaskText=2. Get Pirate Cook To Join In| TaskImage=[[File:Tok3129.png|link=|35px]]}}{{Quests/Task| TaskText=3. Get Barber Pirate To Join In| TaskImage=[[File:Tok3130.png|link=|35px]]}}{{Quests/Task| TaskText=4. Get Pirate Monk To Join In| TaskImage=[[File:Tok3131.png|link=|35px]]}}{{Quests/Task| TaskText=5. Talk To Jack Deep| TaskImage=[[File:Npc5346.png|link=|35px]]}}{{Quests/Task| TaskText=6. Save Pirates (8)| TaskImage=[[File:Tok3132.png|link=|35px]]}}{{Quests/Task| TaskText=7. Find Jack Deep| TaskImage=[[File:Tok3160.png|link=|35px]]}}{{Quests/Task| TaskText=8. Visit Pirate Challenge 1| TaskImage=[[File: Loc1253.png|link=|35px]]}} |
||
| Locations={{Quests/Location| Location=Tortuga Bay<br>Pirate Challenge 1}} |
| Locations={{Quests/Location| Location=Tortuga Bay<br>Pirate Challenge 1}} |
||
| − | | Coins= 2 |
+ | | Coins= 2,900[[File:Mat001.png|link=|20px]] |
| − | | ExperiencePoints= 4 |
+ | | ExperiencePoints= 4,290[[File:Sys001.png|link=|20px]] |
| Rewards= |
| Rewards= |
||
| Available=Searching For Treasure |
| Available=Searching For Treasure |
||
| Line 514: | Line 516: | ||
| Tasks={{Quests/Task| TaskText=1. Get Inside The Fortress| TaskImage=[[File:Tok3133.png|link=|35px]]}}{{Quests/Task| TaskText=2. Free Jack Deep| TaskImage=[[File:Tok3134.png|link=|35px]]}}{{Quests/Task| TaskText=3. Get The Skull Back| TaskImage=[[File:Tok3135.png|link=|35px]]}}{{Quests/Task| TaskText=4. Get Back To The Ship| TaskImage=[[File:Tok3136.png|link=|35px]]}}{{Quests/Task| TaskText=5. Talk To Jack Deep| TaskImage=[[File:Npc5231.png|link=|35px]]}} |
| Tasks={{Quests/Task| TaskText=1. Get Inside The Fortress| TaskImage=[[File:Tok3133.png|link=|35px]]}}{{Quests/Task| TaskText=2. Free Jack Deep| TaskImage=[[File:Tok3134.png|link=|35px]]}}{{Quests/Task| TaskText=3. Get The Skull Back| TaskImage=[[File:Tok3135.png|link=|35px]]}}{{Quests/Task| TaskText=4. Get Back To The Ship| TaskImage=[[File:Tok3136.png|link=|35px]]}}{{Quests/Task| TaskText=5. Talk To Jack Deep| TaskImage=[[File:Npc5231.png|link=|35px]]}} |
||
| Locations={{Quests/Location| Location=Fortress Of Escape}} |
| Locations={{Quests/Location| Location=Fortress Of Escape}} |
||
| − | | Coins= 5 |
+ | | Coins= 5,250[[File:Mat001.png|link=|20px]] |
| − | | ExperiencePoints= 6 |
+ | | ExperiencePoints= 6,500[[File:Sys001.png|link=|20px]] |
| Rewards= |
| Rewards= |
||
| Available=Jack Deep's Crew |
| Available=Jack Deep's Crew |
||
| Line 526: | Line 528: | ||
| Tasks={{Quests/Task| TaskText=1. Find Cannon Balls| TaskImage=[[File:Tok3137.png|link=|35px]]}}{{Quests/Task| TaskText=2. Find 1 Bag Of Gun Powder| TaskImage=[[File:Tok3138.png|link=|35px]]}}{{Quests/Task| TaskText=3. Fire The Cannons (6)| TaskImage=[[File:Tok3139.png|link=|35px]]}}{{Quests/Task| TaskText=4. Board The Ship| TaskImage=[[File:Tok3140.png|link=|35px]]}}{{Quests/Task| TaskText=5. Find A Crystal Skull| TaskImage=[[File:Tok3141.png|link=|35px]]}}{{Quests/Task| TaskText=6. Talk To Jack Deep| TaskImage=[[File:Npc5229.png|link=|35px]]}}{{Quests/Task| TaskText=7. Visit Pirate Challenge 2| TaskImage=[[File: Loc1254.png|link=|35px]]}}{{Quests/Task| TaskText=8. Talk To Jack Deep| TaskImage=[[File:Npc5229.png|link=|35px]]}} |
| Tasks={{Quests/Task| TaskText=1. Find Cannon Balls| TaskImage=[[File:Tok3137.png|link=|35px]]}}{{Quests/Task| TaskText=2. Find 1 Bag Of Gun Powder| TaskImage=[[File:Tok3138.png|link=|35px]]}}{{Quests/Task| TaskText=3. Fire The Cannons (6)| TaskImage=[[File:Tok3139.png|link=|35px]]}}{{Quests/Task| TaskText=4. Board The Ship| TaskImage=[[File:Tok3140.png|link=|35px]]}}{{Quests/Task| TaskText=5. Find A Crystal Skull| TaskImage=[[File:Tok3141.png|link=|35px]]}}{{Quests/Task| TaskText=6. Talk To Jack Deep| TaskImage=[[File:Npc5229.png|link=|35px]]}}{{Quests/Task| TaskText=7. Visit Pirate Challenge 2| TaskImage=[[File: Loc1254.png|link=|35px]]}}{{Quests/Task| TaskText=8. Talk To Jack Deep| TaskImage=[[File:Npc5229.png|link=|35px]]}} |
||
| Locations={{Quests/Location| Location=Pacific Current<br>Pirate Challenge 2}} |
| Locations={{Quests/Location| Location=Pacific Current<br>Pirate Challenge 2}} |
||
| − | | Coins= 7 |
+ | | Coins= 7,300[[File:Mat001.png|link=|20px]] |
| − | | ExperiencePoints= 8 |
+ | | ExperiencePoints= 8,370[[File:Sys001.png|link=|20px]] |
| Rewards= |
| Rewards= |
||
| Available=Jack On The Run |
| Available=Jack On The Run |
||
| Line 539: | Line 541: | ||
| Tasks={{Quests/Task| TaskText=1. Talk To Jack Deep| TaskImage=[[File:Npc5389.png|link=|35px]]}}{{Quests/Task| TaskText=2. Find Voodoo Priestess' Hut| TaskImage=[[File:Tok3142.png|link=|35px]]}}{{Quests/Task| TaskText=3. Talk To Voodoo Priestess| TaskImage=[[File:Npc5234.png|link=|35px]]}}{{Quests/Task| TaskText=4. Find Temple| TaskImage=[[File:Tok3144.png|link=|35px]]}}{{Quests/Task| TaskText=5. Find List Of Crystal Skulls| TaskImage=[[File:Tok3145.png|link=|35px]]}}{{Quests/Task| TaskText=6. Find A Crystal Skull| TaskImage=[[File:Tok3141.png|link=|35px]]}}{{Quests/Task| TaskText=7. Talk To Jack Deep| TaskImage=[[File:Npc5229.png|link=|35px]]}}{{Quests/Task| TaskText=8. Visit Pirate Challenge 3| TaskImage=[[File: Loc1255.png|link=|35px]]}}{{Quests/Task| TaskText=9. Talk To Jack Deep| TaskImage=[[File:Npc5229.png|link=|35px]]}} |
| Tasks={{Quests/Task| TaskText=1. Talk To Jack Deep| TaskImage=[[File:Npc5389.png|link=|35px]]}}{{Quests/Task| TaskText=2. Find Voodoo Priestess' Hut| TaskImage=[[File:Tok3142.png|link=|35px]]}}{{Quests/Task| TaskText=3. Talk To Voodoo Priestess| TaskImage=[[File:Npc5234.png|link=|35px]]}}{{Quests/Task| TaskText=4. Find Temple| TaskImage=[[File:Tok3144.png|link=|35px]]}}{{Quests/Task| TaskText=5. Find List Of Crystal Skulls| TaskImage=[[File:Tok3145.png|link=|35px]]}}{{Quests/Task| TaskText=6. Find A Crystal Skull| TaskImage=[[File:Tok3141.png|link=|35px]]}}{{Quests/Task| TaskText=7. Talk To Jack Deep| TaskImage=[[File:Npc5229.png|link=|35px]]}}{{Quests/Task| TaskText=8. Visit Pirate Challenge 3| TaskImage=[[File: Loc1255.png|link=|35px]]}}{{Quests/Task| TaskText=9. Talk To Jack Deep| TaskImage=[[File:Npc5229.png|link=|35px]]}} |
||
| Locations={{Quests/Location| Location=Swamp Island<br>Pirate Challenge 3}} |
| Locations={{Quests/Location| Location=Swamp Island<br>Pirate Challenge 3}} |
||
| − | | Coins= 8 |
+ | | Coins= 8,600[[File:Mat001.png|link=|20px]] |
| − | | ExperiencePoints= 10 |
+ | | ExperiencePoints= 10,060[[File:Sys001.png|link=|20px]] |
| Rewards= |
| Rewards= |
||
| Available=Sea Battle |
| Available=Sea Battle |
||
| Line 552: | Line 554: | ||
| Tasks={{Quests/Task| TaskText=1. Find A Crystal Skull| TaskImage=[[File:Tok3141.png|link=|35px]]}}{{Quests/Task| TaskText=2. Talk To Jack Deep| TaskImage=[[File:Npc5229.png|link=|35px]]}}{{Quests/Task| TaskText=3. Visit Pirate Challenge 4| TaskImage=[[File: Loc1256.png|link=|35px]]}}{{Quests/Task| TaskText=4. Talk To Jack Deep| TaskImage=[[File:Npc5229.png|link=|35px]]}} |
| Tasks={{Quests/Task| TaskText=1. Find A Crystal Skull| TaskImage=[[File:Tok3141.png|link=|35px]]}}{{Quests/Task| TaskText=2. Talk To Jack Deep| TaskImage=[[File:Npc5229.png|link=|35px]]}}{{Quests/Task| TaskText=3. Visit Pirate Challenge 4| TaskImage=[[File: Loc1256.png|link=|35px]]}}{{Quests/Task| TaskText=4. Talk To Jack Deep| TaskImage=[[File:Npc5229.png|link=|35px]]}} |
||
| Locations={{Quests/Location| Location=Shipwreck Bay<br>Pirate Challenge 4}} |
| Locations={{Quests/Location| Location=Shipwreck Bay<br>Pirate Challenge 4}} |
||
| − | | Coins= 10 |
+ | | Coins= 10,100[[File:Mat001.png|link=|20px]] |
| − | | ExperiencePoints= 11 |
+ | | ExperiencePoints= 11,800[[File:Sys001.png|link=|20px]] |
| Rewards= |
| Rewards= |
||
| Available=Voodoo Priestess |
| Available=Voodoo Priestess |
||
| Line 565: | Line 567: | ||
| Tasks={{Quests/Task| TaskText=1. Find Flying Dutchman| TaskImage=[[File:Tok3148.png|link=|35px]]}}{{Quests/Task| TaskText=2. Talk To Flying Dutchman| TaskImage=[[File:Npc5236.png|link=|35px]]}}{{Quests/Task| TaskText=3. Set Up Trap For Kraken| TaskImage=[[File:Tok3149.png|link=|35px]]}}{{Quests/Task| TaskText=4. Cut Through Kraken's Tentacles (8)| TaskImage=[[File:Tok3150.png|link=|35px]]}}{{Quests/Task| TaskText=5. Find A Crystal Skull| TaskImage=[[File:Tok3141.png|link=|35px]]}}{{Quests/Task| TaskText=6. Visit Pirate Challenge 5| TaskImage=[[File: Loc1257.png|link=|35px]]}} |
| Tasks={{Quests/Task| TaskText=1. Find Flying Dutchman| TaskImage=[[File:Tok3148.png|link=|35px]]}}{{Quests/Task| TaskText=2. Talk To Flying Dutchman| TaskImage=[[File:Npc5236.png|link=|35px]]}}{{Quests/Task| TaskText=3. Set Up Trap For Kraken| TaskImage=[[File:Tok3149.png|link=|35px]]}}{{Quests/Task| TaskText=4. Cut Through Kraken's Tentacles (8)| TaskImage=[[File:Tok3150.png|link=|35px]]}}{{Quests/Task| TaskText=5. Find A Crystal Skull| TaskImage=[[File:Tok3141.png|link=|35px]]}}{{Quests/Task| TaskText=6. Visit Pirate Challenge 5| TaskImage=[[File: Loc1257.png|link=|35px]]}} |
||
| Locations={{Quests/Location| Location=Kraken Coast<br>Pirate Challenge 5}} |
| Locations={{Quests/Location| Location=Kraken Coast<br>Pirate Challenge 5}} |
||
| − | | Coins= 12 |
+ | | Coins= 12,200[[File:Mat001.png|link=|20px]] |
| − | | ExperiencePoints= 13 |
+ | | ExperiencePoints= 13,100[[File:Sys001.png|link=|20px]] |
| Rewards= |
| Rewards= |
||
| Available=Saving Soldiers |
| Available=Saving Soldiers |
||
| Line 577: | Line 579: | ||
| Tasks={{Quests/Task| TaskText=1. Talk To Jack Deep| TaskImage=[[File:Npc5229.png|link=|35px]]}}{{Quests/Task| TaskText=2. Get Inside The Cave| TaskImage=[[File:Tok3152.png|link=|35px]]}}{{Quests/Task| TaskText=3. Collect Remaining Skulls (3)| TaskImage=[[File:Tok3141.png|link=|35px]]}}{{Quests/Task| TaskText=4. Trick Dead Beard| TaskImage=[[File:Tok3154.png|link=|35px]]}}{{Quests/Task| TaskText=5. Start Lullaby Ritual| TaskImage=[[File:Tok3155.png|link=|35px]]}}{{Quests/Task| TaskText=6. Talk To Jack Deep| TaskImage=[[File:Npc5419.png|link=|35px]]}} |
| Tasks={{Quests/Task| TaskText=1. Talk To Jack Deep| TaskImage=[[File:Npc5229.png|link=|35px]]}}{{Quests/Task| TaskText=2. Get Inside The Cave| TaskImage=[[File:Tok3152.png|link=|35px]]}}{{Quests/Task| TaskText=3. Collect Remaining Skulls (3)| TaskImage=[[File:Tok3141.png|link=|35px]]}}{{Quests/Task| TaskText=4. Trick Dead Beard| TaskImage=[[File:Tok3154.png|link=|35px]]}}{{Quests/Task| TaskText=5. Start Lullaby Ritual| TaskImage=[[File:Tok3155.png|link=|35px]]}}{{Quests/Task| TaskText=6. Talk To Jack Deep| TaskImage=[[File:Npc5419.png|link=|35px]]}} |
||
| Locations={{Quests/Location| Location=Cave Of Bones<br>Sextant Island}} |
| Locations={{Quests/Location| Location=Cave Of Bones<br>Sextant Island}} |
||
| − | | Coins= 13 |
+ | | Coins= 13,900[[File:Mat001.png|link=|20px]] |
| − | | ExperiencePoints= 16 |
+ | | ExperiencePoints= 16,690[[File:Sys001.png|link=|20px]] |
| Rewards= |
| Rewards= |
||
| Available=In The Belly Of The Beast |
| Available=In The Belly Of The Beast |
||
| Line 590: | Line 592: | ||
| Locations={{Quests/Location| Location=}} |
| Locations={{Quests/Location| Location=}} |
||
| Coins= 700[[File:Mat001.png|link=|20px]] |
| Coins= 700[[File:Mat001.png|link=|20px]] |
||
| − | | ExperiencePoints= 1 |
+ | | ExperiencePoints= 1,300[[File:Sys001.png|link=|20px]] |
| Rewards= |
| Rewards= |
||
| Available=7 Crystal Skulls |
| Available=7 Crystal Skulls |
||
| Line 612: | Line 614: | ||
| Locations={{Quests/Location| Location=Oyster Field}} |
| Locations={{Quests/Location| Location=Oyster Field}} |
||
| Coins= 770[[File:Mat001.png|link=|20px]] |
| Coins= 770[[File:Mat001.png|link=|20px]] |
||
| − | | ExperiencePoints= 1 |
+ | | ExperiencePoints= 1,300[[File:Sys001.png|link=|20px]] |
| Rewards= |
| Rewards= |
||
| − | | Available=Continuing The Adventure |
+ | | Available=[https://diggysadventure.fandom.com/wiki/Egypt_(Quests)#Isis Continuing The Adventure] |
}} |
}} |
||
| Line 624: | Line 626: | ||
| Tasks={{Quests/Task| TaskText=1. Talk To Mariel| TaskImage=[[File:Npc4958.png|link=|35px]]}}{{Quests/Task| TaskText=2. Get A Large Aquarium| TaskImage=[[File:Tok3047.png|link=|35px]]}}{{Quests/Task| TaskText=3. Get A Cart For Transportation| TaskImage=[[File:Tok3027.png|link=|35px]]}}{{Quests/Task| TaskText=4. Talk To Mariel| TaskImage=[[File:Npc4959.png|link=|35px]]}}{{Quests/Task| TaskText=5. Take Mariel To The Village| TaskImage=[[File:Tok3028.png|link=|35px]]}}{{Quests/Task| TaskText=6. Show Mariel 3 Things (3)| TaskImage=[[File:Tok3029.png|link=|35px]]}}{{Quests/Task| TaskText=7. Talk To Mariel| TaskImage=[[File:Npc4966.png|link=|35px]]}}{{Quests/Task| TaskText=8. Talk To Fairy Godmother| TaskImage=[[File:Npc4930.png|link=|35px]]}} |
| Tasks={{Quests/Task| TaskText=1. Talk To Mariel| TaskImage=[[File:Npc4958.png|link=|35px]]}}{{Quests/Task| TaskText=2. Get A Large Aquarium| TaskImage=[[File:Tok3047.png|link=|35px]]}}{{Quests/Task| TaskText=3. Get A Cart For Transportation| TaskImage=[[File:Tok3027.png|link=|35px]]}}{{Quests/Task| TaskText=4. Talk To Mariel| TaskImage=[[File:Npc4959.png|link=|35px]]}}{{Quests/Task| TaskText=5. Take Mariel To The Village| TaskImage=[[File:Tok3028.png|link=|35px]]}}{{Quests/Task| TaskText=6. Show Mariel 3 Things (3)| TaskImage=[[File:Tok3029.png|link=|35px]]}}{{Quests/Task| TaskText=7. Talk To Mariel| TaskImage=[[File:Npc4966.png|link=|35px]]}}{{Quests/Task| TaskText=8. Talk To Fairy Godmother| TaskImage=[[File:Npc4930.png|link=|35px]]}} |
||
| Locations={{Quests/Location| Location=Seaside Village}} |
| Locations={{Quests/Location| Location=Seaside Village}} |
||
| − | | Coins= 1 |
+ | | Coins= 1,800[[File:Mat001.png|link=|20px]] |
| − | | ExperiencePoints= 2 |
+ | | ExperiencePoints= 2,300[[File:Sys001.png|link=|20px]] |
| Rewards= |
| Rewards= |
||
| Available=Oyster Delicacy |
| Available=Oyster Delicacy |
||
| Line 637: | Line 639: | ||
| Tasks={{Quests/Task| TaskText=1. Save Prince Elric| TaskImage=[[File:Tok3030.png|link=|35px]]}}{{Quests/Task| TaskText=2. Save 7 Sailors (7)| TaskImage=[[File:Tok3031.png|link=|35px]]}}{{Quests/Task| TaskText=3. Talk To Fairy Godmother| TaskImage=[[File:Npc4930.png|link=|35px]]}} |
| Tasks={{Quests/Task| TaskText=1. Save Prince Elric| TaskImage=[[File:Tok3030.png|link=|35px]]}}{{Quests/Task| TaskText=2. Save 7 Sailors (7)| TaskImage=[[File:Tok3031.png|link=|35px]]}}{{Quests/Task| TaskText=3. Talk To Fairy Godmother| TaskImage=[[File:Npc4930.png|link=|35px]]}} |
||
| Locations={{Quests/Location| Location=Vortex Island<br>Vortex Island Challenge}} |
| Locations={{Quests/Location| Location=Vortex Island<br>Vortex Island Challenge}} |
||
| − | | Coins= 2 |
+ | | Coins= 2,820[[File:Mat001.png|link=|20px]] |
| − | | ExperiencePoints= 4 |
+ | | ExperiencePoints= 4,200[[File:Sys001.png|link=|20px]] |
| Rewards= |
| Rewards= |
||
| Available=Trip To Village |
| Available=Trip To Village |
||
| Line 650: | Line 652: | ||
| Tasks={{Quests/Task| TaskText=1. Talk To Pursula| TaskImage=[[File:Npc4975.png|link=|35px]]}}{{Quests/Task| TaskText=2. Get Foot Powder| TaskImage=[[File:Tok3032.png|link=|35px]]}}{{Quests/Task| TaskText=3. Get A Pair Of Giant's Socks| TaskImage=[[File:Tok3033.png|link=|35px]]}}{{Quests/Task| TaskText=4. Get A Centipede| TaskImage=[[File:Tok3034.png|link=|35px]]}}{{Quests/Task| TaskText=5. Talk To Pursula| TaskImage=[[File:Npc4975.png|link=|35px]]}}{{Quests/Task| TaskText=6. Cook The Feet Growing Potion| TaskImage=[[File:Tok3071.png|link=|35px]]}}{{Quests/Task| TaskText=7. Talk To Fairy Godmother| TaskImage=[[File:Npc4930.png|link=|35px]]}} |
| Tasks={{Quests/Task| TaskText=1. Talk To Pursula| TaskImage=[[File:Npc4975.png|link=|35px]]}}{{Quests/Task| TaskText=2. Get Foot Powder| TaskImage=[[File:Tok3032.png|link=|35px]]}}{{Quests/Task| TaskText=3. Get A Pair Of Giant's Socks| TaskImage=[[File:Tok3033.png|link=|35px]]}}{{Quests/Task| TaskText=4. Get A Centipede| TaskImage=[[File:Tok3034.png|link=|35px]]}}{{Quests/Task| TaskText=5. Talk To Pursula| TaskImage=[[File:Npc4975.png|link=|35px]]}}{{Quests/Task| TaskText=6. Cook The Feet Growing Potion| TaskImage=[[File:Tok3071.png|link=|35px]]}}{{Quests/Task| TaskText=7. Talk To Fairy Godmother| TaskImage=[[File:Npc4930.png|link=|35px]]}} |
||
| Locations={{Quests/Location| Location=Pursula's Secret Laboratory<br>Pursula's Secret Laboratory Challenge}} |
| Locations={{Quests/Location| Location=Pursula's Secret Laboratory<br>Pursula's Secret Laboratory Challenge}} |
||
| − | | Coins= 5 |
+ | | Coins= 5,050[[File:Mat001.png|link=|20px]] |
| − | | ExperiencePoints= 6 |
+ | | ExperiencePoints= 6,100[[File:Sys001.png|link=|20px]] |
| Rewards= |
| Rewards= |
||
| Available=Rescuing Prince |
| Available=Rescuing Prince |
||
| Line 663: | Line 665: | ||
| Tasks={{Quests/Task| TaskText=1. Get Invited To The Wedding Ball| TaskImage=[[File:Tok3035.png|link=|35px]]}}{{Quests/Task| TaskText=2. Talk To Fairy Godmother| TaskImage=[[File:Npc4930.png|link=|35px]]}} |
| Tasks={{Quests/Task| TaskText=1. Get Invited To The Wedding Ball| TaskImage=[[File:Tok3035.png|link=|35px]]}}{{Quests/Task| TaskText=2. Talk To Fairy Godmother| TaskImage=[[File:Npc4930.png|link=|35px]]}} |
||
| Locations={{Quests/Location| Location=Royal Countryside}} |
| Locations={{Quests/Location| Location=Royal Countryside}} |
||
| − | | Coins= 7 |
+ | | Coins= 7,090[[File:Mat001.png|link=|20px]] |
| − | | ExperiencePoints= 8 |
+ | | ExperiencePoints= 8,170[[File:Sys001.png|link=|20px]] |
| Rewards= |
| Rewards= |
||
| Available=Magical Potion |
| Available=Magical Potion |
||
| Line 676: | Line 678: | ||
| Tasks={{Quests/Task| TaskText=1. Talk To Fairy Godmother| TaskImage=[[File:Npc4993.png|link=|35px]]}}{{Quests/Task| TaskText=2. Get Rid Of Indian Princess| TaskImage=[[File:Tok3036.png|link=|35px]]}}{{Quests/Task| TaskText=3. Get Rid Of Egyptian Princess| TaskImage=[[File:Tok3037.png|link=|35px]]}}{{Quests/Task| TaskText=4. Get Rid Of Princess From North| TaskImage=[[File:Tok3038.png|link=|35px]]}}{{Quests/Task| TaskText=5. Get Rid Of Chinese Princess| TaskImage=[[File:Tok3039.png|link=|35px]]}}{{Quests/Task| TaskText=6. Talk To Fairy Godmother| TaskImage=[[File:Npc4997.png|link=|35px]]}}{{Quests/Task| TaskText=7. Break Pursula's Spell| TaskImage=[[File:Tok3040.png|link=|35px]]}}{{Quests/Task| TaskText=8. Talk To Fairy Godmother| TaskImage=[[File:Npc4930.png|link=|35px]]}} |
| Tasks={{Quests/Task| TaskText=1. Talk To Fairy Godmother| TaskImage=[[File:Npc4993.png|link=|35px]]}}{{Quests/Task| TaskText=2. Get Rid Of Indian Princess| TaskImage=[[File:Tok3036.png|link=|35px]]}}{{Quests/Task| TaskText=3. Get Rid Of Egyptian Princess| TaskImage=[[File:Tok3037.png|link=|35px]]}}{{Quests/Task| TaskText=4. Get Rid Of Princess From North| TaskImage=[[File:Tok3038.png|link=|35px]]}}{{Quests/Task| TaskText=5. Get Rid Of Chinese Princess| TaskImage=[[File:Tok3039.png|link=|35px]]}}{{Quests/Task| TaskText=6. Talk To Fairy Godmother| TaskImage=[[File:Npc4997.png|link=|35px]]}}{{Quests/Task| TaskText=7. Break Pursula's Spell| TaskImage=[[File:Tok3040.png|link=|35px]]}}{{Quests/Task| TaskText=8. Talk To Fairy Godmother| TaskImage=[[File:Npc4930.png|link=|35px]]}} |
||
| Locations={{Quests/Location| Location=Prince's Palace<br>Prince's Palace Challenge}} |
| Locations={{Quests/Location| Location=Prince's Palace<br>Prince's Palace Challenge}} |
||
| − | | Coins= 8 |
+ | | Coins= 8,280[[File:Mat001.png|link=|20px]] |
| − | | ExperiencePoints= 9 |
+ | | ExperiencePoints= 9,800[[File:Sys001.png|link=|20px]] |
| Rewards= |
| Rewards= |
||
| Available=Chasing After Prince |
| Available=Chasing After Prince |
||
| Line 689: | Line 691: | ||
| Tasks={{Quests/Task| TaskText=1. Turn Prince Elric Into A Merman| TaskImage=[[File:Tok3041.png|link=|35px]]}}{{Quests/Task| TaskText=2. Talk To Fairy Godmother| TaskImage=[[File:Npc4930.png|link=|35px]]}} |
| Tasks={{Quests/Task| TaskText=1. Turn Prince Elric Into A Merman| TaskImage=[[File:Tok3041.png|link=|35px]]}}{{Quests/Task| TaskText=2. Talk To Fairy Godmother| TaskImage=[[File:Npc4930.png|link=|35px]]}} |
||
| Locations={{Quests/Location| Location=Isle Of Transformation}} |
| Locations={{Quests/Location| Location=Isle Of Transformation}} |
||
| − | | Coins= 9 |
+ | | Coins= 9,900[[File:Mat001.png|link=|20px]] |
| − | | ExperiencePoints= 11 |
+ | | ExperiencePoints= 11,500[[File:Sys001.png|link=|20px]] |
| Rewards= |
| Rewards= |
||
| Available=Wedding Ball |
| Available=Wedding Ball |
||
| Line 702: | Line 704: | ||
| Tasks={{Quests/Task| TaskText=1. Save Mariel| TaskImage=[[File:Tok3042.png|link=|35px]]}}{{Quests/Task| TaskText=2. Talk To King Trident| TaskImage=[[File:Npc4976.png|link=|35px]]}} |
| Tasks={{Quests/Task| TaskText=1. Save Mariel| TaskImage=[[File:Tok3042.png|link=|35px]]}}{{Quests/Task| TaskText=2. Talk To King Trident| TaskImage=[[File:Npc4976.png|link=|35px]]}} |
||
| Locations={{Quests/Location| Location=Pursula's Cave<br>Pursula's Cave Challenge}} |
| Locations={{Quests/Location| Location=Pursula's Cave<br>Pursula's Cave Challenge}} |
||
| − | | Coins= 11 |
+ | | Coins= 11,910[[File:Mat001.png|link=|20px]] |
| − | | ExperiencePoints= 13 |
+ | | ExperiencePoints= 13,010[[File:Sys001.png|link=|20px]] |
| Rewards= |
| Rewards= |
||
| Available=From Prince To Merman |
| Available=From Prince To Merman |
||
| Line 714: | Line 716: | ||
| Tasks={{Quests/Task| TaskText=1. Free Good Fish People (3)| TaskImage=[[File:Tok3043.png|link=|35px]]}}{{Quests/Task| TaskText=2. Imprison Pursula's Guards (4)| TaskImage=[[File:Tok3044.png|link=|35px]]}}{{Quests/Task| TaskText=3. Defeat Pursula| TaskImage=[[File:Tok3045.png|link=|35px]]}}{{Quests/Task| TaskText=4. Save Mariel| TaskImage=[[File:Tok3046.png|link=|35px]]}}{{Quests/Task| TaskText=5. Talk To Fairy Godmother| TaskImage=[[File:Npc4930.png|link=|35px]]}} |
| Tasks={{Quests/Task| TaskText=1. Free Good Fish People (3)| TaskImage=[[File:Tok3043.png|link=|35px]]}}{{Quests/Task| TaskText=2. Imprison Pursula's Guards (4)| TaskImage=[[File:Tok3044.png|link=|35px]]}}{{Quests/Task| TaskText=3. Defeat Pursula| TaskImage=[[File:Tok3045.png|link=|35px]]}}{{Quests/Task| TaskText=4. Save Mariel| TaskImage=[[File:Tok3046.png|link=|35px]]}}{{Quests/Task| TaskText=5. Talk To Fairy Godmother| TaskImage=[[File:Npc4930.png|link=|35px]]}} |
||
| Locations={{Quests/Location| Location=Trident's Kingdom<br>Trident's Kingdom Challenge}} |
| Locations={{Quests/Location| Location=Trident's Kingdom<br>Trident's Kingdom Challenge}} |
||
| − | | Coins= 13 |
+ | | Coins= 13,300[[File:Mat001.png|link=|20px]] |
| − | | ExperiencePoints= 16 |
+ | | ExperiencePoints= 16,030[[File:Sys001.png|link=|20px]] |
| Rewards= |
| Rewards= |
||
| Available=Free Mariel! |
| Available=Free Mariel! |
||
| Line 737: | Line 739: | ||
| Locations={{Quests/Location| Location=The Island Of Doctor Nope}} |
| Locations={{Quests/Location| Location=The Island Of Doctor Nope}} |
||
| Coins= 750[[File:Mat001.png|link=|20px]] |
| Coins= 750[[File:Mat001.png|link=|20px]] |
||
| − | | ExperiencePoints= 1 |
+ | | ExperiencePoints= 1,250[[File:Sys001.png|link=|20px]] |
| Rewards= |
| Rewards= |
||
| − | | Available=Continuing The Adventure |
+ | | Available=[https://diggysadventure.fandom.com/wiki/Egypt_(Quests)#Isis Continuing The Adventure] |
}} |
}} |
||
| Line 749: | Line 751: | ||
| Tasks={{Quests/Task| TaskText=1. Talk To Casino Doorman| TaskImage=[[File:Npc4720.png|link=|35px]]}}{{Quests/Task| TaskText=2. Get The Deck Of Cards| TaskImage=[[File:Tok2930.png|link=|35px]]}}{{Quests/Task| TaskText=3. Plant The Fake Cards In Faramanga's Room| TaskImage=[[File:Tok2931.png|link=|35px]]}}{{Quests/Task| TaskText=4. Play Poker With Faramanga| TaskImage=[[File:Tok2932.png|link=|35px]]}}{{Quests/Task| TaskText=5. Talk To James Blond| TaskImage=[[File:Npc4718.png|link=|35px]]}} |
| Tasks={{Quests/Task| TaskText=1. Talk To Casino Doorman| TaskImage=[[File:Npc4720.png|link=|35px]]}}{{Quests/Task| TaskText=2. Get The Deck Of Cards| TaskImage=[[File:Tok2930.png|link=|35px]]}}{{Quests/Task| TaskText=3. Plant The Fake Cards In Faramanga's Room| TaskImage=[[File:Tok2931.png|link=|35px]]}}{{Quests/Task| TaskText=4. Play Poker With Faramanga| TaskImage=[[File:Tok2932.png|link=|35px]]}}{{Quests/Task| TaskText=5. Talk To James Blond| TaskImage=[[File:Npc4718.png|link=|35px]]}} |
||
| Locations={{Quests/Location| Location=Monaco City Centre}} |
| Locations={{Quests/Location| Location=Monaco City Centre}} |
||
| − | | Coins= 1 |
+ | | Coins= 1,600[[File:Mat001.png|link=|20px]] |
| − | | ExperiencePoints= 2 |
+ | | ExperiencePoints= 2,060[[File:Sys001.png|link=|20px]] |
| Rewards= |
| Rewards= |
||
| Available=Dr. Nope |
| Available=Dr. Nope |
||
| Line 762: | Line 764: | ||
| Tasks={{Quests/Task| TaskText=1. Deactivate 4 Amplifiers (4)| TaskImage=[[File:Tok2933.png|link=|35px]]}}{{Quests/Task| TaskText=2. Get Inside The Server Room| TaskImage=[[File:Tok2934.png|link=|35px]]}}{{Quests/Task| TaskText=3. Catch Day May| TaskImage=[[File:Tok2935.png|link=|35px]]}}{{Quests/Task| TaskText=4. Catch Zax Morin| TaskImage=[[File:Tok2936.png|link=|35px]]}}{{Quests/Task| TaskText=5. Get The Super-computer| TaskImage=[[File:Tok2937.png|link=|35px]]}}{{Quests/Task| TaskText=6. Talk To James Blond| TaskImage=[[File:Npc4718.png|link=|35px]]}} |
| Tasks={{Quests/Task| TaskText=1. Deactivate 4 Amplifiers (4)| TaskImage=[[File:Tok2933.png|link=|35px]]}}{{Quests/Task| TaskText=2. Get Inside The Server Room| TaskImage=[[File:Tok2934.png|link=|35px]]}}{{Quests/Task| TaskText=3. Catch Day May| TaskImage=[[File:Tok2935.png|link=|35px]]}}{{Quests/Task| TaskText=4. Catch Zax Morin| TaskImage=[[File:Tok2936.png|link=|35px]]}}{{Quests/Task| TaskText=5. Get The Super-computer| TaskImage=[[File:Tok2937.png|link=|35px]]}}{{Quests/Task| TaskText=6. Talk To James Blond| TaskImage=[[File:Npc4718.png|link=|35px]]}} |
||
| Locations={{Quests/Location| Location=Plastic Valley}} |
| Locations={{Quests/Location| Location=Plastic Valley}} |
||
| − | | Coins= 2 |
+ | | Coins= 2,700[[File:Mat001.png|link=|20px]] |
| − | | ExperiencePoints= 3 |
+ | | ExperiencePoints= 3,900[[File:Sys001.png|link=|20px]] |
| Rewards= |
| Rewards= |
||
| Available=Casino Royale |
| Available=Casino Royale |
||
| Line 775: | Line 777: | ||
| Tasks={{Quests/Task| TaskText=1. Free The Astronauts| TaskImage=[[File:Tok2938.png|link=|35px]]}}{{Quests/Task| TaskText=2. Reset The Laser Satellite| TaskImage=[[File:Tok2939.png|link=|35px]]}}{{Quests/Task| TaskText=3. Obtain The Control Usb| TaskImage=[[File:Tok2940.png|link=|35px]]}}{{Quests/Task| TaskText=4. Catch Chomper| TaskImage=[[File:Tok2941.png|link=|35px]]}}{{Quests/Task| TaskText=5. Talk To James Blond| TaskImage=[[File:Npc4718.png|link=|35px]]}} |
| Tasks={{Quests/Task| TaskText=1. Free The Astronauts| TaskImage=[[File:Tok2938.png|link=|35px]]}}{{Quests/Task| TaskText=2. Reset The Laser Satellite| TaskImage=[[File:Tok2939.png|link=|35px]]}}{{Quests/Task| TaskText=3. Obtain The Control Usb| TaskImage=[[File:Tok2940.png|link=|35px]]}}{{Quests/Task| TaskText=4. Catch Chomper| TaskImage=[[File:Tok2941.png|link=|35px]]}}{{Quests/Task| TaskText=5. Talk To James Blond| TaskImage=[[File:Npc4718.png|link=|35px]]}} |
||
| Locations={{Quests/Location| Location=Fleming's Space Station}} |
| Locations={{Quests/Location| Location=Fleming's Space Station}} |
||
| − | | Coins= 4 |
+ | | Coins= 4,010[[File:Mat001.png|link=|20px]] |
| − | | ExperiencePoints= 5 |
+ | | ExperiencePoints= 5,900[[File:Sys001.png|link=|20px]] |
| Rewards= |
| Rewards= |
||
| Available=A View To Kill |
| Available=A View To Kill |
||
| Line 788: | Line 790: | ||
| Tasks={{Quests/Task| TaskText=1. Destroy 10 Infected Barrels (10)| TaskImage=[[File:Tok2942.png|link=|35px]]}}{{Quests/Task| TaskText=2. Catch Offjob| TaskImage=[[File:Tok2943.png|link=|35px]]}}{{Quests/Task| TaskText=3. Get The Briefcase With The Original Virus| TaskImage=[[File:Tok2944.png|link=|35px]]}}{{Quests/Task| TaskText=4. Talk To James Blond| TaskImage=[[File:Npc4718.png|link=|35px]]}} |
| Tasks={{Quests/Task| TaskText=1. Destroy 10 Infected Barrels (10)| TaskImage=[[File:Tok2942.png|link=|35px]]}}{{Quests/Task| TaskText=2. Catch Offjob| TaskImage=[[File:Tok2943.png|link=|35px]]}}{{Quests/Task| TaskText=3. Get The Briefcase With The Original Virus| TaskImage=[[File:Tok2944.png|link=|35px]]}}{{Quests/Task| TaskText=4. Talk To James Blond| TaskImage=[[File:Npc4718.png|link=|35px]]}} |
||
| Locations={{Quests/Location| Location=Wheatland Farm}} |
| Locations={{Quests/Location| Location=Wheatland Farm}} |
||
| − | | Coins= 5 |
+ | | Coins= 5,350[[File:Mat001.png|link=|20px]] |
| − | | ExperiencePoints= 8 |
+ | | ExperiencePoints= 8,030[[File:Sys001.png|link=|20px]] |
| Rewards= |
| Rewards= |
||
| Available=Moonraker |
| Available=Moonraker |
||
| Line 801: | Line 803: | ||
| Tasks={{Quests/Task| TaskText=1. Talk To Blond In Disguise| TaskImage=[[File:Npc4729.png|link=|35px]]}}{{Quests/Task| TaskText=2. Place Dynamites In The Right Spots| TaskImage=[[File:Tok2945.png|link=|35px]]}}{{Quests/Task| TaskText=3. Blow Up The Oil Pipeline| TaskImage=[[File:Tok2946.png|link=|35px]]}}{{Quests/Task| TaskText=4. Open Oil Pipeline That Leads To Bratislava| TaskImage=[[File:Tok2947.png|link=|35px]]}}{{Quests/Task| TaskText=5. Talk To James Blond| TaskImage=[[File:Npc4718.png|link=|35px]]}} |
| Tasks={{Quests/Task| TaskText=1. Talk To Blond In Disguise| TaskImage=[[File:Npc4729.png|link=|35px]]}}{{Quests/Task| TaskText=2. Place Dynamites In The Right Spots| TaskImage=[[File:Tok2945.png|link=|35px]]}}{{Quests/Task| TaskText=3. Blow Up The Oil Pipeline| TaskImage=[[File:Tok2946.png|link=|35px]]}}{{Quests/Task| TaskText=4. Open Oil Pipeline That Leads To Bratislava| TaskImage=[[File:Tok2947.png|link=|35px]]}}{{Quests/Task| TaskText=5. Talk To James Blond| TaskImage=[[File:Npc4718.png|link=|35px]]}} |
||
| Locations={{Quests/Location| Location=Snow Mountains}} |
| Locations={{Quests/Location| Location=Snow Mountains}} |
||
| − | | Coins= 7 |
+ | | Coins= 7,900[[File:Mat001.png|link=|20px]] |
| − | | ExperiencePoints= 9 |
+ | | ExperiencePoints= 9,260[[File:Sys001.png|link=|20px]] |
| Rewards= |
| Rewards= |
||
| Available=In Her Majesty's Secret Service |
| Available=In Her Majesty's Secret Service |
||
| Line 814: | Line 816: | ||
| Tasks={{Quests/Task| TaskText=1. Talk To Assistant Agent| TaskImage=[[File:Npc4722.png|link=|35px]]}}{{Quests/Task| TaskText=2. Find The Nuclear Bomb| TaskImage=[[File:Tok2948.png|link=|35px]]}}{{Quests/Task| TaskText=3. Catch Goldenfoot| TaskImage=[[File:Tok2949.png|link=|35px]]}}{{Quests/Task| TaskText=4. Deactivate Nuclear Bomb| TaskImage=[[File:Tok2950.png|link=|35px]]}}{{Quests/Task| TaskText=5. Talk To Goldenfoot| TaskImage=[[File:Npc4727.png|link=|35px]]}} |
| Tasks={{Quests/Task| TaskText=1. Talk To Assistant Agent| TaskImage=[[File:Npc4722.png|link=|35px]]}}{{Quests/Task| TaskText=2. Find The Nuclear Bomb| TaskImage=[[File:Tok2948.png|link=|35px]]}}{{Quests/Task| TaskText=3. Catch Goldenfoot| TaskImage=[[File:Tok2949.png|link=|35px]]}}{{Quests/Task| TaskText=4. Deactivate Nuclear Bomb| TaskImage=[[File:Tok2950.png|link=|35px]]}}{{Quests/Task| TaskText=5. Talk To Goldenfoot| TaskImage=[[File:Npc4727.png|link=|35px]]}} |
||
| Locations={{Quests/Location| Location=Fort Knox}} |
| Locations={{Quests/Location| Location=Fort Knox}} |
||
| − | | Coins= 9 |
+ | | Coins= 9,400[[File:Mat001.png|link=|20px]] |
| − | | ExperiencePoints= 11 |
+ | | ExperiencePoints= 11,100[[File:Sys001.png|link=|20px]] |
| Rewards= |
| Rewards= |
||
| Available=From Russia With Love |
| Available=From Russia With Love |
||
| Line 826: | Line 828: | ||
| Tasks={{Quests/Task| TaskText=1. Free The Real James Blond| TaskImage=[[File:Tok2952.png|link=|35px]]}}{{Quests/Task| TaskText=2. Talk To Bloodfield| TaskImage=[[File:Npc4811.png|link=|35px]]}}{{Quests/Task| TaskText=3. Save Her Majesty| TaskImage=[[File:Tok2953.png|link=|35px]]}}{{Quests/Task| TaskText=4. Stop The Countdown| TaskImage=[[File:Tok2954.png|link=|35px]]}}{{Quests/Task| TaskText=5. Catch Ernst Stavro Bloodfield| TaskImage=[[File:Tok2955.png|link=|35px]]}}{{Quests/Task| TaskText=6. Talk To James Blond| TaskImage=[[File:Npc4761.png|link=|35px]]}} |
| Tasks={{Quests/Task| TaskText=1. Free The Real James Blond| TaskImage=[[File:Tok2952.png|link=|35px]]}}{{Quests/Task| TaskText=2. Talk To Bloodfield| TaskImage=[[File:Npc4811.png|link=|35px]]}}{{Quests/Task| TaskText=3. Save Her Majesty| TaskImage=[[File:Tok2953.png|link=|35px]]}}{{Quests/Task| TaskText=4. Stop The Countdown| TaskImage=[[File:Tok2954.png|link=|35px]]}}{{Quests/Task| TaskText=5. Catch Ernst Stavro Bloodfield| TaskImage=[[File:Tok2955.png|link=|35px]]}}{{Quests/Task| TaskText=6. Talk To James Blond| TaskImage=[[File:Npc4761.png|link=|35px]]}} |
||
| Locations={{Quests/Location| Location=Bunker Under London}} |
| Locations={{Quests/Location| Location=Bunker Under London}} |
||
| − | | Coins= 11 |
+ | | Coins= 11,500[[File:Mat001.png|link=|20px]] |
| − | | ExperiencePoints= 14 |
+ | | ExperiencePoints= 14,050[[File:Sys001.png|link=|20px]] |
| Rewards= |
| Rewards= |
||
| Available=Goldfinger |
| Available=Goldfinger |
||
| Line 851: | Line 853: | ||
| ExperiencePoints= 730[[File:Sys001.png|link=|20px]] |
| ExperiencePoints= 730[[File:Sys001.png|link=|20px]] |
||
| Rewards= |
| Rewards= |
||
| − | | Available=Continuing The Adventure |
+ | | Available=[https://diggysadventure.fandom.com/wiki/Egypt_(Quests)#Isis Continuing The Adventure] |
}} |
}} |
||
| Line 862: | Line 864: | ||
| Locations={{Quests/Location| Location=New York In Ruins}} |
| Locations={{Quests/Location| Location=New York In Ruins}} |
||
| Coins= 760[[File:Mat001.png|link=|20px]] |
| Coins= 760[[File:Mat001.png|link=|20px]] |
||
| − | | ExperiencePoints= 1 |
+ | | ExperiencePoints= 1,200[[File:Sys001.png|link=|20px]] |
| Rewards= |
| Rewards= |
||
| Available=Space Attacks! |
| Available=Space Attacks! |
||
| Line 874: | Line 876: | ||
| Tasks={{Quests/Task| TaskText=1. Save Mr. President| TaskImage=[[File:Tok2839.png|link=|35px]]}}{{Quests/Task| TaskText=2. Save Scientist Jeff| TaskImage=[[File:Tok2840.png|link=|35px]]}}{{Quests/Task| TaskText=3. Save The Dog| TaskImage=[[File:Tok2841.png|link=|35px]]}}{{Quests/Task| TaskText=4. Talk To Agent Molder| TaskImage=[[File:Npc4429.png|link=|35px]]}} |
| Tasks={{Quests/Task| TaskText=1. Save Mr. President| TaskImage=[[File:Tok2839.png|link=|35px]]}}{{Quests/Task| TaskText=2. Save Scientist Jeff| TaskImage=[[File:Tok2840.png|link=|35px]]}}{{Quests/Task| TaskText=3. Save The Dog| TaskImage=[[File:Tok2841.png|link=|35px]]}}{{Quests/Task| TaskText=4. Talk To Agent Molder| TaskImage=[[File:Npc4429.png|link=|35px]]}} |
||
| Locations={{Quests/Location| Location=White House Under Attack}} |
| Locations={{Quests/Location| Location=White House Under Attack}} |
||
| − | | Coins= 1 |
+ | | Coins= 1,620[[File:Mat001.png|link=|20px]] |
| − | | ExperiencePoints= 2 |
+ | | ExperiencePoints= 2,270[[File:Sys001.png|link=|20px]] |
| Rewards= |
| Rewards= |
||
| Available=Mystery Files |
| Available=Mystery Files |
||
| Line 887: | Line 889: | ||
| Tasks={{Quests/Task| TaskText=1. Talk To Scientist Jeff| TaskImage=[[File:Npc4431.png|link=|35px]]}}{{Quests/Task| TaskText=2. Turn On Ufo| TaskImage=[[File:Tok2842.png|link=|35px]]}}{{Quests/Task| TaskText=3. Find Pilot Russel| TaskImage=[[File:Tok2834.png|link=|35px]]}}{{Quests/Task| TaskText=4. Make Coffee For Pilot Russel| TaskImage=[[File:Tok2843.png|link=|35px]]}}{{Quests/Task| TaskText=5. Talk To Mr. President| TaskImage=[[File:Npc4433.png|link=|35px]]}} |
| Tasks={{Quests/Task| TaskText=1. Talk To Scientist Jeff| TaskImage=[[File:Npc4431.png|link=|35px]]}}{{Quests/Task| TaskText=2. Turn On Ufo| TaskImage=[[File:Tok2842.png|link=|35px]]}}{{Quests/Task| TaskText=3. Find Pilot Russel| TaskImage=[[File:Tok2834.png|link=|35px]]}}{{Quests/Task| TaskText=4. Make Coffee For Pilot Russel| TaskImage=[[File:Tok2843.png|link=|35px]]}}{{Quests/Task| TaskText=5. Talk To Mr. President| TaskImage=[[File:Npc4433.png|link=|35px]]}} |
||
| Locations={{Quests/Location| Location=Area 15}} |
| Locations={{Quests/Location| Location=Area 15}} |
||
| − | | Coins= 2 |
+ | | Coins= 2,400[[File:Mat001.png|link=|20px]] |
| − | | ExperiencePoints= 4 |
+ | | ExperiencePoints= 4,620[[File:Sys001.png|link=|20px]] |
| Rewards= |
| Rewards= |
||
| Available=President In Peril |
| Available=President In Peril |
||
| Line 900: | Line 902: | ||
| Tasks={{Quests/Task| TaskText=1. Find Pilot Will Schmidt| TaskImage=[[File:Tok2844.png|link=|35px]]}}{{Quests/Task| TaskText=2. Find The Shot Down Ufo| TaskImage=[[File:Tok2845.png|link=|35px]]}}{{Quests/Task| TaskText=3. Talk To Mr. President| TaskImage=[[File:Npc4433.png|link=|35px]]}} |
| Tasks={{Quests/Task| TaskText=1. Find Pilot Will Schmidt| TaskImage=[[File:Tok2844.png|link=|35px]]}}{{Quests/Task| TaskText=2. Find The Shot Down Ufo| TaskImage=[[File:Tok2845.png|link=|35px]]}}{{Quests/Task| TaskText=3. Talk To Mr. President| TaskImage=[[File:Npc4433.png|link=|35px]]}} |
||
| Locations={{Quests/Location| Location=Nevada Desert}} |
| Locations={{Quests/Location| Location=Nevada Desert}} |
||
| − | | Coins= 3 |
+ | | Coins= 3,300[[File:Mat001.png|link=|20px]] |
| − | | ExperiencePoints= 6 |
+ | | ExperiencePoints= 6,030[[File:Sys001.png|link=|20px]] |
| Rewards= |
| Rewards= |
||
| Available=Making Saucers Fly |
| Available=Making Saucers Fly |
||
| Line 913: | Line 915: | ||
| Tasks={{Quests/Task| TaskText=1. Talk To The Captain| TaskImage=[[File:Npc4428.png|link=|35px]]}}{{Quests/Task| TaskText=2. Find Nuclear Bomb| TaskImage=[[File:Tok2846.png|link=|35px]]}}{{Quests/Task| TaskText=3. Talk To Mr. President| TaskImage=[[File:Npc4433.png|link=|35px]]}} |
| Tasks={{Quests/Task| TaskText=1. Talk To The Captain| TaskImage=[[File:Npc4428.png|link=|35px]]}}{{Quests/Task| TaskText=2. Find Nuclear Bomb| TaskImage=[[File:Tok2846.png|link=|35px]]}}{{Quests/Task| TaskText=3. Talk To Mr. President| TaskImage=[[File:Npc4433.png|link=|35px]]}} |
||
| Locations={{Quests/Location| Location=Bikini Beach}} |
| Locations={{Quests/Location| Location=Bikini Beach}} |
||
| − | | Coins= 4 |
+ | | Coins= 4,300[[File:Mat001.png|link=|20px]] |
| − | | ExperiencePoints= 7 |
+ | | ExperiencePoints= 7,400[[File:Sys001.png|link=|20px]] |
| Rewards= |
| Rewards= |
||
| Available=Finding Will Schmidt |
| Available=Finding Will Schmidt |
||
| Line 926: | Line 928: | ||
| Tasks={{Quests/Task| TaskText=1. Talk To Will Schmidt| TaskImage=[[File:Npc4432.png|link=|35px]]}}{{Quests/Task| TaskText=2. Get 6 Space Stations Under Control (6)| TaskImage=[[File:Tok2847.png|link=|35px]]}}{{Quests/Task| TaskText=3. Talk To Mr. President| TaskImage=[[File:Npc4433.png|link=|35px]]}} |
| Tasks={{Quests/Task| TaskText=1. Talk To Will Schmidt| TaskImage=[[File:Npc4432.png|link=|35px]]}}{{Quests/Task| TaskText=2. Get 6 Space Stations Under Control (6)| TaskImage=[[File:Tok2847.png|link=|35px]]}}{{Quests/Task| TaskText=3. Talk To Mr. President| TaskImage=[[File:Npc4433.png|link=|35px]]}} |
||
| Locations={{Quests/Location| Location=International Space Stations}} |
| Locations={{Quests/Location| Location=International Space Stations}} |
||
| − | | Coins= 5 |
+ | | Coins= 5,650[[File:Mat001.png|link=|20px]] |
| − | | ExperiencePoints= 9 |
+ | | ExperiencePoints= 9,200[[File:Sys001.png|link=|20px]] |
| Rewards= |
| Rewards= |
||
| Available=Nuclear Threat |
| Available=Nuclear Threat |
||
| Line 939: | Line 941: | ||
| Tasks={{Quests/Task| TaskText=1. Talk To Will Schmidt| TaskImage=[[File:Npc4432.png|link=|35px]]}}{{Quests/Task| TaskText=2. Get On The Bridge| TaskImage=[[File:Tok2848.png|link=|35px]]}}{{Quests/Task| TaskText=3. Save 9 Kidnapped People (9)| TaskImage=[[File:Tok2849.png|link=|35px]]}}{{Quests/Task| TaskText=4. Talk To Scientist Jeff| TaskImage=[[File:Npc4575.png|link=|35px]]}}{{Quests/Task| TaskText=5. Save The Dog| TaskImage=[[File:Tok2833.png|link=|35px]]}}{{Quests/Task| TaskText=6. Talk To Scientist Jeff| TaskImage=[[File:Npc4577.png|link=|35px]]}}{{Quests/Task| TaskText=7. Teleport The Nuclear Bomb To The Alien Queen| TaskImage=[[File:Tok2850.png|link=|35px]]}}{{Quests/Task| TaskText=8. Activate The Nuclear Bomb| TaskImage=[[File:Tok2857.png|link=|35px]]}}{{Quests/Task| TaskText=9. Talk To Mr. President| TaskImage=[[File:Npc4433.png|link=|35px]]}} |
| Tasks={{Quests/Task| TaskText=1. Talk To Will Schmidt| TaskImage=[[File:Npc4432.png|link=|35px]]}}{{Quests/Task| TaskText=2. Get On The Bridge| TaskImage=[[File:Tok2848.png|link=|35px]]}}{{Quests/Task| TaskText=3. Save 9 Kidnapped People (9)| TaskImage=[[File:Tok2849.png|link=|35px]]}}{{Quests/Task| TaskText=4. Talk To Scientist Jeff| TaskImage=[[File:Npc4575.png|link=|35px]]}}{{Quests/Task| TaskText=5. Save The Dog| TaskImage=[[File:Tok2833.png|link=|35px]]}}{{Quests/Task| TaskText=6. Talk To Scientist Jeff| TaskImage=[[File:Npc4577.png|link=|35px]]}}{{Quests/Task| TaskText=7. Teleport The Nuclear Bomb To The Alien Queen| TaskImage=[[File:Tok2850.png|link=|35px]]}}{{Quests/Task| TaskText=8. Activate The Nuclear Bomb| TaskImage=[[File:Tok2857.png|link=|35px]]}}{{Quests/Task| TaskText=9. Talk To Mr. President| TaskImage=[[File:Npc4433.png|link=|35px]]}} |
||
| Locations={{Quests/Location| Location=Mothership}} |
| Locations={{Quests/Location| Location=Mothership}} |
||
| − | | Coins= 6 |
+ | | Coins= 6,220[[File:Mat001.png|link=|20px]] |
| − | | ExperiencePoints= 11 |
+ | | ExperiencePoints= 11,200[[File:Sys001.png|link=|20px]] |
| Rewards= |
| Rewards= |
||
| Available=Space Walk |
| Available=Space Walk |
||
| Line 977: | Line 979: | ||
| ExperiencePoints= 500[[File:Sys001.png|link=|20px]] |
| ExperiencePoints= 500[[File:Sys001.png|link=|20px]] |
||
| Rewards= |
| Rewards= |
||
| − | | Available=Continuing The Adventure |
+ | | Available=[https://diggysadventure.fandom.com/wiki/Egypt_(Quests)#Isis Continuing The Adventure] |
}} |
}} |
||
| Line 988: | Line 990: | ||
| Locations={{Quests/Location| Location=Pixel Federation}} |
| Locations={{Quests/Location| Location=Pixel Federation}} |
||
| Coins= 750[[File:Mat001.png|link=|20px]] |
| Coins= 750[[File:Mat001.png|link=|20px]] |
||
| − | | ExperiencePoints= 1 |
+ | | ExperiencePoints= 1,300[[File:Sys001.png|link=|20px]] |
| Rewards= |
| Rewards= |
||
| Available=Sweet Delight |
| Available=Sweet Delight |
||
| Line 999: | Line 1,001: | ||
| Tasks={{Quests/Task| TaskText=1. Talk To Shmolko| TaskImage=[[File:Npc4267.png|link=|35px]]}}{{Quests/Task| TaskText=2. Find The Code Detector| TaskImage=[[File:Tok2765.png|link=|35px]]}}{{Quests/Task| TaskText=3. Talk To Shmolko| TaskImage=[[File:Npc4267.png|link=|35px]]}} |
| Tasks={{Quests/Task| TaskText=1. Talk To Shmolko| TaskImage=[[File:Npc4267.png|link=|35px]]}}{{Quests/Task| TaskText=2. Find The Code Detector| TaskImage=[[File:Tok2765.png|link=|35px]]}}{{Quests/Task| TaskText=3. Talk To Shmolko| TaskImage=[[File:Npc4267.png|link=|35px]]}} |
||
| Locations={{Quests/Location| Location=Megatest Level}} |
| Locations={{Quests/Location| Location=Megatest Level}} |
||
| − | | Coins= 1 |
+ | | Coins= 1,010[[File:Mat001.png|link=|20px]] |
| − | | ExperiencePoints= 2 |
+ | | ExperiencePoints= 2,000[[File:Sys001.png|link=|20px]] |
| Rewards= |
| Rewards= |
||
| Available=Birthday Party |
| Available=Birthday Party |
||
| Line 1,012: | Line 1,014: | ||
| Tasks={{Quests/Task| TaskText=1. Find Missing Pieces Of The Code (4)| TaskImage=[[File:Tok2766.png|link=|35px]]}}{{Quests/Task| TaskText=2. Talk To Shmolko|TaskImage=[[File:Npc4267.png|link=|35px]]}} |
| Tasks={{Quests/Task| TaskText=1. Find Missing Pieces Of The Code (4)| TaskImage=[[File:Tok2766.png|link=|35px]]}}{{Quests/Task| TaskText=2. Talk To Shmolko|TaskImage=[[File:Npc4267.png|link=|35px]]}} |
||
| Locations={{Quests/Location| Location=Old World}} |
| Locations={{Quests/Location| Location=Old World}} |
||
| − | | Coins= 2 |
+ | | Coins= 2,900[[File:Mat001.png|link=|20px]] |
| − | | ExperiencePoints= 4 |
+ | | ExperiencePoints= 4,800[[File:Sys001.png|link=|20px]] |
| Rewards= |
| Rewards= |
||
| Available=Lost And Found |
| Available=Lost And Found |
||
| Line 1,025: | Line 1,027: | ||
| Tasks={{Quests/Task| TaskText=1. Find Missing Piece Of The Code| TaskImage=[[File:Tok2766.png|link=|35px]]}}{{Quests/Task| TaskText=2. Talk To Shmolko| TaskImage=[[File:Npc4267.png|link=|35px]]}} |
| Tasks={{Quests/Task| TaskText=1. Find Missing Piece Of The Code| TaskImage=[[File:Tok2766.png|link=|35px]]}}{{Quests/Task| TaskText=2. Talk To Shmolko| TaskImage=[[File:Npc4267.png|link=|35px]]}} |
||
| Locations={{Quests/Location| Location=City Of Trouble}} |
| Locations={{Quests/Location| Location=City Of Trouble}} |
||
| − | | Coins= 3 |
+ | | Coins= 3,620[[File:Mat001.png|link=|20px]] |
| − | | ExperiencePoints= 5 |
+ | | ExperiencePoints= 5,450[[File:Sys001.png|link=|20px]] |
| Rewards= |
| Rewards= |
||
| Available=Diggy The Ghost Buster |
| Available=Diggy The Ghost Buster |
||
| Line 1,038: | Line 1,040: | ||
| Tasks={{Quests/Task| TaskText=1. Find Missing Pieces Of The Code (5)| TaskImage=[[File:Tok2766.png|link=|35px]]}}{{Quests/Task| TaskText=2. Talk To Shmolko|TaskImage=[[File:Npc4267.png|link=|35px]]}} |
| Tasks={{Quests/Task| TaskText=1. Find Missing Pieces Of The Code (5)| TaskImage=[[File:Tok2766.png|link=|35px]]}}{{Quests/Task| TaskText=2. Talk To Shmolko|TaskImage=[[File:Npc4267.png|link=|35px]]}} |
||
| Locations={{Quests/Location| Location=Farm Simulation}} |
| Locations={{Quests/Location| Location=Farm Simulation}} |
||
| − | | Coins= 4 |
+ | | Coins= 4,350[[File:Mat001.png|link=|20px]] |
| − | | ExperiencePoints= 6 |
+ | | ExperiencePoints= 6,100[[File:Sys001.png|link=|20px]] |
| Rewards= |
| Rewards= |
||
| Available=Daily Crisis |
| Available=Daily Crisis |
||
| Line 1,051: | Line 1,053: | ||
| Tasks={{Quests/Task| TaskText=1. Find Missing Pieces Of The Code (3)| TaskImage=[[File:Tok2766.png|link=|35px]]}}{{Quests/Task| TaskText=2. Talk To Shmolko|TaskImage=[[File:Npc4267.png|link=|35px]]}} |
| Tasks={{Quests/Task| TaskText=1. Find Missing Pieces Of The Code (3)| TaskImage=[[File:Tok2766.png|link=|35px]]}}{{Quests/Task| TaskText=2. Talk To Shmolko|TaskImage=[[File:Npc4267.png|link=|35px]]}} |
||
| Locations={{Quests/Location| Location=The Racing Tracks}} |
| Locations={{Quests/Location| Location=The Racing Tracks}} |
||
| − | | Coins= 4 |
+ | | Coins= 4,820[[File:Mat001.png|link=|20px]] |
| − | | ExperiencePoints= 6 |
+ | | ExperiencePoints= 6,930[[File:Sys001.png|link=|20px]] |
| Rewards= |
| Rewards= |
||
| Available=Seeding And Diggying |
| Available=Seeding And Diggying |
||
| Line 1,064: | Line 1,066: | ||
| Tasks={{Quests/Task| TaskText=1. Talk To PeŤo| TaskImage=[[File:Npc4325.png|link=|35px]]}}{{Quests/Task| TaskText=2. Find Usb Stick| TaskImage=[[File:Tok2794.png|link=|35px]]}}{{Quests/Task| TaskText=3. Find Usb Stick| TaskImage=[[File:Tok2795.png|link=|35px]]}}{{Quests/Task| TaskText=4. Find Usb Stick|TaskImage=[[File:Tok2796.png|link=|35px]]}}{{Quests/Task| TaskText=5. Find Usb Stick| TaskImage=[[File:Tok2797.png|link=|35px]]}}{{Quests/Task| TaskText=6. Insert Usb Sticks Into The Computer| TaskImage=[[File:Tok2793.png|link=|35px]]}}{{Quests/Task| TaskText=7. Talk To Shmolko| TaskImage=[[File:Npc4267.png|link=|35px]]}} |
| Tasks={{Quests/Task| TaskText=1. Talk To PeŤo| TaskImage=[[File:Npc4325.png|link=|35px]]}}{{Quests/Task| TaskText=2. Find Usb Stick| TaskImage=[[File:Tok2794.png|link=|35px]]}}{{Quests/Task| TaskText=3. Find Usb Stick| TaskImage=[[File:Tok2795.png|link=|35px]]}}{{Quests/Task| TaskText=4. Find Usb Stick|TaskImage=[[File:Tok2796.png|link=|35px]]}}{{Quests/Task| TaskText=5. Find Usb Stick| TaskImage=[[File:Tok2797.png|link=|35px]]}}{{Quests/Task| TaskText=6. Insert Usb Sticks Into The Computer| TaskImage=[[File:Tok2793.png|link=|35px]]}}{{Quests/Task| TaskText=7. Talk To Shmolko| TaskImage=[[File:Npc4267.png|link=|35px]]}} |
||
| Locations={{Quests/Location| Location=The Interweb}} |
| Locations={{Quests/Location| Location=The Interweb}} |
||
| − | | Coins= 5 |
+ | | Coins= 5,230[[File:Mat001.png|link=|20px]] |
| − | | ExperiencePoints= 8 |
+ | | ExperiencePoints= 8,200[[File:Sys001.png|link=|20px]] |
| Rewards= |
| Rewards= |
||
| Available=Mad Chase |
| Available=Mad Chase |
||
| Line 1,077: | Line 1,079: | ||
| Tasks={{Quests/Task| TaskText=1. Get Inside The Computer| TaskImage=[[File:Tok2772.png|link=|35px]]}}{{Quests/Task| TaskText=2. Talk To Mojmir| TaskImage=[[File:Npc4326.png|link=|35px]]}}{{Quests/Task| TaskText=3. Give Mojmir The Cake| TaskImage=[[File:Tok2771.png|link=|35px]]}}{{Quests/Task| TaskText=4. Talk To Shmolko| TaskImage=[[File:Npc4267.png|link=|35px]]}} |
| Tasks={{Quests/Task| TaskText=1. Get Inside The Computer| TaskImage=[[File:Tok2772.png|link=|35px]]}}{{Quests/Task| TaskText=2. Talk To Mojmir| TaskImage=[[File:Npc4326.png|link=|35px]]}}{{Quests/Task| TaskText=3. Give Mojmir The Cake| TaskImage=[[File:Tok2771.png|link=|35px]]}}{{Quests/Task| TaskText=4. Talk To Shmolko| TaskImage=[[File:Npc4267.png|link=|35px]]}} |
||
| Locations={{Quests/Location| Location=Mojmir's Digital Fortress}} |
| Locations={{Quests/Location| Location=Mojmir's Digital Fortress}} |
||
| − | | Coins= 5 |
+ | | Coins= 5,500[[File:Mat001.png|link=|20px]] |
| − | | ExperiencePoints= 9 |
+ | | ExperiencePoints= 9,100[[File:Sys001.png|link=|20px]] |
| Rewards= |
| Rewards= |
||
| Available=Connection Lost |
| Available=Connection Lost |
||
| Line 1,102: | Line 1,104: | ||
| ExperiencePoints= 500[[File:Sys001.png|link=|20px]] |
| ExperiencePoints= 500[[File:Sys001.png|link=|20px]] |
||
| Rewards= |
| Rewards= |
||
| − | | Available=Continuing The Adventure |
+ | | Available=[https://diggysadventure.fandom.com/wiki/Egypt_(Quests)#Isis Continuing The Adventure] |
}} |
}} |
||
| Line 1,113: | Line 1,115: | ||
| Locations={{Quests/Location| Location=Forest Of The Unwanted}} |
| Locations={{Quests/Location| Location=Forest Of The Unwanted}} |
||
| Coins= 800[[File:Mat001.png|link=|20px]] |
| Coins= 800[[File:Mat001.png|link=|20px]] |
||
| − | | ExperiencePoints= 2 |
+ | | ExperiencePoints= 2,250[[File:Sys001.png|link=|20px]] |
| Rewards= |
| Rewards= |
||
| Available=Snow White |
| Available=Snow White |
||
| Line 1,125: | Line 1,127: | ||
| Tasks={{Quests/Task| TaskText=1. Check Out The Houses Looking For A Tenement (4)| TaskImage=[[File:Tok2628.png|link=|35px]]}}{{Quests/Task| TaskText=2. Talk To Lock| TaskImage=[[File:Npc4005.png|link=|35px]]}} |
| Tasks={{Quests/Task| TaskText=1. Check Out The Houses Looking For A Tenement (4)| TaskImage=[[File:Tok2628.png|link=|35px]]}}{{Quests/Task| TaskText=2. Talk To Lock| TaskImage=[[File:Npc4005.png|link=|35px]]}} |
||
| Locations={{Quests/Location| Location=Fairy Tale Real-estate}} |
| Locations={{Quests/Location| Location=Fairy Tale Real-estate}} |
||
| − | | Coins= 1 |
+ | | Coins= 1,500[[File:Mat001.png|link=|20px]] |
| − | | ExperiencePoints= 3 |
+ | | ExperiencePoints= 3,500[[File:Sys001.png|link=|20px]] |
| Rewards= |
| Rewards= |
||
| Available=Huntsman With A Heart |
| Available=Huntsman With A Heart |
||
| Line 1,137: | Line 1,139: | ||
| Tasks={{Quests/Task| TaskText=1. Find The Missing Dwarfs (6)| TaskImage=[[File:Tok2629.png|link=|35px]]}}{{Quests/Task| TaskText=2. Talk To Fairy Godmother| TaskImage=[[File:Npc4001.png|link=|35px]]}} |
| Tasks={{Quests/Task| TaskText=1. Find The Missing Dwarfs (6)| TaskImage=[[File:Tok2629.png|link=|35px]]}}{{Quests/Task| TaskText=2. Talk To Fairy Godmother| TaskImage=[[File:Npc4001.png|link=|35px]]}} |
||
| Locations={{Quests/Location| Location=Dwarven Forest}} |
| Locations={{Quests/Location| Location=Dwarven Forest}} |
||
| − | | Coins= 3 |
+ | | Coins= 3,000[[File:Mat001.png|link=|20px]] |
| − | | ExperiencePoints= 5 |
+ | | ExperiencePoints= 5,000[[File:Sys001.png|link=|20px]] |
| Rewards= |
| Rewards= |
||
| Available=Sublease From A Fairy Tale |
| Available=Sublease From A Fairy Tale |
||
| Line 1,150: | Line 1,152: | ||
| Tasks={{Quests/Task| TaskText=1. Get Cabbage| TaskImage=[[File:Tok2630.png|link=|35px]]}}{{Quests/Task| TaskText=2. Get Cheese| TaskImage=[[File:Tok2631.png|link=|35px]]}}{{Quests/Task| TaskText=3. Get A Sausage| TaskImage=[[File:Tok2632.png|link=|35px]]}}{{Quests/Task| TaskText=4. Get Some Apples| TaskImage=[[File:Tok2633.png|link=|35px]]}}{{Quests/Task| TaskText=5. Talk To Fairy Godmother| TaskImage=[[File:Npc4001.png|link=|35px]]}} |
| Tasks={{Quests/Task| TaskText=1. Get Cabbage| TaskImage=[[File:Tok2630.png|link=|35px]]}}{{Quests/Task| TaskText=2. Get Cheese| TaskImage=[[File:Tok2631.png|link=|35px]]}}{{Quests/Task| TaskText=3. Get A Sausage| TaskImage=[[File:Tok2632.png|link=|35px]]}}{{Quests/Task| TaskText=4. Get Some Apples| TaskImage=[[File:Tok2633.png|link=|35px]]}}{{Quests/Task| TaskText=5. Talk To Fairy Godmother| TaskImage=[[File:Npc4001.png|link=|35px]]}} |
||
| Locations={{Quests/Location| Location=Market Under The Castle}} |
| Locations={{Quests/Location| Location=Market Under The Castle}} |
||
| − | | Coins= 3 |
+ | | Coins= 3,750[[File:Mat001.png|link=|20px]] |
| − | | ExperiencePoints= 5 |
+ | | ExperiencePoints= 5,500[[File:Sys001.png|link=|20px]] |
| Rewards= |
| Rewards= |
||
| Available=Garden Gnomes |
| Available=Garden Gnomes |
||
| Line 1,163: | Line 1,165: | ||
| Tasks={{Quests/Task| TaskText=1. Get The Chairs On Their Places (4)| TaskImage=[[File:Tok2634.png|link=|35px]]}}{{Quests/Task| TaskText=2. Roll The Barrels To Their Marks (2)| TaskImage=[[File:Tok2635.png|link=|35px]]}}{{Quests/Task| TaskText=3. Place The Apples On The Tables (8)| TaskImage=[[File:Tok2636.png|link=|35px]]}}{{Quests/Task| TaskText=4. Ring The Bell| TaskImage=[[File:Tok2637.png|link=|35px]]}}{{Quests/Task| TaskText=5. Talk To Mopey| TaskImage=[[File:Npc4006.png|link=|35px]]}}{{Quests/Task| TaskText=6. Get A Suitable Coffin For Snow White| TaskImage=[[File:Tok2638.png|link=|35px]]}}{{Quests/Task| TaskText=7. Talk To Mopey| TaskImage=[[File:Npc4006.png|link=|35px]]}}{{Quests/Task| TaskText=8. Talk To Fairy Godmother| TaskImage=[[File:Npc4001.png|link=|35px]]}} |
| Tasks={{Quests/Task| TaskText=1. Get The Chairs On Their Places (4)| TaskImage=[[File:Tok2634.png|link=|35px]]}}{{Quests/Task| TaskText=2. Roll The Barrels To Their Marks (2)| TaskImage=[[File:Tok2635.png|link=|35px]]}}{{Quests/Task| TaskText=3. Place The Apples On The Tables (8)| TaskImage=[[File:Tok2636.png|link=|35px]]}}{{Quests/Task| TaskText=4. Ring The Bell| TaskImage=[[File:Tok2637.png|link=|35px]]}}{{Quests/Task| TaskText=5. Talk To Mopey| TaskImage=[[File:Npc4006.png|link=|35px]]}}{{Quests/Task| TaskText=6. Get A Suitable Coffin For Snow White| TaskImage=[[File:Tok2638.png|link=|35px]]}}{{Quests/Task| TaskText=7. Talk To Mopey| TaskImage=[[File:Npc4006.png|link=|35px]]}}{{Quests/Task| TaskText=8. Talk To Fairy Godmother| TaskImage=[[File:Npc4001.png|link=|35px]]}} |
||
| Locations={{Quests/Location| Location=Dwarfyard}} |
| Locations={{Quests/Location| Location=Dwarfyard}} |
||
| − | | Coins= 4 |
+ | | Coins= 4,500[[File:Mat001.png|link=|20px]] |
| − | | ExperiencePoints= 6 |
+ | | ExperiencePoints= 6,000[[File:Sys001.png|link=|20px]] |
| Rewards= |
| Rewards= |
||
| Available=Giant Preparations For A Dwarf Feast |
| Available=Giant Preparations For A Dwarf Feast |
||
| Line 1,176: | Line 1,178: | ||
| Tasks={{Quests/Task| TaskText=1. Find A Suitable Prince For Snow White| TaskImage=[[File:Tok2639.png|link=|35px]]}}{{Quests/Task| TaskText=2. Talk To Prince Charming| TaskImage=[[File:Npc4007.png|link=|35px]]}}{{Quests/Task| TaskText=3. Bring The Prince To Snow White| TaskImage=[[File:Tok2640.png|link=|35px]]}}{{Quests/Task| TaskText=4. Talk To Fairy Godmother| TaskImage=[[File:Npc4001.png|link=|35px]]}} |
| Tasks={{Quests/Task| TaskText=1. Find A Suitable Prince For Snow White| TaskImage=[[File:Tok2639.png|link=|35px]]}}{{Quests/Task| TaskText=2. Talk To Prince Charming| TaskImage=[[File:Npc4007.png|link=|35px]]}}{{Quests/Task| TaskText=3. Bring The Prince To Snow White| TaskImage=[[File:Tok2640.png|link=|35px]]}}{{Quests/Task| TaskText=4. Talk To Fairy Godmother| TaskImage=[[File:Npc4001.png|link=|35px]]}} |
||
| Locations={{Quests/Location| Location=Princely Path}} |
| Locations={{Quests/Location| Location=Princely Path}} |
||
| − | | Coins= 4 |
+ | | Coins= 4,750[[File:Mat001.png|link=|20px]] |
| − | | ExperiencePoints= 7 |
+ | | ExperiencePoints= 7,000[[File:Sys001.png|link=|20px]] |
| Rewards= |
| Rewards= |
||
| Available=Dwarven Banquet |
| Available=Dwarven Banquet |
||
| Line 1,189: | Line 1,191: | ||
| Tasks={{Quests/Task| TaskText=1. Find The Magical Mirror| TaskImage=[[File:Tok2641.png|link=|35px]]}}{{Quests/Task| TaskText=2. Find Queen's Weakness In The Mirror| TaskImage=[[File:Tok2642.png|link=|35px]]}}{{Quests/Task| TaskText=3. Talk To Magical Mirror| TaskImage=[[File:Npc4066.png|link=|35px]]}}{{Quests/Task| TaskText=4. Defeat The Evil Queen| TaskImage=[[File:Tok2643.png|link=|35px]]}}{{Quests/Task| TaskText=5. Talk To Fairy Godmother| TaskImage=[[File:Npc4001.png|link=|35px]]}} |
| Tasks={{Quests/Task| TaskText=1. Find The Magical Mirror| TaskImage=[[File:Tok2641.png|link=|35px]]}}{{Quests/Task| TaskText=2. Find Queen's Weakness In The Mirror| TaskImage=[[File:Tok2642.png|link=|35px]]}}{{Quests/Task| TaskText=3. Talk To Magical Mirror| TaskImage=[[File:Npc4066.png|link=|35px]]}}{{Quests/Task| TaskText=4. Defeat The Evil Queen| TaskImage=[[File:Tok2643.png|link=|35px]]}}{{Quests/Task| TaskText=5. Talk To Fairy Godmother| TaskImage=[[File:Npc4001.png|link=|35px]]}} |
||
| Locations={{Quests/Location| Location=Evil Queen's Tower}} |
| Locations={{Quests/Location| Location=Evil Queen's Tower}} |
||
| − | | Coins= 5 |
+ | | Coins= 5,000[[File:Mat001.png|link=|20px]] |
| − | | ExperiencePoints= 8 |
+ | | ExperiencePoints= 8,000[[File:Sys001.png|link=|20px]] |
| Rewards= |
| Rewards= |
||
| Available=Reversed Courtship |
| Available=Reversed Courtship |
||
| Line 1,214: | Line 1,216: | ||
| ExperiencePoints= 500[[File:Sys001.png|link=|20px]] |
| ExperiencePoints= 500[[File:Sys001.png|link=|20px]] |
||
| Rewards= |
| Rewards= |
||
| − | | Available=Continuing The Adventure |
+ | | Available=[https://diggysadventure.fandom.com/wiki/Egypt_(Quests)#Isis Continuing The Adventure] |
}} |
}} |
||
| Line 1,225: | Line 1,227: | ||
| Locations={{Quests/Location| Location=Dirty Hen-coop}} |
| Locations={{Quests/Location| Location=Dirty Hen-coop}} |
||
| Coins= 700[[File:Mat001.png|link=|20px]] |
| Coins= 700[[File:Mat001.png|link=|20px]] |
||
| − | | ExperiencePoints= 1 |
+ | | ExperiencePoints= 1,000[[File:Sys001.png|link=|20px]] |
| Rewards= |
| Rewards= |
||
| Available=Monica's Carrots |
| Available=Monica's Carrots |
||
| Line 1,237: | Line 1,239: | ||
| Tasks={{Quests/Task| TaskText=1. Find Seagull Eggs (5)| TaskImage=[[File:Tok2528.png|link=|35px]]}}{{Quests/Task| TaskText=2. Find Ostrich Eggs (4)| TaskImage=[[File:Tok2529.png|link=|35px]]}}{{Quests/Task| TaskText=3. Find Crocodile Eggs (4)| TaskImage=[[File:Tok2530.png|link=|35px]]}}{{Quests/Task| TaskText=4. Find Dragon Eggs (2)| TaskImage=[[File:Tok2531.png|link=|35px]]}}{{Quests/Task| TaskText=5. Talk To Monica The Hen| TaskImage=[[File:Npc3831.png|link=|35px]]}} |
| Tasks={{Quests/Task| TaskText=1. Find Seagull Eggs (5)| TaskImage=[[File:Tok2528.png|link=|35px]]}}{{Quests/Task| TaskText=2. Find Ostrich Eggs (4)| TaskImage=[[File:Tok2529.png|link=|35px]]}}{{Quests/Task| TaskText=3. Find Crocodile Eggs (4)| TaskImage=[[File:Tok2530.png|link=|35px]]}}{{Quests/Task| TaskText=4. Find Dragon Eggs (2)| TaskImage=[[File:Tok2531.png|link=|35px]]}}{{Quests/Task| TaskText=5. Talk To Monica The Hen| TaskImage=[[File:Npc3831.png|link=|35px]]}} |
||
| Locations={{Quests/Location| Location=Eggislands}} |
| Locations={{Quests/Location| Location=Eggislands}} |
||
| − | | Coins= 1 |
+ | | Coins= 1,000[[File:Mat001.png|link=|20px]] |
| − | | ExperiencePoints= 2 |
+ | | ExperiencePoints= 2,000[[File:Sys001.png|link=|20px]] |
| Rewards= |
| Rewards= |
||
| Available=Messy Hen-coop |
| Available=Messy Hen-coop |
||
| Line 1,250: | Line 1,252: | ||
| Tasks={{Quests/Task| TaskText=1. Talk To Guerilla Chicken| TaskImage=[[File:Npc3796.png|link=|35px]]}}{{Quests/Task| TaskText=2. Turn The Speakers Off (4)| TaskImage=[[File:Tok2532.png|link=|35px]]}}{{Quests/Task| TaskText=3. Talk To Guerilla Chicken| TaskImage=[[File:Npc3799.png|link=|35px]]}}{{Quests/Task| TaskText=4. Trap The Weasels| TaskImage=[[File:Tok2533.png|link=|35px]]}}{{Quests/Task| TaskText=5. Talk To Guerilla Chicken| TaskImage=[[File:Npc3802.png|link=|35px]]}}{{Quests/Task| TaskText=6. Open The Gate| TaskImage=[[File:Tok2534.png|link=|35px]]}}{{Quests/Task| TaskText=7. Talk To The Big Rooster| TaskImage=[[File:Npc3805.png|link=|35px]]}} |
| Tasks={{Quests/Task| TaskText=1. Talk To Guerilla Chicken| TaskImage=[[File:Npc3796.png|link=|35px]]}}{{Quests/Task| TaskText=2. Turn The Speakers Off (4)| TaskImage=[[File:Tok2532.png|link=|35px]]}}{{Quests/Task| TaskText=3. Talk To Guerilla Chicken| TaskImage=[[File:Npc3799.png|link=|35px]]}}{{Quests/Task| TaskText=4. Trap The Weasels| TaskImage=[[File:Tok2533.png|link=|35px]]}}{{Quests/Task| TaskText=5. Talk To Guerilla Chicken| TaskImage=[[File:Npc3802.png|link=|35px]]}}{{Quests/Task| TaskText=6. Open The Gate| TaskImage=[[File:Tok2534.png|link=|35px]]}}{{Quests/Task| TaskText=7. Talk To The Big Rooster| TaskImage=[[File:Npc3805.png|link=|35px]]}} |
||
| Locations={{Quests/Location| Location=Revolting Hen-coops}} |
| Locations={{Quests/Location| Location=Revolting Hen-coops}} |
||
| − | | Coins= 1 |
+ | | Coins= 1,500[[File:Mat001.png|link=|20px]] |
| − | | ExperiencePoints= 3 |
+ | | ExperiencePoints= 3,000[[File:Sys001.png|link=|20px]] |
| Rewards= |
| Rewards= |
||
| Available=External Sources |
| Available=External Sources |
||
| Line 1,262: | Line 1,264: | ||
| Tasks={{Quests/Task| TaskText=1. Talk To The Bunny Boss| TaskImage=[[File:Npc3806.png|link=|35px]]}}{{Quests/Task| TaskText=2. Rescue The Bunnies| TaskImage=[[File:Tok2535.png|link=|35px]]}}{{Quests/Task| TaskText=3. Rescue The Hens| TaskImage=[[File:Tok2536.png|link=|35px]]}}{{Quests/Task| TaskText=4. Talk To The Bunny Boss| TaskImage=[[File:Npc3806.png|link=|35px]]}} |
| Tasks={{Quests/Task| TaskText=1. Talk To The Bunny Boss| TaskImage=[[File:Npc3806.png|link=|35px]]}}{{Quests/Task| TaskText=2. Rescue The Bunnies| TaskImage=[[File:Tok2535.png|link=|35px]]}}{{Quests/Task| TaskText=3. Rescue The Hens| TaskImage=[[File:Tok2536.png|link=|35px]]}}{{Quests/Task| TaskText=4. Talk To The Bunny Boss| TaskImage=[[File:Npc3806.png|link=|35px]]}} |
||
| Locations={{Quests/Location| Location=Poultry Farms}} |
| Locations={{Quests/Location| Location=Poultry Farms}} |
||
| − | | Coins= 2 |
+ | | Coins= 2,000[[File:Mat001.png|link=|20px]] |
| − | | ExperiencePoints= 4 |
+ | | ExperiencePoints= 4,000[[File:Sys001.png|link=|20px]] |
| Rewards= |
| Rewards= |
||
| Available=Egg-olution |
| Available=Egg-olution |
||
| Line 1,274: | Line 1,276: | ||
| Tasks={{Quests/Task| TaskText=1. Talk To The Bunny Boss| TaskImage=[[File:Npc3788.png|link=|35px]]}}{{Quests/Task| TaskText=2. Get Inside The Room| TaskImage=[[File:Tok2537.png|link=|35px]]}}{{Quests/Task| TaskText=3. Talk To Monica The Hen| TaskImage=[[File:Npc3831.png|link=|35px]]}} |
| Tasks={{Quests/Task| TaskText=1. Talk To The Bunny Boss| TaskImage=[[File:Npc3788.png|link=|35px]]}}{{Quests/Task| TaskText=2. Get Inside The Room| TaskImage=[[File:Tok2537.png|link=|35px]]}}{{Quests/Task| TaskText=3. Talk To Monica The Hen| TaskImage=[[File:Npc3831.png|link=|35px]]}} |
||
| Locations={{Quests/Location| Location=Weasel Hideout}} |
| Locations={{Quests/Location| Location=Weasel Hideout}} |
||
| − | | Coins= 3 |
+ | | Coins= 3,000[[File:Mat001.png|link=|20px]] |
| − | | ExperiencePoints= 5 |
+ | | ExperiencePoints= 5,000[[File:Sys001.png|link=|20px]] |
| Rewards= |
| Rewards= |
||
| Available=Hens, Bunnies And Assembly Lines |
| Available=Hens, Bunnies And Assembly Lines |
||
| Line 1,287: | Line 1,289: | ||
| Tasks={{Quests/Task| TaskText=1. Talk To The Bunny Boss| TaskImage=[[File:Npc3835.png|link=|35px]]}}{{Quests/Task| TaskText=2. Catch Baron Ram| TaskImage=[[File:Tok2538.png|link=|35px]]}}{{Quests/Task| TaskText=3. Talk To The Bunny Boss| TaskImage=[[File:Npc3835.png|link=|35px]]}} |
| Tasks={{Quests/Task| TaskText=1. Talk To The Bunny Boss| TaskImage=[[File:Npc3835.png|link=|35px]]}}{{Quests/Task| TaskText=2. Catch Baron Ram| TaskImage=[[File:Tok2538.png|link=|35px]]}}{{Quests/Task| TaskText=3. Talk To The Bunny Boss| TaskImage=[[File:Npc3835.png|link=|35px]]}} |
||
| Locations={{Quests/Location| Location=Shopping Centre}} |
| Locations={{Quests/Location| Location=Shopping Centre}} |
||
| − | | Coins= 3 |
+ | | Coins= 3,500[[File:Mat001.png|link=|20px]] |
| − | | ExperiencePoints= 6 |
+ | | ExperiencePoints= 6,000[[File:Sys001.png|link=|20px]] |
| Rewards= |
| Rewards= |
||
| Available=Bunny Mafia |
| Available=Bunny Mafia |
||
| Line 1,299: | Line 1,301: | ||
| Tasks={{Quests/Task| TaskText=1. Catch Baron Ram| TaskImage=[[File:Tok2539.png|link=|35px]]}}{{Quests/Task| TaskText=2. Talk To Monica The Hen| TaskImage=[[File:Npc3831.png|link=|35px]]}} |
| Tasks={{Quests/Task| TaskText=1. Catch Baron Ram| TaskImage=[[File:Tok2539.png|link=|35px]]}}{{Quests/Task| TaskText=2. Talk To Monica The Hen| TaskImage=[[File:Npc3831.png|link=|35px]]}} |
||
| Locations={{Quests/Location| Location=Secret Chalet}} |
| Locations={{Quests/Location| Location=Secret Chalet}} |
||
| − | | Coins= 4 |
+ | | Coins= 4,000[[File:Mat001.png|link=|20px]] |
| − | | ExperiencePoints= 6 |
+ | | ExperiencePoints= 6,500[[File:Sys001.png|link=|20px]] |
| Rewards= |
| Rewards= |
||
| Available=Baron Ram |
| Available=Baron Ram |
||
| Line 1,312: | Line 1,314: | ||
| Tasks={{Quests/Task| TaskText=1. Complete The Tasks (4)| TaskImage=[[File:Tok2540.png|link=|35px]]}}{{Quests/Task| TaskText=2. Talk To Monica The Hen| TaskImage=[[File:Npc3831.png|link=|35px]]}} |
| Tasks={{Quests/Task| TaskText=1. Complete The Tasks (4)| TaskImage=[[File:Tok2540.png|link=|35px]]}}{{Quests/Task| TaskText=2. Talk To Monica The Hen| TaskImage=[[File:Npc3831.png|link=|35px]]}} |
||
| Locations={{Quests/Location| Location=Easter Picnic}} |
| Locations={{Quests/Location| Location=Easter Picnic}} |
||
| − | | Coins= 4 |
+ | | Coins= 4,500[[File:Mat001.png|link=|20px]] |
| − | | ExperiencePoints= 7 |
+ | | ExperiencePoints= 7,000[[File:Sys001.png|link=|20px]] |
| Rewards= |
| Rewards= |
||
| Available=Ram The Baron |
| Available=Ram The Baron |
||
| Line 1,325: | Line 1,327: | ||
| Tasks={{Quests/Task| TaskText=1. Visit The Easter Challenge| TaskImage=[[File: Loc1107.png|link=|35px]]}} |
| Tasks={{Quests/Task| TaskText=1. Visit The Easter Challenge| TaskImage=[[File: Loc1107.png|link=|35px]]}} |
||
| Locations={{Quests/Location| Location=Easter Challenge}} |
| Locations={{Quests/Location| Location=Easter Challenge}} |
||
| − | | Coins= 5 |
+ | | Coins= 5,000[[File:Mat001.png|link=|20px]] |
| − | | ExperiencePoints= 8 |
+ | | ExperiencePoints= 8,000[[File:Sys001.png|link=|20px]] |
| Rewards= |
| Rewards= |
||
| Available=Diggy's Easter Hunt |
| Available=Diggy's Easter Hunt |
||
| Line 1,350: | Line 1,352: | ||
| ExperiencePoints= 250[[File:Sys001.png|link=|20px]] |
| ExperiencePoints= 250[[File:Sys001.png|link=|20px]] |
||
| Rewards= |
| Rewards= |
||
| − | | Available=Continuing The Adventure |
+ | | Available=[https://diggysadventure.fandom.com/wiki/Egypt_(Quests)#Isis Continuing The Adventure] |
}} |
}} |
||
| Line 1,396: | Line 1,398: | ||
| Tasks={{Quests/Task| TaskText=1. Talk To Inspector Closet| TaskImage=[[File:Npc3534.png|link=|35px]]}}{{Quests/Task| TaskText=2. Get Into The Bedroom| TaskImage=[[File:Tok2438.png|link=|35px]]}}{{Quests/Task| TaskText=3. Talk To Sir Charles Litton| TaskImage=[[File:Npc3535.png|link=|35px]]}} |
| Tasks={{Quests/Task| TaskText=1. Talk To Inspector Closet| TaskImage=[[File:Npc3534.png|link=|35px]]}}{{Quests/Task| TaskText=2. Get Into The Bedroom| TaskImage=[[File:Tok2438.png|link=|35px]]}}{{Quests/Task| TaskText=3. Talk To Sir Charles Litton| TaskImage=[[File:Npc3535.png|link=|35px]]}} |
||
| Locations={{Quests/Location| Location=Phantom's Alpine Castle}} |
| Locations={{Quests/Location| Location=Phantom's Alpine Castle}} |
||
| − | | Coins= 1 |
+ | | Coins= 1,000[[File:Mat001.png|link=|20px]] |
| − | | ExperiencePoints= 1 |
+ | | ExperiencePoints= 1,800[[File:Sys001.png|link=|20px]] |
| Rewards= |
| Rewards= |
||
| Available=The Car Chase |
| Available=The Car Chase |
||
| Line 1,408: | Line 1,410: | ||
| Tasks={{Quests/Task| TaskText=1. Talk To Inspector Closet| TaskImage=[[File:Npc3607.png|link=|35px]]}}{{Quests/Task| TaskText=2. Get Into The Cell| TaskImage=[[File:Tok2439.png|link=|35px]]}}{{Quests/Task| TaskText=3. Talk To Inspector Dreyfus| TaskImage=[[File:Npc3617.png|link=|35px]]}}{{Quests/Task| TaskText=4. Help Dreyfus Out| TaskImage=[[File:Tok2440.png|link=|35px]]}} |
| Tasks={{Quests/Task| TaskText=1. Talk To Inspector Closet| TaskImage=[[File:Npc3607.png|link=|35px]]}}{{Quests/Task| TaskText=2. Get Into The Cell| TaskImage=[[File:Tok2439.png|link=|35px]]}}{{Quests/Task| TaskText=3. Talk To Inspector Dreyfus| TaskImage=[[File:Npc3617.png|link=|35px]]}}{{Quests/Task| TaskText=4. Help Dreyfus Out| TaskImage=[[File:Tok2440.png|link=|35px]]}} |
||
| Locations={{Quests/Location| Location=Mental Asylum}} |
| Locations={{Quests/Location| Location=Mental Asylum}} |
||
| − | | Coins= 1 |
+ | | Coins= 1,600[[File:Mat001.png|link=|20px]] |
| − | | ExperiencePoints= 2 |
+ | | ExperiencePoints= 2,800[[File:Sys001.png|link=|20px]] |
| Rewards= |
| Rewards= |
||
| Available=The Home Of The Phantom |
| Available=The Home Of The Phantom |
||
| Line 1,420: | Line 1,422: | ||
| Tasks={{Quests/Task| TaskText=1. Talk To Inspector Closet| TaskImage=[[File:Npc3534.png|link=|35px]]}}{{Quests/Task| TaskText=2. Get The 1st Stamp| TaskImage=[[File:Tok2441.png|link=|35px]]}}{{Quests/Task| TaskText=3. Get The 2nd Stamp| TaskImage=[[File:Tok2442.png|link=|35px]]}}{{Quests/Task| TaskText=4. Get The 3rd Stamp| TaskImage=[[File:Tok2443.png|link=|35px]]}}{{Quests/Task| TaskText=5. Get The 4th Stamp| TaskImage=[[File:Tok2444.png|link=|35px]]}}{{Quests/Task| TaskText=6. Talk To Master Gem Cutter| TaskImage=[[File:Npc3537.png|link=|35px]]}} |
| Tasks={{Quests/Task| TaskText=1. Talk To Inspector Closet| TaskImage=[[File:Npc3534.png|link=|35px]]}}{{Quests/Task| TaskText=2. Get The 1st Stamp| TaskImage=[[File:Tok2441.png|link=|35px]]}}{{Quests/Task| TaskText=3. Get The 2nd Stamp| TaskImage=[[File:Tok2442.png|link=|35px]]}}{{Quests/Task| TaskText=4. Get The 3rd Stamp| TaskImage=[[File:Tok2443.png|link=|35px]]}}{{Quests/Task| TaskText=5. Get The 4th Stamp| TaskImage=[[File:Tok2444.png|link=|35px]]}}{{Quests/Task| TaskText=6. Talk To Master Gem Cutter| TaskImage=[[File:Npc3537.png|link=|35px]]}} |
||
| Locations={{Quests/Location| Location=Antwerp}} |
| Locations={{Quests/Location| Location=Antwerp}} |
||
| − | | Coins= 2 |
+ | | Coins= 2,400[[File:Mat001.png|link=|20px]] |
| − | | ExperiencePoints= 3 |
+ | | ExperiencePoints= 3,800[[File:Sys001.png|link=|20px]] |
| Rewards= |
| Rewards= |
||
| Available=The Mental Asylum |
| Available=The Mental Asylum |
||
| Line 1,432: | Line 1,434: | ||
| Tasks={{Quests/Task| TaskText=1. Find The Place Of The Sale| TaskImage=[[File:Tok2445.png|link=|35px]]}}{{Quests/Task| TaskText=2. Talk To Inspector Closet| TaskImage=[[File:Npc3534.png|link=|35px]]}}{{Quests/Task| TaskText=3. Catch The Phantom| TaskImage=[[File:Tok2446.png|link=|35px]]}}{{Quests/Task| TaskText=4. Get The Diamond| TaskImage=[[File:Tok2447.png|link=|35px]]}}{{Quests/Task| TaskText=5. Talk To Inspector Closet| TaskImage=[[File:Npc3534.png|link=|35px]]}} |
| Tasks={{Quests/Task| TaskText=1. Find The Place Of The Sale| TaskImage=[[File:Tok2445.png|link=|35px]]}}{{Quests/Task| TaskText=2. Talk To Inspector Closet| TaskImage=[[File:Npc3534.png|link=|35px]]}}{{Quests/Task| TaskText=3. Catch The Phantom| TaskImage=[[File:Tok2446.png|link=|35px]]}}{{Quests/Task| TaskText=4. Get The Diamond| TaskImage=[[File:Tok2447.png|link=|35px]]}}{{Quests/Task| TaskText=5. Talk To Inspector Closet| TaskImage=[[File:Npc3534.png|link=|35px]]}} |
||
| Locations={{Quests/Location| Location=Lugash National Museum}} |
| Locations={{Quests/Location| Location=Lugash National Museum}} |
||
| − | | Coins= 3 |
+ | | Coins= 3,300[[File:Mat001.png|link=|20px]] |
| − | | ExperiencePoints= 4 |
+ | | ExperiencePoints= 4,800[[File:Sys001.png|link=|20px]] |
| Rewards= |
| Rewards= |
||
| Available=Gang Infiltration |
| Available=Gang Infiltration |
||
| Line 1,444: | Line 1,446: | ||
| Tasks={{Quests/Task| TaskText=1. Return The Diamond| TaskImage=[[File:Tok2448.png|link=|35px]]}}{{Quests/Task| TaskText=2. Follow The Wrappers On The Ground (12)| TaskImage=[[File:Tok2449.png|link=|35px]]}}{{Quests/Task| TaskText=3. Talk To Princess Dala| TaskImage=[[File:Npc3533.png|link=|35px]]}}{{Quests/Task| TaskText=4. Talk To Inspector Closet| TaskImage=[[File:Npc3534.png|link=|35px]]}} |
| Tasks={{Quests/Task| TaskText=1. Return The Diamond| TaskImage=[[File:Tok2448.png|link=|35px]]}}{{Quests/Task| TaskText=2. Follow The Wrappers On The Ground (12)| TaskImage=[[File:Tok2449.png|link=|35px]]}}{{Quests/Task| TaskText=3. Talk To Princess Dala| TaskImage=[[File:Npc3533.png|link=|35px]]}}{{Quests/Task| TaskText=4. Talk To Inspector Closet| TaskImage=[[File:Npc3534.png|link=|35px]]}} |
||
| Locations={{Quests/Location| Location=Lugash Palace}} |
| Locations={{Quests/Location| Location=Lugash Palace}} |
||
| − | | Coins= 4 |
+ | | Coins= 4,000[[File:Mat001.png|link=|20px]] |
| − | | ExperiencePoints= 6 |
+ | | ExperiencePoints= 6,000[[File:Sys001.png|link=|20px]] |
| Rewards= |
| Rewards= |
||
| Available=Acquiring The Diamond |
| Available=Acquiring The Diamond |
||
| Line 1,456: | Line 1,458: | ||
| Tasks={{Quests/Task| TaskText=1. Visit The Lugash Jewellery| TaskImage=[[File: Loc1093.png|link=|35px]]}} |
| Tasks={{Quests/Task| TaskText=1. Visit The Lugash Jewellery| TaskImage=[[File: Loc1093.png|link=|35px]]}} |
||
| Locations={{Quests/Location| Location=Lugash Jewellery}} |
| Locations={{Quests/Location| Location=Lugash Jewellery}} |
||
| − | | Coins= 1 |
+ | | Coins= 1,000[[File:Mat001.png|link=|20px]] |
| − | | ExperiencePoints= 3 |
+ | | ExperiencePoints= 3,000[[File:Sys001.png|link=|20px]] |
| Rewards= |
| Rewards= |
||
| Available=The Reveal |
| Available=The Reveal |
||
| Line 1,481: | Line 1,483: | ||
| ExperiencePoints= 200[[File:Sys001.png|link=|20px]] |
| ExperiencePoints= 200[[File:Sys001.png|link=|20px]] |
||
| Rewards= |
| Rewards= |
||
| − | | Available=Continuing The Adventure |
+ | | Available=[https://diggysadventure.fandom.com/wiki/Egypt_(Quests)#Isis Continuing The Adventure] |
}} |
}} |
||
| Line 1,517: | Line 1,519: | ||
| Locations={{Quests/Location| Location=Capulet Ball}} |
| Locations={{Quests/Location| Location=Capulet Ball}} |
||
| Coins= 750[[File:Mat001.png|link=|20px]] |
| Coins= 750[[File:Mat001.png|link=|20px]] |
||
| − | | ExperiencePoints= 1 |
+ | | ExperiencePoints= 1,000[[File:Sys001.png|link=|20px]] |
| Rewards= |
| Rewards= |
||
| Available=Romeo And Juliet |
| Available=Romeo And Juliet |
||
| Line 1,528: | Line 1,530: | ||
| Tasks={{Quests/Task| TaskText=1. Talk To William Shakespeare| TaskImage=[[File:Npc3298.png|link=|35px]]}}{{Quests/Task| TaskText=2. Help Romeo Get To Juliet| TaskImage=[[File:Tok2342.png|link=|35px]]}}{{Quests/Task| TaskText=3. Talk To Romeo Montague| TaskImage=[[File:Npc3299.png|link=|35px]]}} |
| Tasks={{Quests/Task| TaskText=1. Talk To William Shakespeare| TaskImage=[[File:Npc3298.png|link=|35px]]}}{{Quests/Task| TaskText=2. Help Romeo Get To Juliet| TaskImage=[[File:Tok2342.png|link=|35px]]}}{{Quests/Task| TaskText=3. Talk To Romeo Montague| TaskImage=[[File:Npc3299.png|link=|35px]]}} |
||
| Locations={{Quests/Location| Location=Juliet's Gardens}} |
| Locations={{Quests/Location| Location=Juliet's Gardens}} |
||
| − | | Coins= 1 |
+ | | Coins= 1,200[[File:Mat001.png|link=|20px]] |
| − | | ExperiencePoints= 2 |
+ | | ExperiencePoints= 2,000[[File:Sys001.png|link=|20px]] |
| Rewards= |
| Rewards= |
||
| Available=The Capulet Ball |
| Available=The Capulet Ball |
||
| Line 1,540: | Line 1,542: | ||
| Tasks={{Quests/Task| TaskText=1. Talk To William Shakespeare| TaskImage=[[File:Npc3298.png|link=|35px]]}}{{Quests/Task| TaskText=2. Talk To Juliet Capulet| TaskImage=[[File:Npc3300.png|link=|35px]]}}{{Quests/Task| TaskText=3. Find Romeo| TaskImage=[[File:Tok2343.png|link=|35px]]}}{{Quests/Task| TaskText=4. Find Friar Lawrence| TaskImage=[[File:Tok2344.png|link=|35px]]}}{{Quests/Task| TaskText=5. Light The Candles (12)| TaskImage=[[File:Tok2345.png|link=|35px]]}}{{Quests/Task| TaskText=6. Pull The Lever| TaskImage=[[File:Tok2346.png|link=|35px]]}} |
| Tasks={{Quests/Task| TaskText=1. Talk To William Shakespeare| TaskImage=[[File:Npc3298.png|link=|35px]]}}{{Quests/Task| TaskText=2. Talk To Juliet Capulet| TaskImage=[[File:Npc3300.png|link=|35px]]}}{{Quests/Task| TaskText=3. Find Romeo| TaskImage=[[File:Tok2343.png|link=|35px]]}}{{Quests/Task| TaskText=4. Find Friar Lawrence| TaskImage=[[File:Tok2344.png|link=|35px]]}}{{Quests/Task| TaskText=5. Light The Candles (12)| TaskImage=[[File:Tok2345.png|link=|35px]]}}{{Quests/Task| TaskText=6. Pull The Lever| TaskImage=[[File:Tok2346.png|link=|35px]]}} |
||
| Locations={{Quests/Location| Location=Verona Chapel}} |
| Locations={{Quests/Location| Location=Verona Chapel}} |
||
| − | | Coins= 1 |
+ | | Coins= 1,800[[File:Mat001.png|link=|20px]] |
| − | | ExperiencePoints= 3 |
+ | | ExperiencePoints= 3,000[[File:Sys001.png|link=|20px]] |
| Rewards= |
| Rewards= |
||
| Available=The Balcony Scene |
| Available=The Balcony Scene |
||
| Line 1,552: | Line 1,554: | ||
| Tasks={{Quests/Task| TaskText=1. Talk To William Shakespeare| TaskImage=[[File:Npc3298.png|link=|35px]]}}{{Quests/Task| TaskText=2. Talk To Romeo Montague| TaskImage=[[File:Npc3315.png|link=|35px]]}}{{Quests/Task| TaskText=3. Talk To Mercutio| TaskImage=[[File:Npc3312.png|link=|35px]]}}{{Quests/Task| TaskText=4. Find A Laxative| TaskImage=[[File:Tok2347.png|link=|35px]]}}{{Quests/Task| TaskText=5. Put The Laxative Into The Food| TaskImage=[[File:Tok2373.png|link=|35px]]}}{{Quests/Task| TaskText=6. Barricade Tybalt| TaskImage=[[File:Tok2349.png|link=|35px]]}}{{Quests/Task| TaskText=7. Talk To Romeo Montague| TaskImage=[[File:Npc3315.png|link=|35px]]}}{{Quests/Task| TaskText=8. Catch Tybalt| TaskImage=[[File:Tok2350.png|link=|35px]]}} |
| Tasks={{Quests/Task| TaskText=1. Talk To William Shakespeare| TaskImage=[[File:Npc3298.png|link=|35px]]}}{{Quests/Task| TaskText=2. Talk To Romeo Montague| TaskImage=[[File:Npc3315.png|link=|35px]]}}{{Quests/Task| TaskText=3. Talk To Mercutio| TaskImage=[[File:Npc3312.png|link=|35px]]}}{{Quests/Task| TaskText=4. Find A Laxative| TaskImage=[[File:Tok2347.png|link=|35px]]}}{{Quests/Task| TaskText=5. Put The Laxative Into The Food| TaskImage=[[File:Tok2373.png|link=|35px]]}}{{Quests/Task| TaskText=6. Barricade Tybalt| TaskImage=[[File:Tok2349.png|link=|35px]]}}{{Quests/Task| TaskText=7. Talk To Romeo Montague| TaskImage=[[File:Npc3315.png|link=|35px]]}}{{Quests/Task| TaskText=8. Catch Tybalt| TaskImage=[[File:Tok2350.png|link=|35px]]}} |
||
| Locations={{Quests/Location| Location=Streets Of Verona}} |
| Locations={{Quests/Location| Location=Streets Of Verona}} |
||
| − | | Coins= 2 |
+ | | Coins= 2,500[[File:Mat001.png|link=|20px]] |
| − | | ExperiencePoints= 4 |
+ | | ExperiencePoints= 4,000[[File:Sys001.png|link=|20px]] |
| Rewards= |
| Rewards= |
||
| Available=The Secret Wedding |
| Available=The Secret Wedding |
||
| Line 1,564: | Line 1,566: | ||
| Tasks={{Quests/Task| TaskText=1. Talk To William Shakespeare| TaskImage=[[File:Npc3298.png|link=|35px]]}}{{Quests/Task| TaskText=2. Talk To Romeo Montague| TaskImage=[[File:Npc3299.png|link=|35px]]}}{{Quests/Task| TaskText=3. Reach Juliet| TaskImage=[[File:Tok2351.png|link=|35px]]}}{{Quests/Task| TaskText=4. Talk To Juliet Capulet| TaskImage=[[File:Npc3300.png|link=|35px]]}} |
| Tasks={{Quests/Task| TaskText=1. Talk To William Shakespeare| TaskImage=[[File:Npc3298.png|link=|35px]]}}{{Quests/Task| TaskText=2. Talk To Romeo Montague| TaskImage=[[File:Npc3299.png|link=|35px]]}}{{Quests/Task| TaskText=3. Reach Juliet| TaskImage=[[File:Tok2351.png|link=|35px]]}}{{Quests/Task| TaskText=4. Talk To Juliet Capulet| TaskImage=[[File:Npc3300.png|link=|35px]]}} |
||
| Locations={{Quests/Location| Location=Capulet Mansion}} |
| Locations={{Quests/Location| Location=Capulet Mansion}} |
||
| − | | Coins= 3 |
+ | | Coins= 3,500[[File:Mat001.png|link=|20px]] |
| − | | ExperiencePoints= 5 |
+ | | ExperiencePoints= 5,000[[File:Sys001.png|link=|20px]] |
| Rewards= |
| Rewards= |
||
| Available=The Duel |
| Available=The Duel |
||
| Line 1,576: | Line 1,578: | ||
| Tasks={{Quests/Task| TaskText=1. Talk To Juliet Capulet| TaskImage=[[File:Npc3300.png|link=|35px]]}}{{Quests/Task| TaskText=2. Talk To Friar Lawrence| TaskImage=[[File:Npc3302.png|link=|35px]]}}{{Quests/Task| TaskText=3. Mix The Poison| TaskImage=[[File:Tok2352.png|link=|35px]]}} |
| Tasks={{Quests/Task| TaskText=1. Talk To Juliet Capulet| TaskImage=[[File:Npc3300.png|link=|35px]]}}{{Quests/Task| TaskText=2. Talk To Friar Lawrence| TaskImage=[[File:Npc3302.png|link=|35px]]}}{{Quests/Task| TaskText=3. Mix The Poison| TaskImage=[[File:Tok2352.png|link=|35px]]}} |
||
| Locations={{Quests/Location| Location=Lawrence's Alchemical Laboratory}} |
| Locations={{Quests/Location| Location=Lawrence's Alchemical Laboratory}} |
||
| − | | Coins= 4 |
+ | | Coins= 4,500[[File:Mat001.png|link=|20px]] |
| − | | ExperiencePoints= 6 |
+ | | ExperiencePoints= 6,000[[File:Sys001.png|link=|20px]] |
| Rewards= |
| Rewards= |
||
| Available=The Wedding Night |
| Available=The Wedding Night |
||
| Line 1,588: | Line 1,590: | ||
| Tasks={{Quests/Task| TaskText=1. Talk To Friar Lawrence| TaskImage=[[File:Npc3302.png|link=|35px]]}}{{Quests/Task| TaskText=2. Find The Crypt Palermo| TaskImage=[[File:Tok2353.png|link=|35px]]}}{{Quests/Task| TaskText=3. Talk To Romeo Montague| TaskImage=[[File:Npc3299.png|link=|35px]]}}{{Quests/Task| TaskText=4. Talk To William Shakespeare| TaskImage=[[File:Npc3298.png|link=|35px]]}}{{Quests/Task| TaskText=5. Find The Crypt Salerno| TaskImage=[[File:Tok2354.png|link=|35px]]}}{{Quests/Task| TaskText=6. Talk To Juliet Capulet| TaskImage=[[File:Npc3300.png|link=|35px]]}}{{Quests/Task| TaskText=7. Reunite Romeo And Juliet| TaskImage=[[File:Tok2355.png|link=|35px]]}}{{Quests/Task| TaskText=8. Talk To William Shakespeare| TaskImage=[[File:Npc3298.png|link=|35px]]}}{{Quests/Task| TaskText=9. Talk To Friar Lawrence| TaskImage=[[File:Tok2382.png|link=|35px]]}} |
| Tasks={{Quests/Task| TaskText=1. Talk To Friar Lawrence| TaskImage=[[File:Npc3302.png|link=|35px]]}}{{Quests/Task| TaskText=2. Find The Crypt Palermo| TaskImage=[[File:Tok2353.png|link=|35px]]}}{{Quests/Task| TaskText=3. Talk To Romeo Montague| TaskImage=[[File:Npc3299.png|link=|35px]]}}{{Quests/Task| TaskText=4. Talk To William Shakespeare| TaskImage=[[File:Npc3298.png|link=|35px]]}}{{Quests/Task| TaskText=5. Find The Crypt Salerno| TaskImage=[[File:Tok2354.png|link=|35px]]}}{{Quests/Task| TaskText=6. Talk To Juliet Capulet| TaskImage=[[File:Npc3300.png|link=|35px]]}}{{Quests/Task| TaskText=7. Reunite Romeo And Juliet| TaskImage=[[File:Tok2355.png|link=|35px]]}}{{Quests/Task| TaskText=8. Talk To William Shakespeare| TaskImage=[[File:Npc3298.png|link=|35px]]}}{{Quests/Task| TaskText=9. Talk To Friar Lawrence| TaskImage=[[File:Tok2382.png|link=|35px]]}} |
||
| Locations={{Quests/Location| Location=Verona Cemetery}} |
| Locations={{Quests/Location| Location=Verona Cemetery}} |
||
| − | | Coins= 5 |
+ | | Coins= 5,500[[File:Mat001.png|link=|20px]] |
| − | | ExperiencePoints= 7 |
+ | | ExperiencePoints= 7,000[[File:Sys001.png|link=|20px]] |
| Rewards= |
| Rewards= |
||
| Available=The Poison |
| Available=The Poison |
||
| Line 1,613: | Line 1,615: | ||
| ExperiencePoints= 500[[File:Sys001.png|link=|20px]] |
| ExperiencePoints= 500[[File:Sys001.png|link=|20px]] |
||
| Rewards= |
| Rewards= |
||
| − | | Available=Continuing The Adventure |
+ | | Available=[https://diggysadventure.fandom.com/wiki/Egypt_(Quests)#Isis Continuing The Adventure] |
}} |
}} |
||
| Line 1,624: | Line 1,626: | ||
| Locations={{Quests/Location| Location=Pawn Shop}} |
| Locations={{Quests/Location| Location=Pawn Shop}} |
||
| Coins= 700[[File:Mat001.png|link=|20px]] |
| Coins= 700[[File:Mat001.png|link=|20px]] |
||
| − | | ExperiencePoints= 1 |
+ | | ExperiencePoints= 1,000[[File:Sys001.png|link=|20px]] |
| Rewards= |
| Rewards= |
||
| Available=Sneferu's Oranges |
| Available=Sneferu's Oranges |
||
| Line 1,636: | Line 1,638: | ||
| Tasks={{Quests/Task| TaskText=1. Talk To Sneferu's Wife| TaskImage=[[File:Npc3145.png|link=|35px]]}}{{Quests/Task| TaskText=2. Talk To Alan Galfianjgakos| TaskImage=[[File:Npc3146.png|link=|35px]]}}{{Quests/Task| TaskText=3. Find Chips (40)| TaskImage=[[File:Tok2278.png|link=|35px]]}}{{Quests/Task| TaskText=4. Talk To Alan Galfianjgakos| TaskImage=[[File:Npc3146.png|link=|35px]]}} |
| Tasks={{Quests/Task| TaskText=1. Talk To Sneferu's Wife| TaskImage=[[File:Npc3145.png|link=|35px]]}}{{Quests/Task| TaskText=2. Talk To Alan Galfianjgakos| TaskImage=[[File:Npc3146.png|link=|35px]]}}{{Quests/Task| TaskText=3. Find Chips (40)| TaskImage=[[File:Tok2278.png|link=|35px]]}}{{Quests/Task| TaskText=4. Talk To Alan Galfianjgakos| TaskImage=[[File:Npc3146.png|link=|35px]]}} |
||
| Locations={{Quests/Location| Location=Pharaoh's Palace}} |
| Locations={{Quests/Location| Location=Pharaoh's Palace}} |
||
| − | | Coins= 1 |
+ | | Coins= 1,000[[File:Mat001.png|link=|20px]] |
| − | | ExperiencePoints= 1 |
+ | | ExperiencePoints= 1,750[[File:Sys001.png|link=|20px]] |
| Rewards= |
| Rewards= |
||
| Available=Pearls Of Mrs. Sneferu |
| Available=Pearls Of Mrs. Sneferu |
||
| Line 1,648: | Line 1,650: | ||
| Tasks={{Quests/Task| TaskText=1. Find The Assistant| TaskImage=[[File:Tok2279.png|link=|35px]]}}{{Quests/Task| TaskText=2. Talk To Dancer| TaskImage=[[File:Npc3115.png|link=|35px]]}}{{Quests/Task| TaskText=3. Get A Tiger| TaskImage=[[File:Tok2280.png|link=|35px]]}}{{Quests/Task| TaskText=4. Talk To Assistant Johnny| TaskImage=[[File:Npc3114.png|link=|35px]]}} |
| Tasks={{Quests/Task| TaskText=1. Find The Assistant| TaskImage=[[File:Tok2279.png|link=|35px]]}}{{Quests/Task| TaskText=2. Talk To Dancer| TaskImage=[[File:Npc3115.png|link=|35px]]}}{{Quests/Task| TaskText=3. Get A Tiger| TaskImage=[[File:Tok2280.png|link=|35px]]}}{{Quests/Task| TaskText=4. Talk To Assistant Johnny| TaskImage=[[File:Npc3114.png|link=|35px]]}} |
||
| Locations={{Quests/Location| Location=Cabaret Mirage}} |
| Locations={{Quests/Location| Location=Cabaret Mirage}} |
||
| − | | Coins= 1 |
+ | | Coins= 1,700[[File:Mat001.png|link=|20px]] |
| − | | ExperiencePoints= 3 |
+ | | ExperiencePoints= 3,000[[File:Sys001.png|link=|20px]] |
| Rewards= |
| Rewards= |
||
| Available=Casino In Las Vegas |
| Available=Casino In Las Vegas |
||
| Line 1,660: | Line 1,662: | ||
| Tasks={{Quests/Task| TaskText=1. Find Uncle| TaskImage=[[File:Tok2281.png|link=|35px]]}}{{Quests/Task| TaskText=2. Release Uncle| TaskImage=[[File:Tok2282.png|link=|35px]]}}{{Quests/Task| TaskText=3. Talk To Uncle Diggster| TaskImage=[[File:Npc3141.png|link=|35px]]}} |
| Tasks={{Quests/Task| TaskText=1. Find Uncle| TaskImage=[[File:Tok2281.png|link=|35px]]}}{{Quests/Task| TaskText=2. Release Uncle| TaskImage=[[File:Tok2282.png|link=|35px]]}}{{Quests/Task| TaskText=3. Talk To Uncle Diggster| TaskImage=[[File:Npc3141.png|link=|35px]]}} |
||
| Locations={{Quests/Location| Location=Las Vegas Bank}} |
| Locations={{Quests/Location| Location=Las Vegas Bank}} |
||
| − | | Coins= 2 |
+ | | Coins= 2,400[[File:Mat001.png|link=|20px]] |
| − | | ExperiencePoints= 4 |
+ | | ExperiencePoints= 4,000[[File:Sys001.png|link=|20px]] |
| Rewards= |
| Rewards= |
||
| Available=The White Tiger |
| Available=The White Tiger |
||
| Line 1,672: | Line 1,674: | ||
| Tasks={{Quests/Task| TaskText=1. Talk To Vladimir The Mummy| TaskImage=[[File:Npc3147.png|link=|35px]]}}{{Quests/Task| TaskText=2. Help Vladimir (6)| TaskImage=[[File:Tok2283.png|link=|35px]]}}{{Quests/Task| TaskText=3. Talk To Vladimir The Mummy| TaskImage=[[File:Npc3147.png|link=|35px]]}}{{Quests/Task| TaskText=4. Talk To Alan Galfianjgakos| TaskImage=[[File:Npc3146.png|link=|35px]]}}{{Quests/Task| TaskText=5. Talk To Sneferu| TaskImage=[[File:Npc3148.png|link=|35px]]}} |
| Tasks={{Quests/Task| TaskText=1. Talk To Vladimir The Mummy| TaskImage=[[File:Npc3147.png|link=|35px]]}}{{Quests/Task| TaskText=2. Help Vladimir (6)| TaskImage=[[File:Tok2283.png|link=|35px]]}}{{Quests/Task| TaskText=3. Talk To Vladimir The Mummy| TaskImage=[[File:Npc3147.png|link=|35px]]}}{{Quests/Task| TaskText=4. Talk To Alan Galfianjgakos| TaskImage=[[File:Npc3146.png|link=|35px]]}}{{Quests/Task| TaskText=5. Talk To Sneferu| TaskImage=[[File:Npc3148.png|link=|35px]]}} |
||
| Locations={{Quests/Location| Location=Belaggio Ceremonial Hall}} |
| Locations={{Quests/Location| Location=Belaggio Ceremonial Hall}} |
||
| − | | Coins= 3 |
+ | | Coins= 3,000[[File:Mat001.png|link=|20px]] |
| − | | ExperiencePoints= 5 |
+ | | ExperiencePoints= 5,000[[File:Sys001.png|link=|20px]] |
| Rewards= |
| Rewards= |
||
| Available=Bank Heist |
| Available=Bank Heist |
||
| Line 1,682: | Line 1,684: | ||
| style="text-align:right;" |[[File:NAVtop.png|50px|class= shiny grow|link=#top|Return to Top page]] |
| style="text-align:right;" |[[File:NAVtop.png|50px|class= shiny grow|link=#top|Return to Top page]] |
||
|} |
|} |
||
| ⚫ | |||
| − | |||
[[Category:Events]] |
[[Category:Events]] |
||
Revision as of 18:26, 26 December 2022

CHRISTMAS 2015
| IMAGE | QUEST | LOCATION | TASKS | QUEST BONUS | REWARDS | |
|---|---|---|---|---|---|---|
 |
Crunchy Ice Cream | Junk Food Stall Under The Christmas Tree |
|
300 |
500 |
1 |
| Available after: Continuing The Adventure | ||||||
 |
Christmas Vouchers | Christmas Terminal | 150 |
300 |
1 | |
| Available after: Crunchy Ice Cream | ||||||
 |
Alone At The Airport | Illinois Airport Christmas Challenge 1 |
|
550 |
770 |
1 |
| Available after: Crunchy Ice Cream | ||||||
 |
Keep The Change | Five Star Hotel |
|
710 |
1,200 |
1 |
| Available after: Alone At The Airport | ||||||
 |
Christmas Wish | New York Shopping Mall Christmas Challenge 2 |
|
1 080 |
1,800 |
1 |
| Available after: Keep The Change | ||||||
 |
In Bandits' Footsteps | Snowy Zoo |
|
1,600 |
2,400 |
1 |
| Available after: Christmas Wish | ||||||
 |
Toy Store Thievery | Danken's Toy Store Christmas Challenge 3 |
|
2,100 |
3,100 |
1 |
| Available after: In Bandits' Footsteps | ||||||
 |
Baiting Bandits | New York Streets Christmas Challenge 4 |
|
2,600 |
3,700 |
1 |
| Available after: Toy Store Thievery | ||||||
 |
Kelvin's Revenge | Traphouse Christmas Challenge 5 |
|
3,200 |
4,400 |
1 |
| Available after: Baiting Bandits | ||||||
 |
The Tree Of Miracles | Rockefeller Plaza |
|
3,800 |
5,300 |
1 |
| Available after: Kelvin's Revenge | ||||||
 |
Christmas Surprise | Christmas Challenge 6 Christmas Challenge 7 Christmas Challenge 8 Christmas Challenge 9 |
|
1,000 |
2,000 |
1 |
| Available after: Kelvin's Revenge | ||||||
 |
Family Vacation | Uncle Freddie's House |
|
4,000 |
5,800 |
1 |
| Available after: The Tree Of Miracles | ||||||
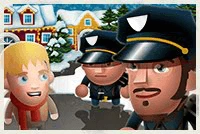 |
Neighbourhood Inspection | Winterville Suburbs |
|
4,300 |
6,400 |
1 |
| Available after: Family Vacation | ||||||
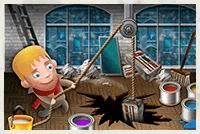 |
House Defense | Kelvin's Traphouse |
|
4,600 |
6,900 |
1 |
| Available after: Neighbourhood Inspection | ||||||
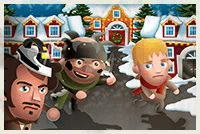 |
Kelvin On The Run | Winterville Village |
|
5,000 |
7,500 |
1 |
| Available after: House Defense | ||||||
 |
Holiday Cheer | Godmother's Pantry | 150 |
300 |
1 | |
| Available after: The Tree Of Miracles | ||||||
 |
Fireworks In Sydney | Sydney Harbour New Year's Challenge 1 |
|
1,000 |
1,500 |
1 |
| Available after: Kelvin On The Run | ||||||
 |
Foggy New Year | Streets Of London |
|
1,300 |
2,100 |
1 |
| Available after: Fireworks In Sydney | ||||||
 |
Family Chase | Coast Of Cuba New Year's Challenge 2 |
|
1,700 |
2,700 |
1 |
| Available after: Foggy New Year | ||||||
 |
Happy New Year 2016! | Statue Of Liberty |
|
1,800 |
3,500 |
1 |
| Available after: Family Chase | ||||||

|
MACGAINER
| IMAGE | QUEST | LOCATION | TASKS | QUEST BONUS | REWARDS | |
|---|---|---|---|---|---|---|
 |
Poisoned Plantation | Free Trade Plantation Macgainer's Challenge 1 |
|
1,500 |
3,000 |
|
| Available after: Continuing The Adventure | ||||||
 |
Oil On Fire | Indian Oil Field Macgainer's Challenge 2 |
|
2,200 |
4,200 |
|
| Available after: Poisoned Plantation | ||||||
 |
Polar Threat | Antarctica Station Macgainer's Challenge 3 |
|
3,050 |
5,300 |
|
| Available after: Oil On Fire | ||||||
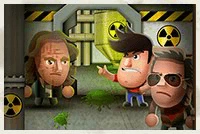 |
Timebomb Ticking | Toxic Waste Power Station |
|
4,300 |
6,400 |
|
| Available after: Polar Threat | ||||||
|
|
HALLOWEEN 2015
| IMAGE | QUEST | LOCATION | TASKS | QUEST BONUS | REWARDS | |
|---|---|---|---|---|---|---|
 |
Halloween Party | Occult Library Halloween Challenge 1 |
|
300 |
500 |
|
| Available after: Continuing The Adventure | ||||||
 |
Who You Gonna Call? | New York University |
|
800 |
1,800 |
|
| Available after: Halloween Party | ||||||
 |
Headless Horseman | Waking Hollow Halloween Challenge 2 |
|
1,500 |
3,100 |
|
| Available after: Who You Gonna Call? | ||||||
 |
Haunted Videotape | Japanese Villa |
|
3,060 |
4,600 |
|
| Available after: Headless Horseman | ||||||
 |
White Lady | Hudson Castle Halloween Challenge 3 |
|
3,800 |
5,300 |
|
| Available after: Haunted Videotape | ||||||
 |
Ghost Ship | New York Harbour Halloween Challenge 4 |
|
4,300 |
6,040 |
|
| Available after: White Lady | ||||||
 |
Capturing Presidents | Central Park Halloween Challenge 5 |
|
5,070 |
7,000 |
|
| Available after: Ghost Ship | ||||||
 |
The Necronomicon | 8th Circle Of Hell |
|
6,300 |
8,300 |
|
| Available after: Capturing Presidents | ||||||
|
|
PIRATES
| IMAGE | QUEST | LOCATION | TASKS | QUEST BONUS | REWARDS | |
|---|---|---|---|---|---|---|
 |
Coconut Refreshment | Coconut Orchard |
|
790 |
1,370 |
|
| Available after: Continuing The Adventure | ||||||
 |
Searching For Treasure | Island Of Crystal Skulls |
|
1,810 |
2,380 |
|
| Available after: Coconut Refreshment | ||||||
 |
Jack Deep's Crew | Tortuga Bay Pirate Challenge 1 |
|
2,900 |
4,290 |
|
| Available after: Searching For Treasure | ||||||
 |
Jack On The Run | Fortress Of Escape |
|
5,250 |
6,500 |
|
| Available after: Jack Deep's Crew | ||||||
 |
Sea Battle | Pacific Current Pirate Challenge 2 |
|
7,300 |
8,370 |
|
| Available after: Jack On The Run | ||||||
 |
Voodoo Priestess | Swamp Island Pirate Challenge 3 |
|
8,600 |
10,060 |
|
| Available after: Sea Battle | ||||||
 |
Saving Soldiers | Shipwreck Bay Pirate Challenge 4 |
|
10,100 |
11,800 |
|
| Available after: Voodoo Priestess | ||||||
 |
In The Belly Of The Beast | Kraken Coast Pirate Challenge 5 |
|
12,200 |
13,100 |
|
| Available after: Saving Soldiers | ||||||
 |
7 Crystal Skulls | Cave Of Bones Sextant Island |
|
13,900 |
16,690 |
|
| Available after: In The Belly Of The Beast | ||||||
 |
Hidden Pirate Treasure | 700 |
1,300 |
|||
| Available after: 7 Crystal Skulls | ||||||
|
|
LITTLE MERMAID
| IMAGE | QUEST | LOCATION | TASKS | QUEST BONUS | REWARDS | |
|---|---|---|---|---|---|---|
 |
Oyster Delicacy | Oyster Field |
|
770 |
1,300 |
|
| Available after: Continuing The Adventure | ||||||
 |
Trip To Village | Seaside Village |
|
1,800 |
2,300 |
|
| Available after: Oyster Delicacy | ||||||
 |
Rescuing Prince | Vortex Island Vortex Island Challenge |
|
2,820 |
4,200 |
|
| Available after: Trip To Village | ||||||
 |
Magical Potion | Pursula's Secret Laboratory Pursula's Secret Laboratory Challenge |
|
5,050 |
6,100 |
|
| Available after: Rescuing Prince | ||||||
 |
Chasing After Prince | Royal Countryside |
|
7,090 |
8,170 |
|
| Available after: Magical Potion | ||||||
 |
Wedding Ball | Prince's Palace Prince's Palace Challenge |
|
8,280 |
9,800 |
|
| Available after: Chasing After Prince | ||||||
 |
From Prince To Merman | Isle Of Transformation |
|
9,900 |
11,500 |
|
| Available after: Wedding Ball | ||||||
 |
Free Mariel! | Pursula's Cave Pursula's Cave Challenge |
|
11,910 |
13,010 |
|
| Available after: From Prince To Merman | ||||||
 |
Love Always Wins | Trident's Kingdom Trident's Kingdom Challenge |
|
13,300 |
16,030 |
|
| Available after: Free Mariel! | ||||||
|
|
JAMES BLOND
| IMAGE | QUEST | LOCATION | TASKS | QUEST BONUS | REWARDS | |
|---|---|---|---|---|---|---|
 |
Dr. Nope | The Island Of Doctor Nope |
|
750 |
1,250 |
|
| Available after: Continuing The Adventure | ||||||
 |
Casino Royale | Monaco City Centre |
|
1,600 |
2,060 |
|
| Available after: Dr. Nope | ||||||
 |
A View To Kill | Plastic Valley |
|
2,700 |
3,900 |
|
| Available after: Casino Royale | ||||||
 |
Moonraker | Fleming's Space Station |
|
4,010 |
5,900 |
|
| Available after: A View To Kill | ||||||
 |
In Her Majesty's Secret Service | Wheatland Farm |
|
5,350 |
8,030 |
|
| Available after: Moonraker | ||||||
 |
From Russia With Love | Snow Mountains |
|
7,900 |
9,260 |
|
| Available after: In Her Majesty's Secret Service | ||||||
 |
Goldfinger | Fort Knox |
|
9,400 |
11,100 |
|
| Available after: From Russia With Love | ||||||
 |
The World Is Not Enough | Bunker Under London |
|
11,500 |
14,050 |
|
| Available after: Goldfinger | ||||||
|
|
INDEPENDENCE DAY
| IMAGE | QUEST | LOCATION | TASKS | QUEST BONUS | REWARDS | |
|---|---|---|---|---|---|---|
 |
Space Attacks! | Chillmark Village |
|
300 |
730 |
|
| Available after: Continuing The Adventure | ||||||
 |
Mystery Files | New York In Ruins |
|
760 |
1,200 |
|
| Available after: Space Attacks! | ||||||
 |
President In Peril | White House Under Attack |
|
1,620 |
2,270 |
|
| Available after: Mystery Files | ||||||
 |
Making Saucers Fly | Area 15 |
|
2,400 |
4,620 |
|
| Available after: President In Peril | ||||||
 |
Finding Will Schmidt | Nevada Desert |
|
3,300 |
6,030 |
|
| Available after: Making Saucers Fly | ||||||
 |
Nuclear Threat | Bikini Beach |
|
4,300 |
7,400 |
|
| Available after: Finding Will Schmidt | ||||||
 |
Space Walk | International Space Stations |
|
5,650 |
9,200 |
|
| Available after: Nuclear Threat | ||||||
 |
Saving The World | Mothership |
|
6,220 |
11,200 |
|
| Available after: Space Walk | ||||||
 |
Alien Challenge | Alien Challenge | 200 |
520 |
||
| Available after: Saving The World | ||||||
|
|
3RD BIRTHDAY
| IMAGE | QUEST | LOCATION | TASKS | QUEST BONUS | REWARDS | |
|---|---|---|---|---|---|---|
 |
Sweet Delight | Mascarpone Manufacture |
|
300 |
500 |
|
| Available after: Continuing The Adventure | ||||||
 |
Birthday Party | Pixel Federation |
|
750 |
1,300 |
|
| Available after: Sweet Delight | ||||||
 |
Lost And Found | Megatest Level |
|
1,010 |
2,000 |
|
| Available after: Birthday Party | ||||||
 |
Diggy The Ghost Buster | Old World |
|
2,900 |
4,800 |
|
| Available after: Lost And Found | ||||||
 |
Daily Crisis | City Of Trouble |
|
3,620 |
5,450 |
|
| Available after: Diggy The Ghost Buster | ||||||
 |
Seeding And Diggying | Farm Simulation |
|
4,350 |
6,100 |
|
| Available after: Daily Crisis | ||||||
 |
Mad Chase | The Racing Tracks |
|
4,820 |
6,930 |
|
| Available after: Seeding And Diggying | ||||||
 |
Connection Lost | The Interweb |
|
5,230 |
8,200 |
|
| Available after: Mad Chase | ||||||
 |
The Mission Possible | Mojmir's Digital Fortress |
|
5,500 |
9,100 |
|
| Available after: Connection Lost | ||||||
|
|
SNOW WHITE
| IMAGE | QUEST | LOCATION | TASKS | QUEST BONUS | REWARDS | |
|---|---|---|---|---|---|---|
 |
Snow White | Snow White's Castle |
|
300 |
500 |
|
| Available after: Continuing The Adventure | ||||||
 |
Huntsman With A Heart | Forest Of The Unwanted |
|
800 |
2,250 |
|
| Available after: Snow White | ||||||
 |
Sublease From A Fairy Tale | Fairy Tale Real-estate |
|
1,500 |
3,500 |
|
| Available after: Huntsman With A Heart | ||||||
 |
Garden Gnomes | Dwarven Forest |
|
3,000 |
5,000 |
|
| Available after: Sublease From A Fairy Tale | ||||||
 |
Giant Preparations For A Dwarf Feast | Market Under The Castle |
|
3,750 |
5,500 |
|
| Available after: Garden Gnomes | ||||||
 |
Dwarven Banquet | Dwarfyard |
|
4,500 |
6,000 |
|
| Available after: Giant Preparations For A Dwarf Feast | ||||||
 |
Reversed Courtship | Princely Path |
|
4,750 |
7,000 |
|
| Available after: Dwarven Banquet | ||||||
 |
Fairest Of Them All | Evil Queen's Tower |
|
5,000 |
8,000 |
|
| Available after: Reversed Courtship | ||||||
|
|
EASTER 2015
| IMAGE | QUEST | LOCATION | TASKS | QUEST BONUS | REWARDS | |
|---|---|---|---|---|---|---|
 |
Monica's Carrots | Bunny Ear Garden |
|
300 |
500 |
|
| Available after: Continuing The Adventure | ||||||
 |
Messy Hen-coop | Dirty Hen-coop |
|
700 |
1,000 |
|
| Available after: Monica's Carrots | ||||||
 |
External Sources | Eggislands |
|
1,000 |
2,000 |
|
| Available after: Messy Hen-coop | ||||||
 |
Egg-olution | Revolting Hen-coops |
|
1,500 |
3,000 |
|
| Available after: External Sources | ||||||
 |
Hens, Bunnies And Assembly Lines | Poultry Farms |
|
2,000 |
4,000 |
|
| Available after: Egg-olution | ||||||
 |
Bunny Mafia | Weasel Hideout |
|
3,000 |
5,000 |
|
| Available after: Hens, Bunnies And Assembly Lines | ||||||
 |
Baron Ram | Shopping Centre |
|
3,500 |
6,000 |
|
| Available after: Bunny Mafia | ||||||
 |
Ram The Baron | Secret Chalet |
|
4,000 |
6,500 |
|
| Available after: Baron Ram | ||||||
 |
Diggy's Easter Hunt | Easter Picnic |
|
4,500 |
7,000 |
|
| Available after: Ram The Baron | ||||||
 |
Easter Challenge | Easter Challenge | 5,000 |
8,000 |
||
| Available after: Diggy's Easter Hunt | ||||||
|
|
PINK PUMA
| IMAGE | QUEST | LOCATION | TASKS | QUEST BONUS | REWARDS | |
|---|---|---|---|---|---|---|
 |
Purple Puma | Raspberry Grove |
|
200 |
250 |
|
| Available after: Continuing The Adventure | ||||||
 |
The Robbery | Metropolitan Gallery |
|
300 |
450 |
|
| Available after: Purple Puma | ||||||
 |
Investigation At The Ball | Benefit Ball |
|
500 |
650 |
|
| Available after: The Robbery | ||||||
 |
The Car Chase | Parisian Streets |
|
800 |
950 |
|
| Available after: Investigation At The Ball | ||||||
 |
The Home Of The Phantom | Phantom's Alpine Castle |
|
1,000 |
1,800 |
|
| Available after: The Car Chase | ||||||
 |
The Mental Asylum | Mental Asylum |
|
1,600 |
2,800 |
|
| Available after: The Home Of The Phantom | ||||||
 |
Gang Infiltration | Antwerp |
|
2,400 |
3,800 |
|
| Available after: The Mental Asylum | ||||||
 |
Acquiring The Diamond | Lugash National Museum |
|
3,300 |
4,800 |
|
| Available after: Gang Infiltration | ||||||
 |
The Reveal | Lugash Palace |
|
4,000 |
6,000 |
|
| Available after: Acquiring The Diamond | ||||||
 |
Closet's Thank You | Lugash Jewellery | 1,000 |
3,000 |
||
| Available after: The Reveal | ||||||
|
|
VALENTINE 2015
| IMAGE | QUEST | LOCATION | TASKS | QUEST BONUS | REWARDS | |
|---|---|---|---|---|---|---|
 |
Cherry Blossom | Cherry Orchard |
|
150 |
200 |
|
| Available after: Continuing The Adventure | ||||||
 |
Precious Necklaces | Garden Of Love |
|
350 |
500 |
|
| Available after: Cherry Blossom | ||||||
 |
Romeo And Juliet | Verona Market |
|
550 |
700 |
|
| Available after: Precious Necklaces | ||||||
 |
The Capulet Ball | Capulet Ball |
|
750 |
1,000 |
|
| Available after: Romeo And Juliet | ||||||
 |
The Balcony Scene | Juliet's Gardens |
|
1,200 |
2,000 |
|
| Available after: The Capulet Ball | ||||||
 |
The Secret Wedding | Verona Chapel |
|
1,800 |
3,000 |
|
| Available after: The Balcony Scene | ||||||
 |
The Duel | Streets Of Verona |
|
2,500 |
4,000 |
|
| Available after: The Secret Wedding | ||||||
 |
The Wedding Night | Capulet Mansion |
|
3,500 |
5,000 |
|
| Available after: The Duel | ||||||
 |
The Poison | Lawrence's Alchemical Laboratory |
|
4,500 |
6,000 |
|
| Available after: The Wedding Night | ||||||
 |
The Happy End | Verona Cemetery |
|
5,500 |
7,000 |
|
| Available after: The Poison | ||||||
|
|
VIVA LAS VEGAS
| IMAGE | QUEST | LOCATION | TASKS | QUEST BONUS | REWARDS | |
|---|---|---|---|---|---|---|
 |
Sneferu's Oranges | Orange Garden |
|
400 |
500 |
|
| Available after: Continuing The Adventure | ||||||
 |
Pearls Of Mrs. Sneferu | Pawn Shop |
|
700 |
1,000 |
|
| Available after: Sneferu's Oranges | ||||||
 |
Casino In Las Vegas | Pharaoh's Palace |
|
1,000 |
1,750 |
|
| Available after: Pearls Of Mrs. Sneferu | ||||||
 |
The White Tiger | Cabaret Mirage |
|
1,700 |
3,000 |
|
| Available after: Casino In Las Vegas | ||||||
 |
Bank Heist | Las Vegas Bank |
|
2,400 |
4,000 |
|
| Available after: The White Tiger | ||||||
 |
Memory Lost | Belaggio Ceremonial Hall |
|
3,000 |
5,000 |
|
| Available after: Bank Heist | ||||||
|
|