Tag: Source edit |
Tag: Source edit |
||
| Line 2,983: | Line 2,983: | ||
=='''Aja'''== |
=='''Aja'''== |
||
| − | |||
{{Quests-yellow |
{{Quests-yellow |
||
| QuestsImage= |
| QuestsImage= |
||
| Line 3,010: | Line 3,009: | ||
| Locations= |
| Locations= |
||
{{Quests/Location |
{{Quests/Location |
||
| − | | Location=Shrines |
+ | | Location=Shrines Of Aja<br> |
| Line 3,111: | Line 3,110: | ||
}} |
}} |
||
| − | | Coins= 711 000[[File:Mat001.png|20px]] |
+ | | Coins= 711 000[[File:Mat001.png|20px]]<br> |
| ⚫ | |||
| ⚫ | |||
| ⚫ | |||
| + | |||
| + | |||
| ⚫ | |||
| Available=Raised By Monkeys |
| Available=Raised By Monkeys |
||
}} |
}} |
||
| + | |||
| + | {{Quests/Quest |
||
| + | |||
| + | | QuestImage=[[File: Qst2628.png|100px|center|Quest Image]] |
||
| + | |||
| + | | QuestName='''On The Way To Other Side''' |
||
| + | |||
| + | | QuestGiverImage= |
||
| + | |||
| + | | QuestGiverText= |
||
| + | |||
| + | | Tasks= |
||
| + | {{Quests/Task |
||
| + | | TaskText=1. Find Sundiata |
||
| + | | TaskImage=[[File: Tok10178.png|35px|center|task]] |
||
| + | }} |
||
| + | {{Quests/Task |
||
| + | | TaskText=2. Talk To Sundiata |
||
| + | | TaskImage=[[File: Npc31763.png|35px|center|task]] |
||
| + | }} |
||
| + | {{Quests/Task |
||
| + | | TaskText=3. Solve Sundiata's Riddle |
||
| + | | TaskImage=[[File: Tok10179.png|35px|center|task]] |
||
| + | }} |
||
| + | {{Quests/Task |
||
| + | | TaskText=4. Talk To Sundiata |
||
| + | | TaskImage=[[File: Npc31764.png|35px|center|task]] |
||
| + | }} |
||
| + | | Locations= |
||
| + | {{Quests/Location |
||
| + | | Location=The World Of Clouds<br> |
||
| + | |||
| + | |||
| + | }} |
||
| + | |||
| + | | Coins= 712 000[[File:Mat001.png|20px]]<br> |
||
| + | |||
| + | |||
| + | |||
| + | |||
| + | | ExperiencePoints= 2 264 000[[File:Sys001.png|20px]]<br> |
||
| + | |||
| + | |||
| + | |||
| + | |||
| + | | Rewards= |
||
| + | |||
| + | | Available=Place Of Healing |
||
}} |
}} |
||
| + | |||
| + | {{Quests/Quest |
||
| + | |||
| + | | QuestImage=[[File: Qst2629.png|100px|center|Quest Image]] |
||
| + | |||
| + | | QuestName='''Sundiata's Nemesis''' |
||
| + | |||
| + | | QuestGiverImage= |
||
| + | |||
| + | | QuestGiverText= |
||
| + | |||
| + | | Tasks= |
||
| + | {{Quests/Task |
||
| + | | TaskText=1. Get To The Village |
||
| + | | TaskImage=[[File: Tok10180.png|35px|center|task]] |
||
| + | }} |
||
| + | {{Quests/Task |
||
| + | | TaskText=2. Prepare Sundiata For The Duel |
||
| + | | TaskImage=[[File: Tok10181.png|35px|center|task]] |
||
| + | }} |
||
| + | {{Quests/Task |
||
| + | | TaskText=3. Help Sundiata Defeat The Opponent |
||
| + | | TaskImage=[[File: Tok10182.png|35px|center|task]] |
||
| + | }} |
||
| + | {{Quests/Task |
||
| + | | TaskText=4. Talk To Sundiata |
||
| + | | TaskImage=[[File: Npc31765.png|35px|center|task]] |
||
| + | }} |
||
| + | {{Quests/Task |
||
| + | | TaskText=5. Talk To Aja |
||
| + | | TaskImage=[[File: Npc31629.png|35px|center|task]] |
||
| + | }} |
||
| + | | Locations= |
||
| + | {{Quests/Location |
||
| + | | Location=Sundiata's Village<br> |
||
| + | |||
| + | |||
| + | }} |
||
| + | |||
| + | | Coins= 713 000[[File:Mat001.png|20px]]<br> |
||
| + | |||
| + | |||
| + | |||
| + | |||
| + | | ExperiencePoints= 2 271 000[[File:Sys001.png|20px]]<br> |
||
| + | |||
| + | |||
| + | |||
| + | |||
| + | | Rewards= |
||
| + | |||
| + | | Available=On The Way To Other Side |
||
| + | |||
| + | }} |
||
| + | |||
| + | {{Quests/Quest |
||
| + | |||
| + | | QuestImage=[[File: Qst2630.png|100px|center|Quest Image]] |
||
| + | |||
| + | | QuestName='''Dangerous Journey''' |
||
| + | |||
| + | | QuestGiverImage= |
||
| + | |||
| + | | QuestGiverText= |
||
| + | |||
| + | | Tasks= |
||
| + | {{Quests/Task |
||
| + | | TaskText=1. Defend Anansi (11) |
||
| + | | TaskImage=[[File: Tok10183.png|35px|center|task]] |
||
| + | }} |
||
| + | {{Quests/Task |
||
| + | | TaskText=2. Get To The Cradle Of Humankind |
||
| + | | TaskImage=[[File: Tok10184.png|35px|center|task]] |
||
| + | }} |
||
| + | {{Quests/Task |
||
| + | | TaskText=3. Talk To Aja |
||
| + | | TaskImage=[[File: Npc31766.png|35px|center|task]] |
||
| + | }} |
||
| + | | Locations= |
||
| + | {{Quests/Location |
||
| + | | Location=Across Africa<br> |
||
| + | |||
| + | |||
| + | }} |
||
| + | |||
| + | | Coins= 714 000[[File:Mat001.png|20px]]<br> |
||
| + | |||
| + | |||
| + | |||
| + | |||
| + | | ExperiencePoints= 2 278 000[[File:Sys001.png|20px]]<br> |
||
| + | |||
| + | |||
| + | |||
| + | |||
| + | | Rewards= |
||
| + | |||
| + | | Available=Sundiata's Nemesis |
||
| + | |||
| + | }} |
||
| + | |||
| + | {{Quests/Quest |
||
| + | |||
| + | | QuestImage=[[File: Qst2631.png|100px|center|Quest Image]] |
||
| + | |||
| + | | QuestName='''Garden Of Eden''' |
||
| + | |||
| + | | QuestGiverImage= |
||
| + | |||
| + | | QuestGiverText= |
||
| + | |||
| + | | Tasks= |
||
| + | {{Quests/Task |
||
| + | | TaskText=1. Find The Sacred Flower |
||
| + | | TaskImage=[[File: Tok10185.png|35px|center|task]] |
||
| + | }} |
||
| + | {{Quests/Task |
||
| + | | TaskText=2. Get The Sacred Flower |
||
| + | | TaskImage=[[File: Tok10186.png|35px|center|task]] |
||
| + | }} |
||
| + | {{Quests/Task |
||
| + | | TaskText=3. Help Aja With The Ritual |
||
| + | | TaskImage=[[File: Tok10187.png|35px|center|task]] |
||
| + | }} |
||
| + | {{Quests/Task |
||
| + | | TaskText=4. Talk To Aja |
||
| + | | TaskImage=[[File: Npc31767.png|35px|center|task]] |
||
| + | }} |
||
| + | | Locations= |
||
| + | {{Quests/Location |
||
| + | | Location=Cradle Of Humankind<br> |
||
| + | |||
| + | |||
| + | }} |
||
| + | |||
| + | | Coins= 715 000[[File:Mat001.png|20px]]<br> |
||
| + | |||
| + | |||
| + | |||
| + | |||
| + | | ExperiencePoints= 2 285 000[[File:Sys001.png|20px]]<br> |
||
| + | |||
| + | |||
| + | |||
| + | |||
| + | | Rewards= |
||
| + | |||
| + | | Available=Dangerous Journey |
||
| + | |||
| + | }} |
||
| + | |||
| + | }} |
||
| + | |||
[[Category:Plot]] |
[[Category:Plot]] |
||
Revision as of 17:51, 17 January 2022

|

|

|
|
Main map
| IMAGE | QUEST | LOCATION | START | TASKS | QUEST BONUS | ||
|---|---|---|---|---|---|---|---|
 |
Trouble On Board | Diggy's Camp | 627,000 |
1,669,000 | |||
| {{{Arrow}}} | Available after: Flight To The Orbit | ||||||
 |
Building The Shuttle | Diggy's Camp | Robot Rusty |
628,000 |
1,676,000 | ||
| {{{Arrow}}} | Available after: Trouble On Board | ||||||
 |
Sweet And Starchy | Diggy's Camp | Robot Rusty |
629,000 |
1,683,000 | ||
| {{{Arrow}}} | Available after: Building The Shuttle | ||||||
 |
Jewels of Meadows | Diggy's Camp | Robot Rusty |
630,000 |
1,690,000 | ||
| {{{Arrow}}} | Available after: Sweet And Starchy | ||||||
 |
Goliath Fish | Diggy's Camp | Robot Rusty |
631,000 |
1,697,000 | ||
| {{{Arrow}}} | Available after: Jewels of Meadows | ||||||
 |
Eternal And Shiny | Diggy's Camp | Robot Rusty |
632,000 |
1,704,000 | ||
| {{{Arrow}}} | Available after: Goliath Fish | ||||||
 |
Elder Alder | Diggy's Camp | Robot Rusty |
633,000 |
1,711,000 | ||
| {{{Arrow}}} | Available after: Eternal And Shiny | ||||||
 |
Have A Gneiss Day! | Diggy's Camp | Robot Rusty |
634,000 |
1,718,000 | ||
| {{{Arrow}}} | Available after: Elder Alder | ||||||
 |
My Precious Opal | Diggy's Camp | Robot Rusty |
635,000 |
1,725,000 | ||
| {{{Arrow}}} | Available after: Have A Gneiss Day! | ||||||
 |
Gods' Quarters | Spaceship's Main Deck | 636,000 |
1,732,000 | |||
| {{{Arrow}}} | Available after: My Precious Opal | ||||||
 |
Hello? Rusty Speaking! | Communication Room | 637,000 |
1,739,000 | |||
| {{{Arrow}}} | Available after: Available=Gods' Quarters | ||||||
 |
Source Of The Signal | Hidden Underground Facility | 638,000 |
1,746,000 | |||
| {{{Arrow}}} | Available after: Hello? Rusty Speaking! | ||||||
 |
Saving Terra | Multiple Locations TBD | 650,000 |
1,760,000 | |||
| {{{Arrow}}} | Available after: Source Of The Signal | ||||||
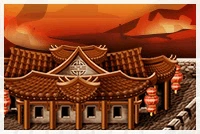
Amaterasu
| IMAGE | QUEST | LOCATION | START | TASKS | QUEST BONUS | ||
|---|---|---|---|---|---|---|---|
 |
Mechanical Buddy | Peaceful Japanese Village | 639,000 |
1,753,000 | |||
| {{{Arrow}}} | Available after: Source Of The Signal | ||||||
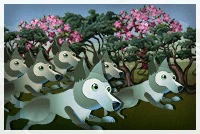 |
Among The Wolves | Wolf Hills | 639,000 |
1,753,000 | |||
| {{{Arrow}}} | Available after: Mechanical Buddy | ||||||
 |
Sun's Shyness | Heavenly Cave | 641,000 |
1,767,000 | |||
| {{{Arrow}}} | Available after: Among The Wolves | ||||||
 |
She's Back! | Sacred Village | 642,000 |
1,774,000 | |||
| {{{Arrow}}} | Available after: Sun's Shyness | ||||||
 |
Impudent Demons | Haunted Hamlet | 643,000 |
1,781,000 | |||
| {{{Arrow}}} | Available after: She's Back! | ||||||
 |
Broken Sword | All Across Japan | 644,000 |
1,788,000 | |||
| {{{Arrow}}} | Available after: Impudent Demons | ||||||
 |
Legendary Smith | Hattori Hanzo's Forge | 645,000 |
1,795,000 | |||
| {{{Arrow}}} | Available after: Broken Sword | ||||||
 |
Susanoo's Tsunami | Flooded Coast | 646,000 |
1,802,000 | |||
| {{{Arrow}}} | Available after: Legendary Smith | ||||||
 |
The First Divine Sphere | Temple Of Amaterasu | 647,000 |
1,809,000 | |||
| {{{Arrow}}} | Available after: Susanoo's Tsunami | ||||||
 |
Divine Protectress | Wrecked City | 648,000 |
1,816,000 | |||
| {{{Arrow}}} | Available after: The First Divine Sphere | ||||||
Susanoo
| IMAGE | QUEST | LOCATION | START | TASKS | QUEST BONUS | ||
|---|---|---|---|---|---|---|---|
 |
Susanoo's Right Hand | Spaceship's Laboratory | 649,000 |
1,823,000 | |||
| {{{Arrow}}} | Available after: Divine Protectress |  AMATERASU'S HOLOGRAM | |||||
 |
Chasing The Storm | Village In Turmoil | 650,000 |
1,830,000 | |||
| {{{Arrow}}} | Available after: Susanoo's Right Hand | ||||||
 |
Way Of The Samurai | Samurai School | 651,000 |
1,837,000 | |||
| {{{Arrow}}} | Available after: Chasing The Storm | ||||||
 |
In The Eye Of The Storm | Susanoo's Fortress | 652,000 |
1,844,000 | |||
| {{{Arrow}}} | Available after: Way Of The Samurai | ||||||
 |
Tainted Memories | M.T.R. | 653,000 |
1,851,000 | |||
| {{{Arrow}}} | Available after: In The Eye Of The Storm | ||||||
 |
The Regretful God | Japanese Seaside Town | 654,000 |
1,858,000 | |||
| {{{Arrow}}} | Available after: Tainted Memories | ||||||
 |
The Thirsty Dragon | The Serpent Road | 655,000 |
1,865,000 | |||
| {{{Arrow}}} | Available after: The Regretful God | ||||||
 |
Dead Keeper | Misty Underworld | 656,000 |
1,872,000 | |||
| {{{Arrow}}} | Available after: The Thirsty Dragon | ||||||
 |
The Second Divine Sphere | Secluded Sanctuary | 657,000 |
1,879,000 | |||
| {{{Arrow}}} | Available after: Dead Keeper | ||||||
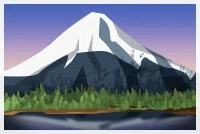 |
Where To Next? | Mount Fuji | 658,000 |
1,886,000 | |||
| {{{Arrow}}} | Available after: The Second Divine Sphere |  SUSANNO'S HOLOGRAM | |||||
 |
The Nameless One | ?? | 330,000 |
945,000 | |||
| {{{Arrow}}} | Available after: Where To Next? | ||||||
Pele
| IMAGE | QUEST | LOCATION | START | TASKS | QUEST BONUS | ||
|---|---|---|---|---|---|---|---|
 |
Raging Volcano | Burning Hawaiian Village | 659,000 |
1,893,000 | |||
| {{{Arrow}}} | Available after: The Nameless One | ||||||
 |
Servitor Unaccounted For | Place of Serenity | 660,000 |
1,900,000 | |||
| {{{Arrow}}} | Available after: Raging Volcano | ||||||
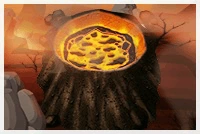 |
The Fiery Goddess | Halema‘Uma‘U | 661,000 |
1,907,000 | |||
| {{{Arrow}}} | Available after: Servitor Unaccounted For | ||||||
 |
Lost Children | Tahiti | 662,000 |
1,914,000 | |||
| {{{Arrow}}} | Available after: The Fiery Goddess | ||||||
 |
Secrets Of The Pacific | On the Ocean Floor | 663,000 |
1,921,000 | |||
| {{{Arrow}}} | Available after: Lost Children | ||||||
 |
General's Gambit | General's Fortress | 664,000 |
1,928,000 | |||
| {{{Arrow}}} | Available after: Secrets Of The Pacific | ||||||
 |
Fire And Water | Deep-Sea Facility | 665,000 |
1,935,000 | |||
| {{{Arrow}}} | Available after: General's Gambit | ||||||
 |
Fiery Race | Mauna Kea | 666,000 |
1,942,000 | |||
| {{{Arrow}}} | Available after: Fire And Water | ||||||
 |
The Third Divine Sphere | Temple Of Pele | 667,000 |
1,949,000 | |||
| {{{Arrow}}} | Available after: Fire And Water | ||||||
 |
Like Mother Like Daughters | Kane's Workshop | 668,000 |
1,956,000 | |||
| {{{Arrow}}} | Available after: The Third Divine Sphere | PELE'S HOLOGRAM | |||||
Kane
| IMAGE | QUEST | LOCATION | START | TASKS | QUEST BONUS | ||
|---|---|---|---|---|---|---|---|
 |
Power Of Creation | Village of Plenty | 669,000 |
1,963,000 | |||
| {{{Arrow}}} | Available after: Like Mother Like Daughters | ||||||
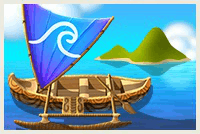
 |
The Last Wave | Surfers Paradise | 670,000 |
1,970,000 | |||
| {{{Arrow}}} | Available after: Power Of Creation | ||||||
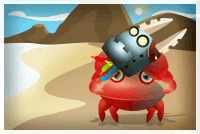 |
Crustacean's Treasure | Crabby Coast | 671,000 |
1,977,000 | |||
| {{{Arrow}}} | Available after: The Last Wave | ||||||
 |
From Head To Toe | Spaceship's Workshop | 672,000 |
1,984,000 | |||
| {{{Arrow}}} | Available after: Crustacean's Treasure | ||||||
 |
The Other Side Of The Coin | Kaho'olawe | 673,000 |
1,991,000 | |||
| {{{Arrow}}} | Available after: From Head To Toe | ||||||
 |
General's Curse | Blighted Village | 674,000 |
1,998,000 | |||
| {{{Arrow}}} | Available after: The Other Side Of The Coin | ||||||
 |
Doing And Undoing | Tainted Land | 675,000 |
2,005,000 | |||
| {{{Arrow}}} | Available after: General's Curse | ||||||
 |
The Springs Of Life | Land of Springs | 676,000 |
2,012,000 | |||
| {{{Arrow}}} | Available after: Doing And Undoing | ||||||
 |
The Fourth Divine Sphere | Ka ʻaina a Kane-Huna-Moku | 677,000 |
2,019,000 | |||
| {{{Arrow}}} | Available after: Land of Springs | ||||||
 |
Touch Of Winter | Radar Room | 678,000 |
2,026,000 | |||
| {{{Arrow}}} | Available after: The Fourth Divine Sphere |  KANE'S HOLOGRAM | |||||
Nanook
| IMAGE | QUEST | LOCATION | START | TASKS | QUEST BONUS | ||
|---|---|---|---|---|---|---|---|
 |
The Northern Connection | Arctic Base | 679,000 |
2,033,000 | |||
| {{{Arrow}}} | Available after: Touch Of Winter | ||||||
 |
Tracking Nanook | Land of Ice | 680,000 |
2,040,000 | |||
| {{{Arrow}}} | Available after: The Northern Connection | ||||||
 |
Of Stars And Spirits | Spirit World | 681,000 |
2,047,000 | |||
| {{{Arrow}}} | Available after: Tracking Nanook | ||||||
 |
Furballs In Trouble | Massive Iceberg | 682,000 |
2,054,000 | |||
| {{{Arrow}}} | Available after: Of Stars And Spirits | ||||||
 |
Human Or Bear? | Igloo Village | 683,000 |
2,061,000 | |||
| {{{Arrow}}} | Available after: Furballs In Trouble | ||||||
 |
Battle On Icebergs | Icy Battlefield | 684,000 |
2,068,000 | |||
| {{{Arrow}}} | Available after: Human Or Bear? | ||||||
 |
Broken Ice | Arctic Coast | 685,000 |
2,075,000 | |||
| {{{Arrow}}} | Available after: Battle On Icebergs | ||||||
 |
Nanook's Secrets | Nanook's Shuttle | 686,000 |
2,082,000 | |||
| {{{Arrow}}} | Available after: Broken Ice | ||||||
 |
The Fifth Divine Sphere | Spirit World Outskirts | 687,000 |
2,089,000 | |||
| {{{Arrow}}} | Available after: Nanook's Secrets | ||||||
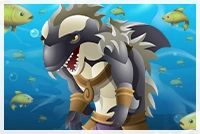
 |
The Sea Wolf | The Arctic Ocean | 688,000 |
2,096,000 | |||
| {{{Arrow}}} | Available after: The Fifth Divine Sphere |  NANOOK'S HOLOGRAM | |||||
Akhlut
| IMAGE | QUEST | LOCATION | START | TASKS | QUEST BONUS | ||
|---|---|---|---|---|---|---|---|
 |
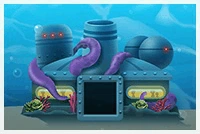
Akhlut's Right Fin | Akhlut's Workshop |
689 000 |
2 103 000 | |||
| {{{Arrow}}} | Available after: The Sea Wolf | ||||||
 |
Against His Will | General's Factory |
690 000 |
2 110 000 | |||
| {{{Arrow}}} | Available after: Akhlut's Right Fin | ||||||
 |
Ocean Hide-and-seek | Deep Ocean |
691 000 |
2 117 000 | |||
| {{{Arrow}}} | Available after: Against His Will | ||||||
 |
Crystal Clear | Murky Waters |
692 000 |
2 124 000 | |||
| {{{Arrow}}} | Available after: Ocean Hide-and-seek | ||||||
 |
Sea World From Hell | Ocean Prison |
693 000 |
2 131 000 | |||
| {{{Arrow}}} | Available after: Crystal Clear | ||||||
 |
Akhlut's Army | Underwater Training Grounds |
694 000 |
2 138 000 | |||
| {{{Arrow}}} | Available after: Sea World From Hell | ||||||
 |
Ocean Strikes Back | Ocean Fortress |
695 000 |
2 145 000 | |||
| {{{Arrow}}} | Available after: Akhlut's Army | ||||||
 |
The Legend Of Akhlut | Theatre On Ice |
696 000 |
2 152 000 | |||
| {{{Arrow}}} | Available after: Ocean Strikes Back | ||||||
 |
The Sixth Divine Sphere | Orca Racing Track |
697 000 |
2 159 000 | |||
| {{{Arrow}}} | Available after: The Legend Of Akhlut | ||||||
 |
General's Research | Confiscated Submarine |
698 000 |
2 166 000 | |||
| {{{Arrow}}} | Available after: The Sixth Divine Sphere | 1 | |||||
Anansi
| IMAGE | QUEST | LOCATION | START | TASKS | QUEST BONUS | ||
|---|---|---|---|---|---|---|---|
 |
Warrior's Song | Savannah Town |
699 000 |
2 173 000 | |||
| {{{Arrow}}} | Available after: General's Research | ||||||
 |
Itsy-bitsy Spider | Temple Of Anansi |
700 000 |
2 180 000 | |||
| {{{Arrow}}} | Available after: Warrior's Song | ||||||
 |
Savannah Poetry | Den Of Poets |
701 000 |
2 187 000 | |||
| {{{Arrow}}} | Available after: Itsy-bitsy Spider | ||||||
 |
Quenching The Thirst | Dry Waterhole |
702 000 |
2 194 000 | |||
| {{{Arrow}}} | Available after: Savannah Poetry | ||||||
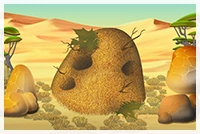 |
Long Live The Queen | Huge Anthill |
703 000 |
2 201 000 | |||
| {{{Arrow}}} | Available after: Quenching The Thirst | ||||||
 |
Spider's Truth | Anthill Depths |
704 000 |
2 208 000 | |||
| {{{Arrow}}} | Available after: Long Live The Queen | ||||||
 |
Reading Is Fundamental! | Anansi's Library |
705 000 |
2 215 000 | |||
| {{{Arrow}}} | Available after: Spider's Truth | ||||||
 |
Diggy The Fixer | Merchant Town |
706 000 |
2 222 000 | |||
| {{{Arrow}}} | Available after: Reading Is Fundamental! | ||||||
 |
Spider's Legs | Savannah Sacred Ground |
707 000 |
2 229 000 | |||
| {{{Arrow}}} | Available after: Diggy The Fixer | ||||||
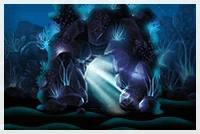
 |
Finding The Healer | Aja's Jungle |
708 000 |
2 236 000 | |||
| {{{Arrow}}} | Available after: Spider's Legs | 1 | |||||
Aja
| IMAGE | QUEST | LOCATION | START | TASKS | QUEST BONUS | ||
|---|---|---|---|---|---|---|---|
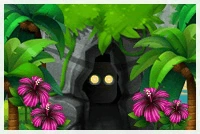
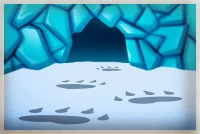
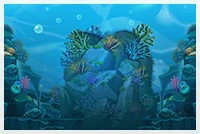
 |
Poisoned Jungle | Shrines Of Aja |
709 000 |
2 243 000 | |||
| {{{Arrow}}} | Available after: Finding The Healer | ||||||
 |
Raised By Monkeys | Arzan's School Of Advanced Learning |
710 000 |
2 250 000 | |||
| {{{Arrow}}} | Available after: Poisoned Jungle | ||||||
 |
Place Of Healing | Aja's Clinic |
711 000 |
2 257 000 | |||
| {{{Arrow}}} | Available after: Raised By Monkeys | ||||||
 |
On The Way To Other Side | The World Of Clouds |
712 000 |
2 264 000 | |||
| {{{Arrow}}} | Available after: Place Of Healing | ||||||
 |
Sundiata's Nemesis | Sundiata's Village |
713 000 |
2 271 000 | |||
| {{{Arrow}}} | Available after: On The Way To Other Side | ||||||
 |
Dangerous Journey | Across Africa |
714 000 |
2 278 000 | |||
| {{{Arrow}}} | Available after: Sundiata's Nemesis | ||||||
 |
Garden Of Eden | Cradle Of Humankind |
715 000 |
2 285 000 | |||
| {{{Arrow}}} | Available after: Dangerous Journey | ||||||